How to Remove a White Background in Photoshop
Ever wondered how to remove a white background or make a background transparent in Photoshop? In this tutorial, you’ll learn my step-by-step process for removing white backgrounds in Photoshop.
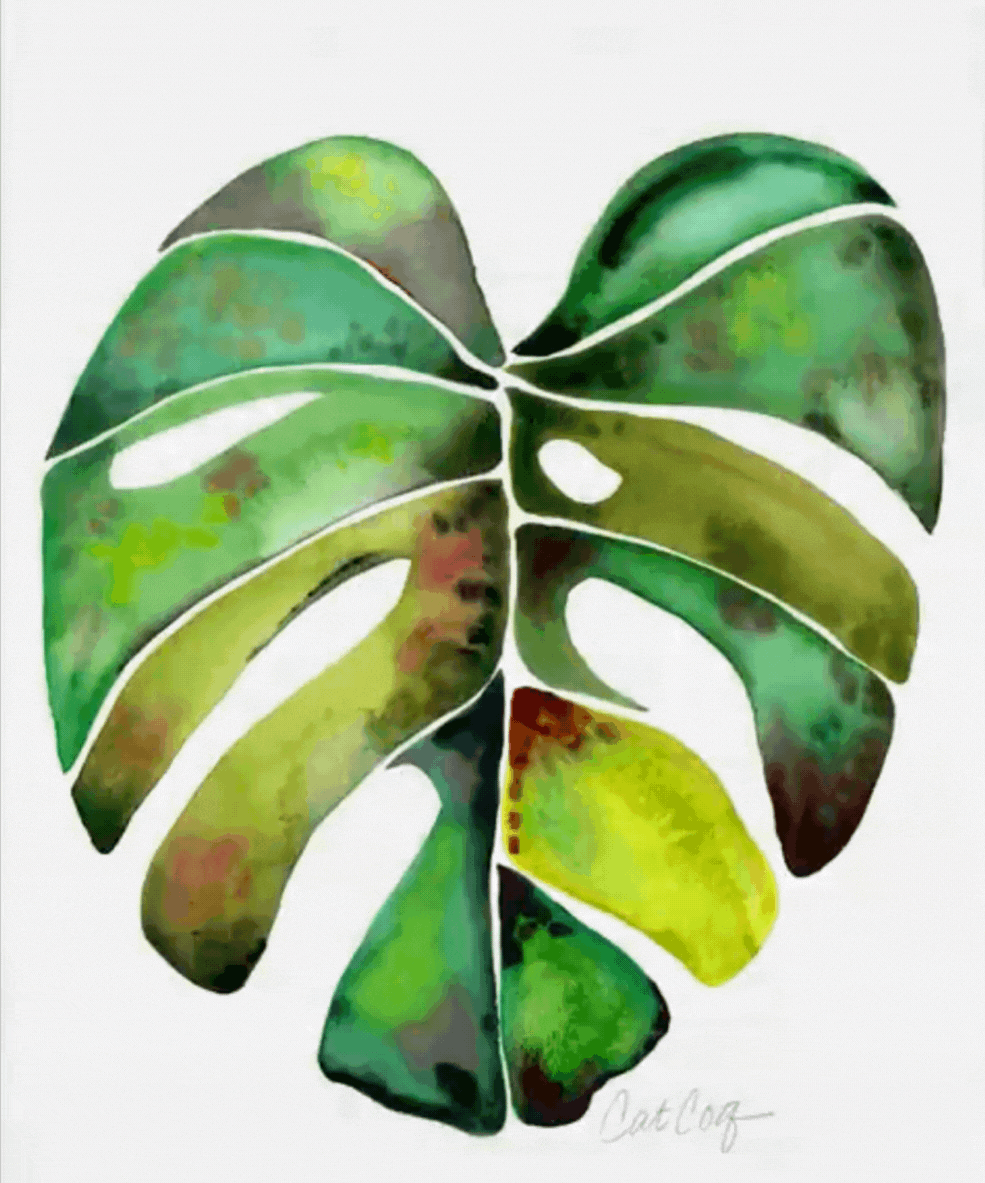
I license all of my artwork which means that it gets reproduced and used on all different kinds of products. In order to turn my hand-drawn artwork into products, I need to turn it into a digital file first.
Learning how to remove white backgrounds in Photoshop is a key skill to learn if you want to get into licensing your artwork or selling your art online. And even though it seems a little daunting, it actually is super simple once you get the hang of it. It takes me just a couple of minutes to remove the paper backgrounds from my illustrations, and with some practice, you’ll be able to remove the background from your artwork quickly too!
Supplies:
All you’ll need to follow along with this tutorial is a scanned or photographed piece of artwork (or anything with a white background!) and Photoshop. Want to learn how to scan or photograph your artwork so that it’s a high-quality digital file? Check out this blog post to learn how to do that and then come back to this one to learn how to remove the background!
If you don’t have Photoshop yet, no problem! You can download a free trial here.
Open the file in Photoshop
The first step is simply to open your artwork file in Photoshop! If you scanned your artwork it’s likely saved on your desktop and you can drag and drop the file directly into Photoshop from there.
Define the white point
The next step is to define the white point. Sometimes scans can come out a little darker than the original painting, so defining the white point helps to brighten up the digital artwork and make it more true to its original form. This step only applies if you’re removing a white background. Since I normally paint on white watercolor paper, I always include this step in my workflow!
To start, open up levels using the keyboard shortcut cmd + L. You can also get there by clicking Image → Adjustments → Levels.
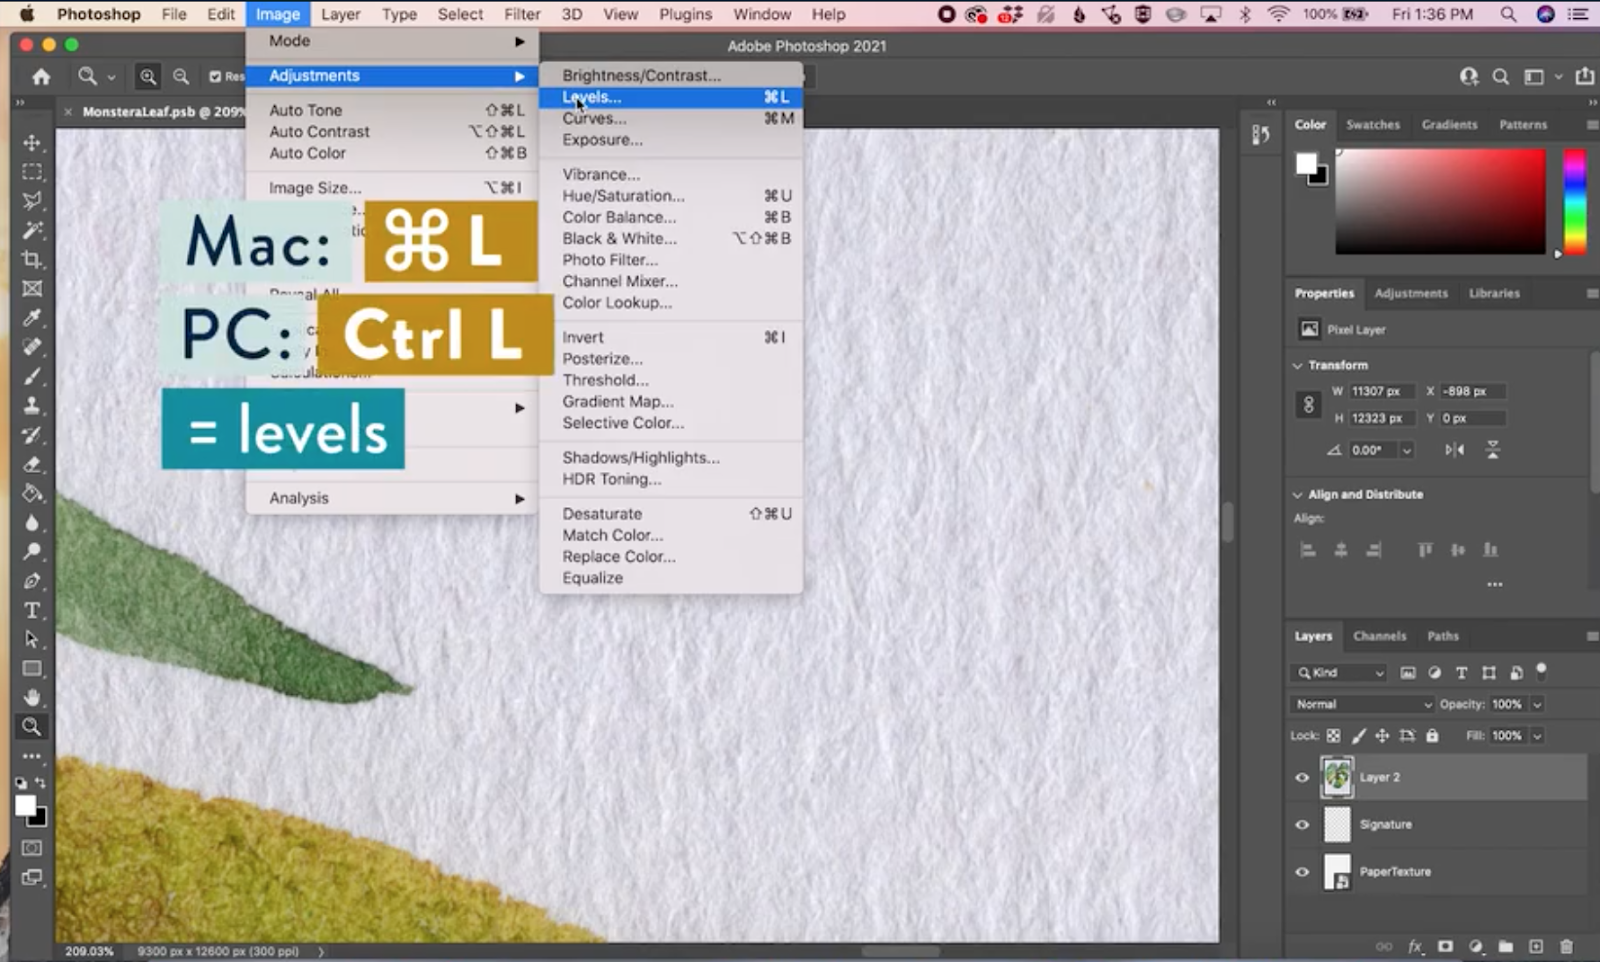
On your Levels panel, there are three eyedroppers. To define the white point, select the white eyedropper on the far right.

Now, zoom in on your white background and simply click once anywhere in the white area. It’s a slight difference, but defining that white point brightens up the entire composition and creates a starker contrast between your painted elements and the white background.

Select the background
First, make a copy of your artwork layer using the keyboard shortcut cmd + j. This gives us flexibility with non-destructive editing.

Next, hide the visibility of the original layer by clicking the eyeball next to the layer thumbnail.

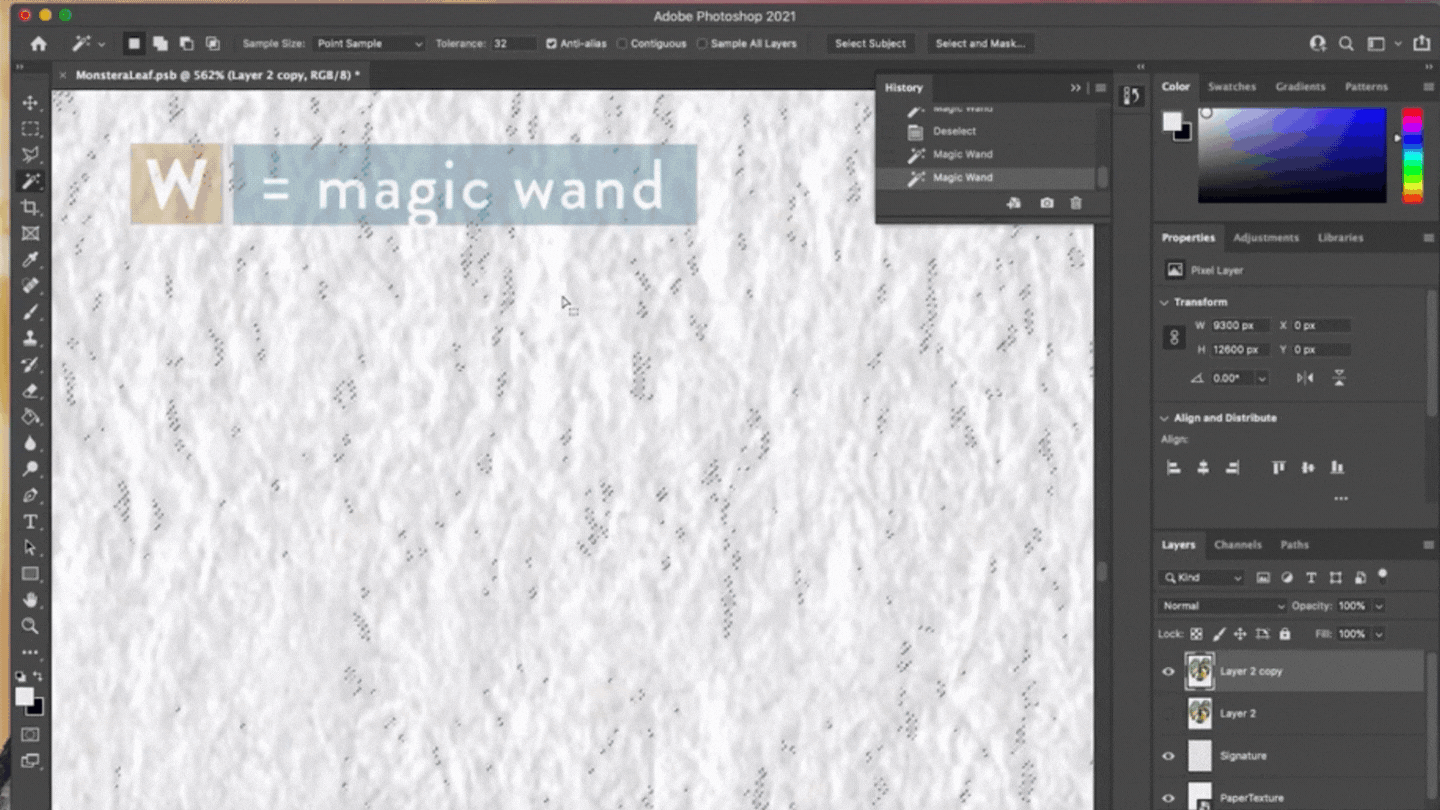
Now to select the background, use the magic wand tool. You can get this by clicking the tool on the toolbar or using the keyboard shortcut: w.

Next, click the checkbox next to “Contiguous” in the toolbar at the top of your screen to turn contiguous off. With contiguous turned off, Photoshop will select all of the similarly colored areas at once, even if they’re not touching each other.

Now you can click anywhere on the white background with the magic wand tool and it will select the majority of the white background for you.

Now take some time to look over your artwork and make sure there aren’t any parts of the background that didn’t make it in the selection. In my example, there are some little gray spots throughout the paper texture that didn’t make it in the selection.
The reason for this is that they were just a little bit darker than the white color I originally clicked with my magic wand tool. But you can easily grab any stragglers like this by holding shift and clicking them to add them to the selection. When you click in one of these small areas it should automatically grab other similarly colored areas.
In my example, it got almost everything, but you can continue to hold shift and click in the unselected areas until all of your white background is selected.
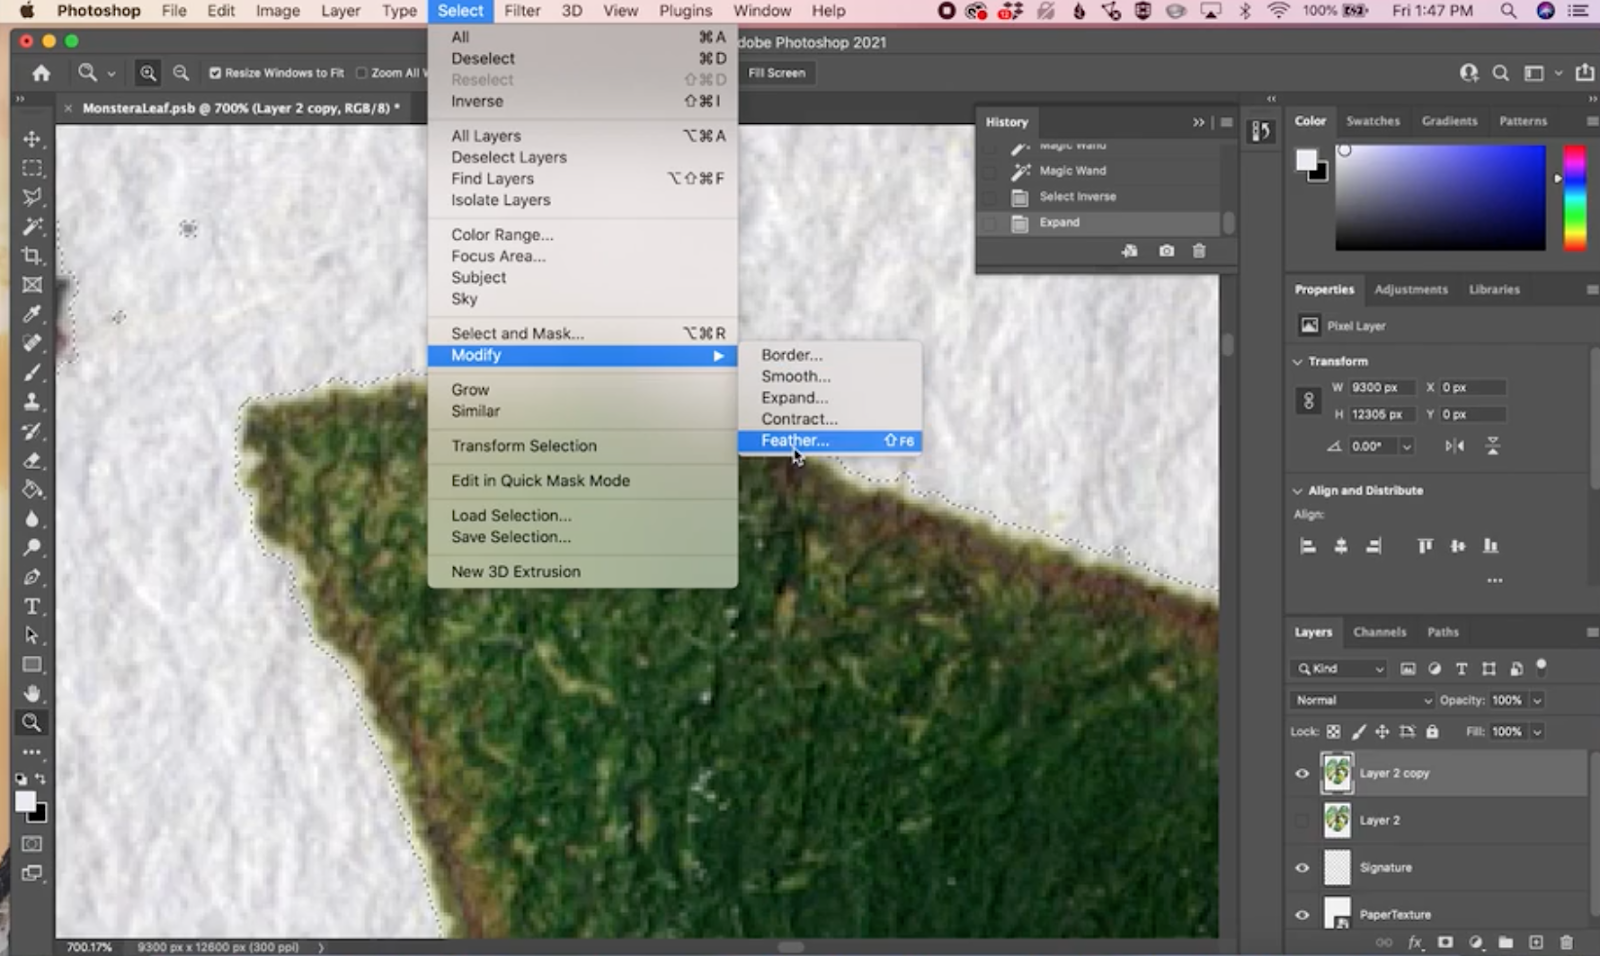
Make the selection look more natural
In this step, we’re going to make a few small adjustments to make sure that our illustration looks natural when we remove the white background.
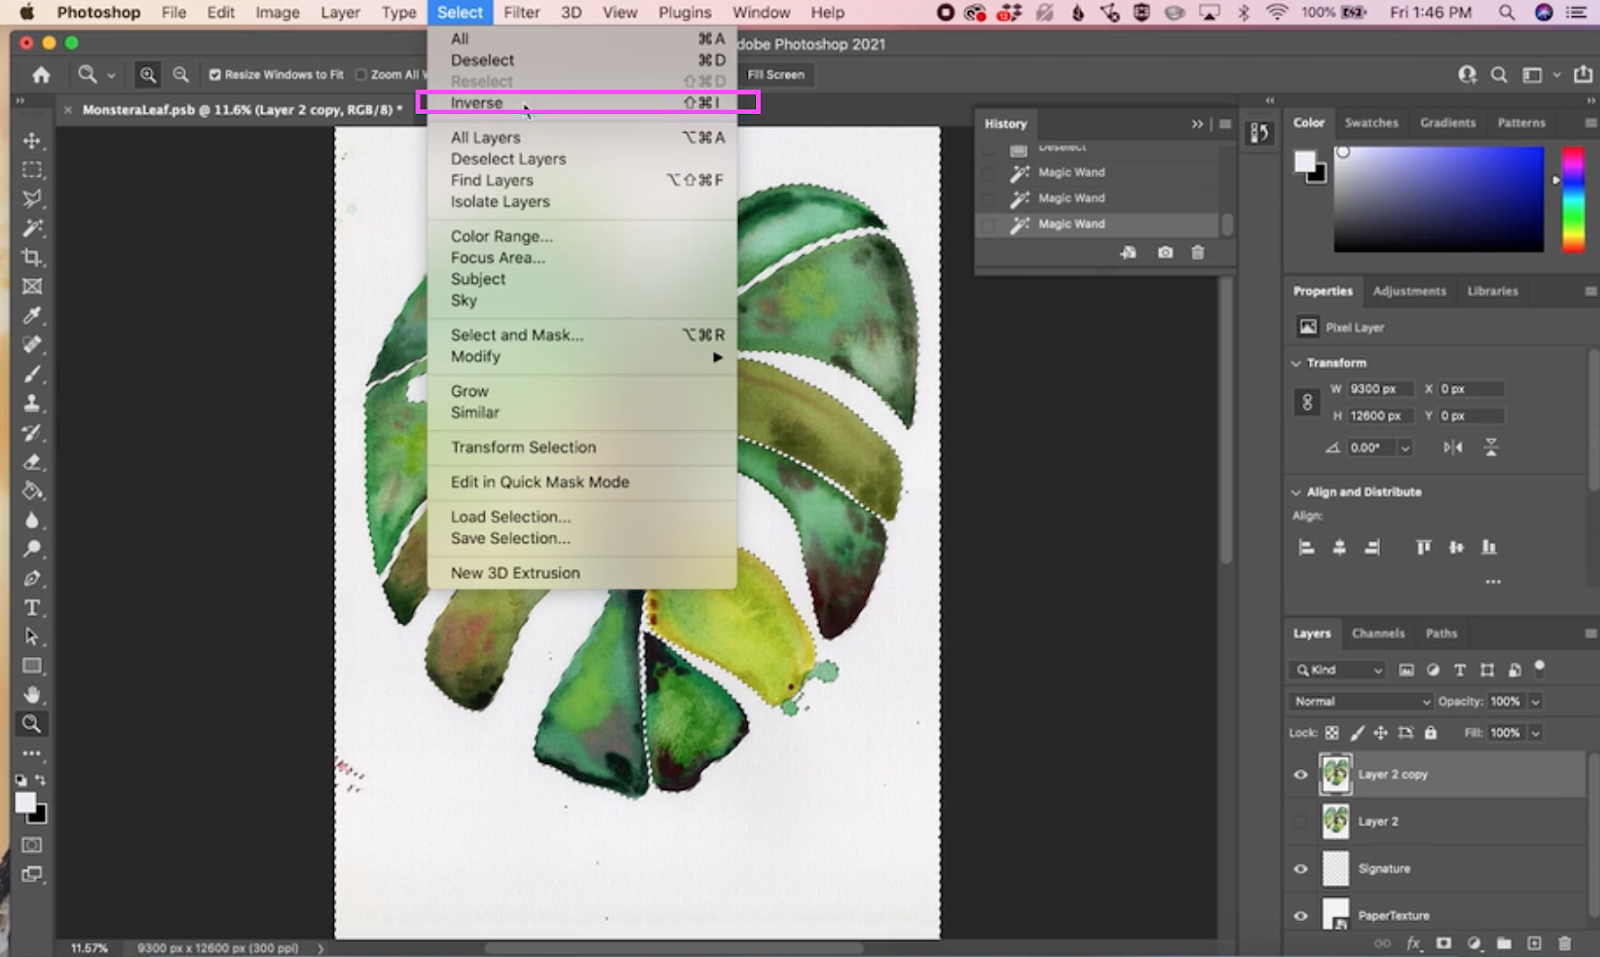
First, inverse your selection. This flips the selection from being the white background to selecting the illustration itself. You can get there by clicking Select → Inverse.
Now click Select → Modify → Expand.

From here, expand your selection by 1 pixel. This just adds a little more breathing room around the illustration so we’re not cutting out any vital details.

Now click Select → Modify → Feather and feather by 1 pixel. You might not be able to notice a difference here, but what feathering does is slightly blurs the edges of your illustration to make it look more natural and less “cut out.”
Remove the background
Now it’s time to remove the background! To do that, make sure your layer is selected, and click the Add Layer Mask icon on the bottom of the layers panel. It’s the rectangle icon with a circle in the middle.
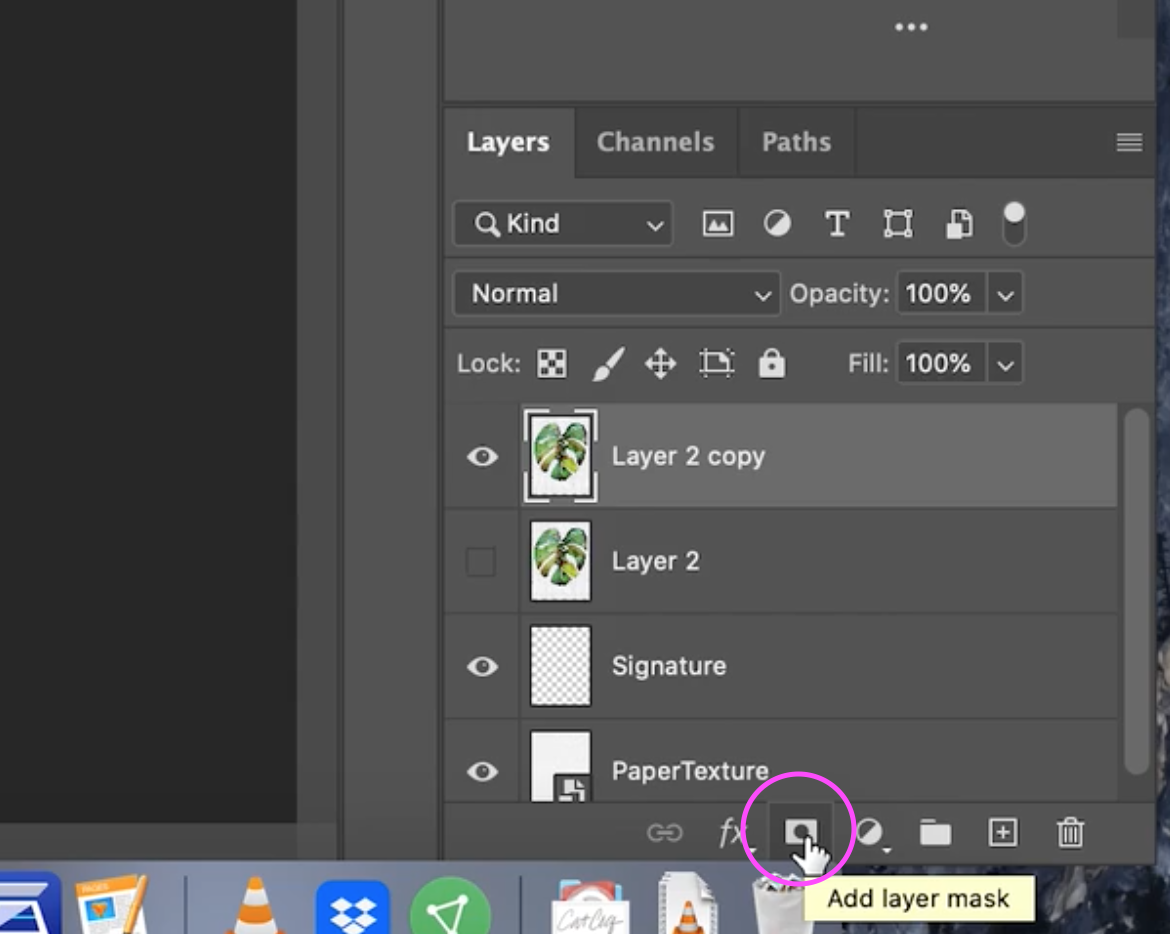
Now you should see a gray and white checkered background which is Photoshop’s way to indicate transparency. The reason that we use a mask instead of just deleting the background entirely is that it gives us the ability to reveal or hid parts of the original illustration instead of deleting them completely. I’ll show you what I mean as we refine things in the next step!
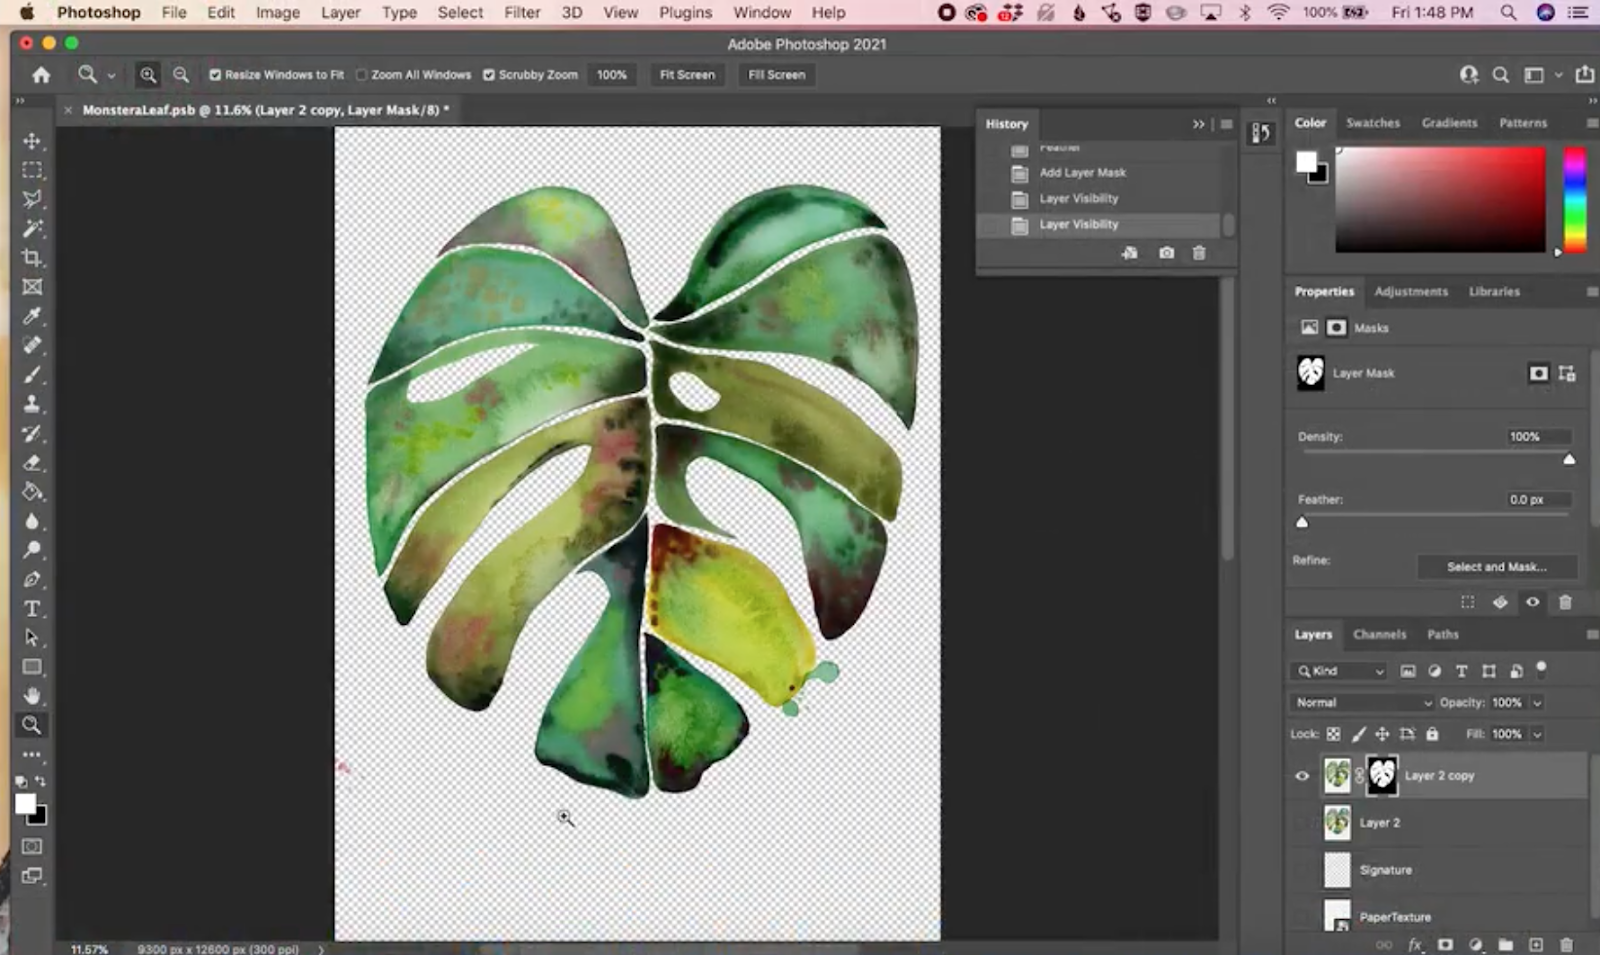
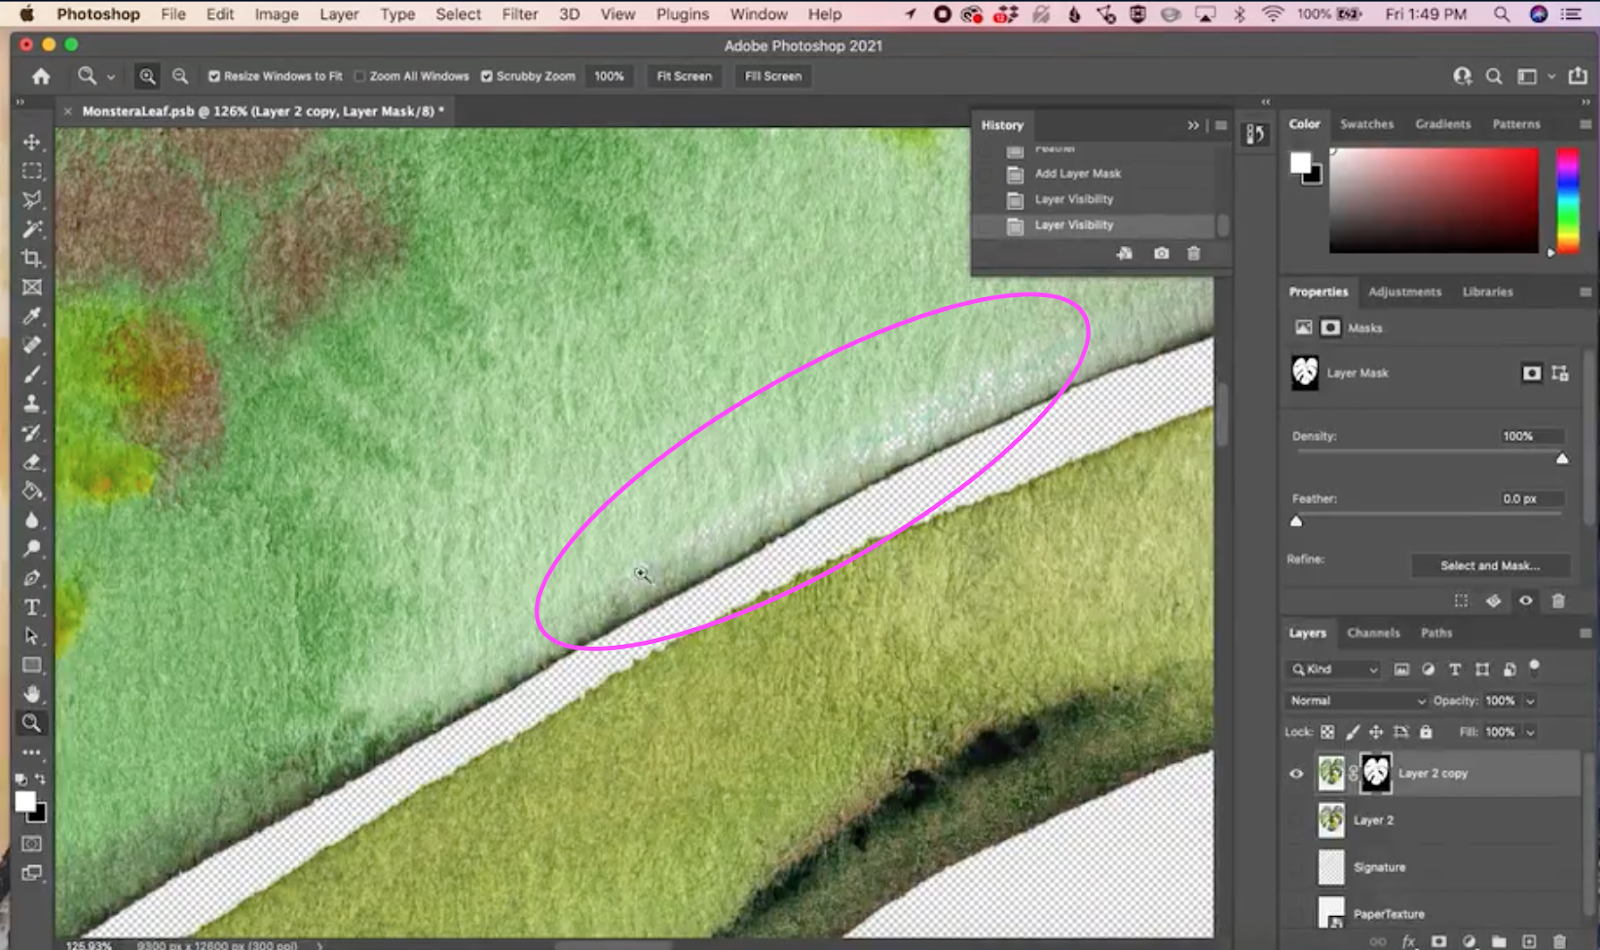
Refining your background selection
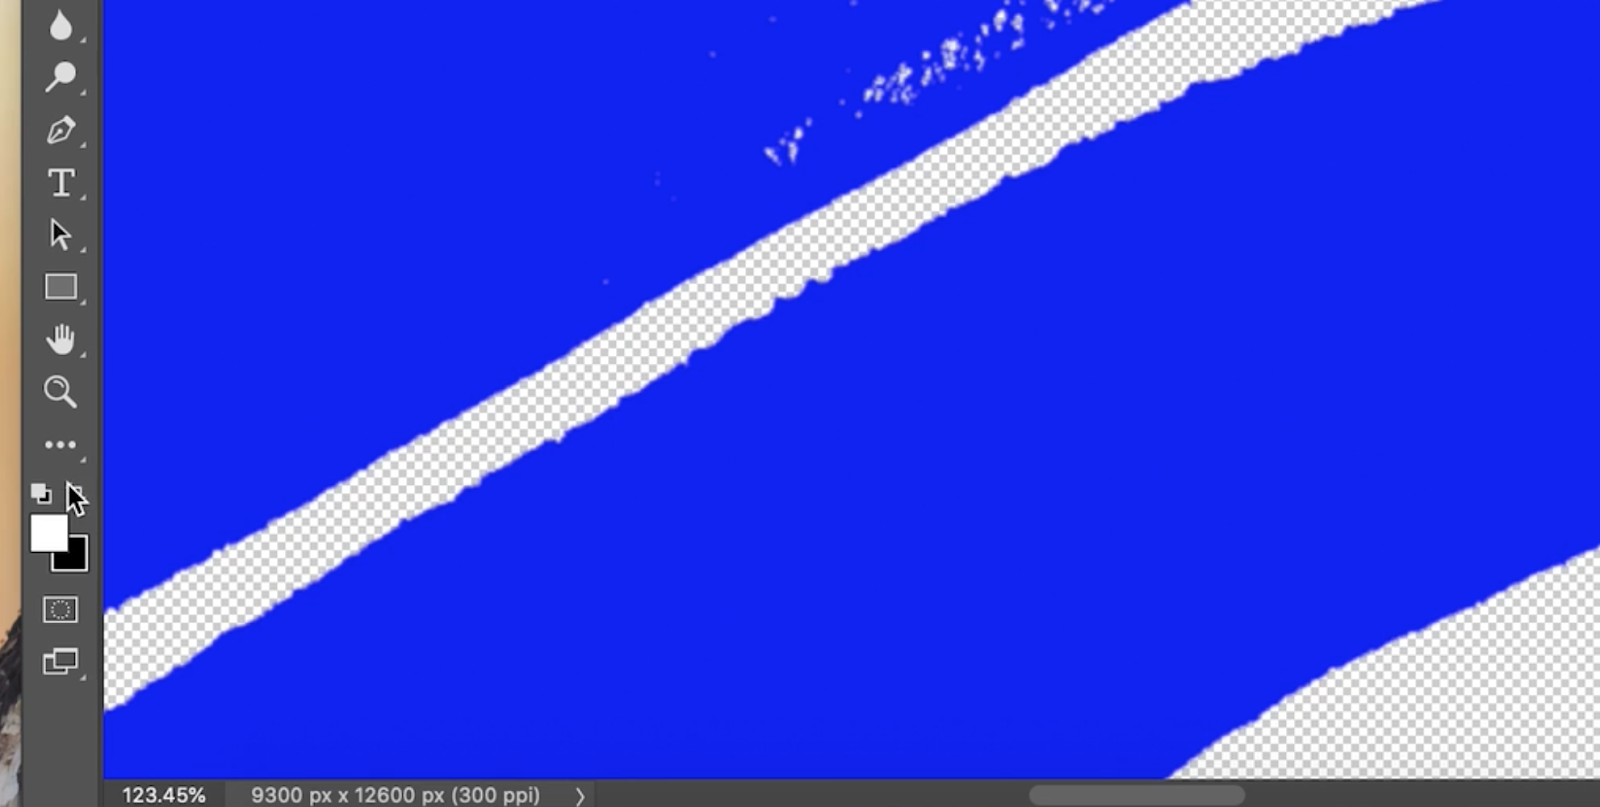
If you paint with watercolor like me, chances are that the selection cut out some of the white areas within your illustration as well as the background. When I zoomed in on my illustration I saw the checkered transparent background peeking through in some areas. Zoom in on your illustration to see if there are any areas like this on your illustration. If that’s the case for you, you can easily add those areas back in!
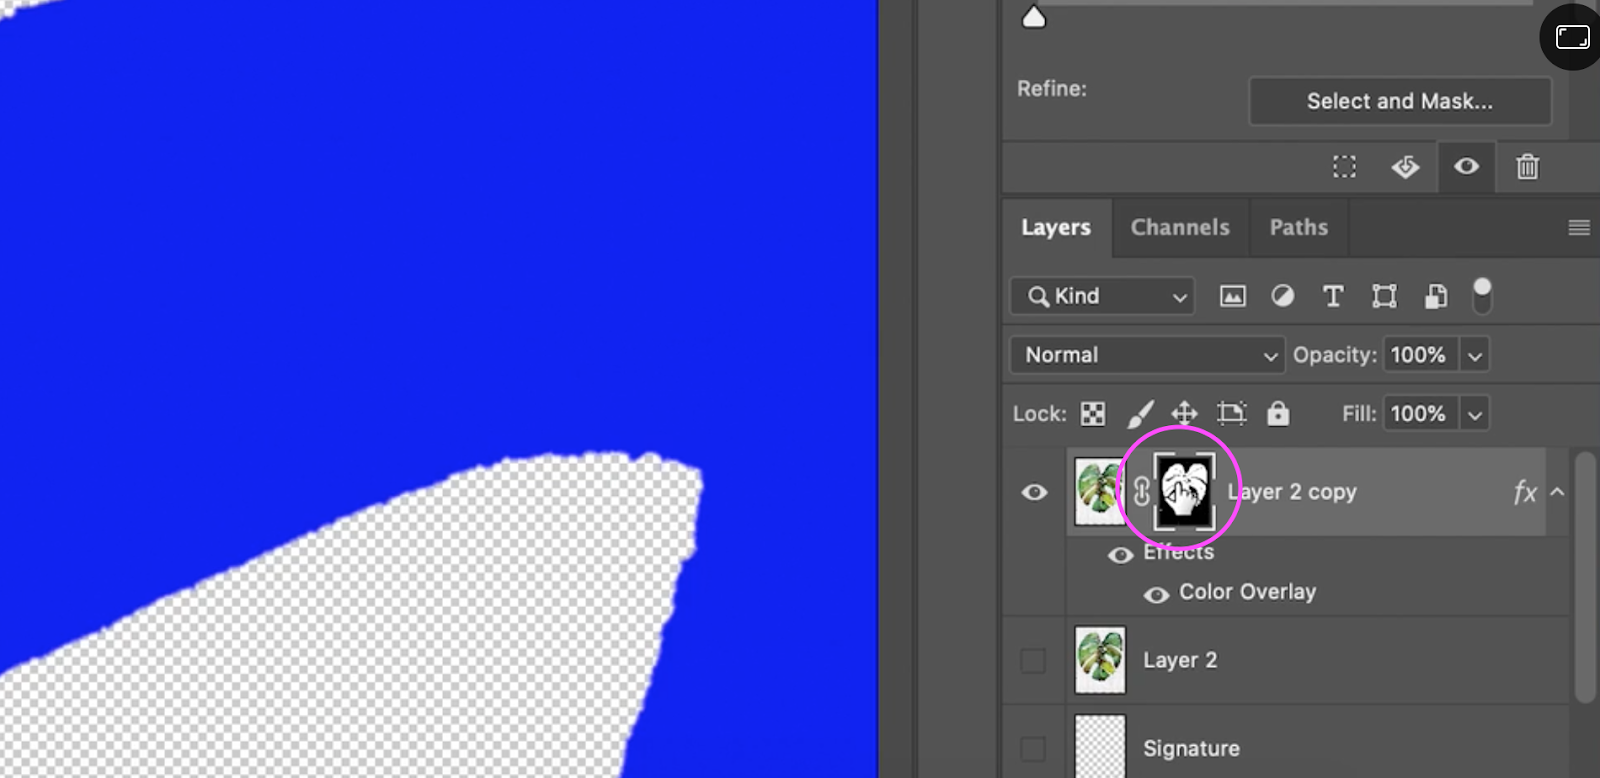
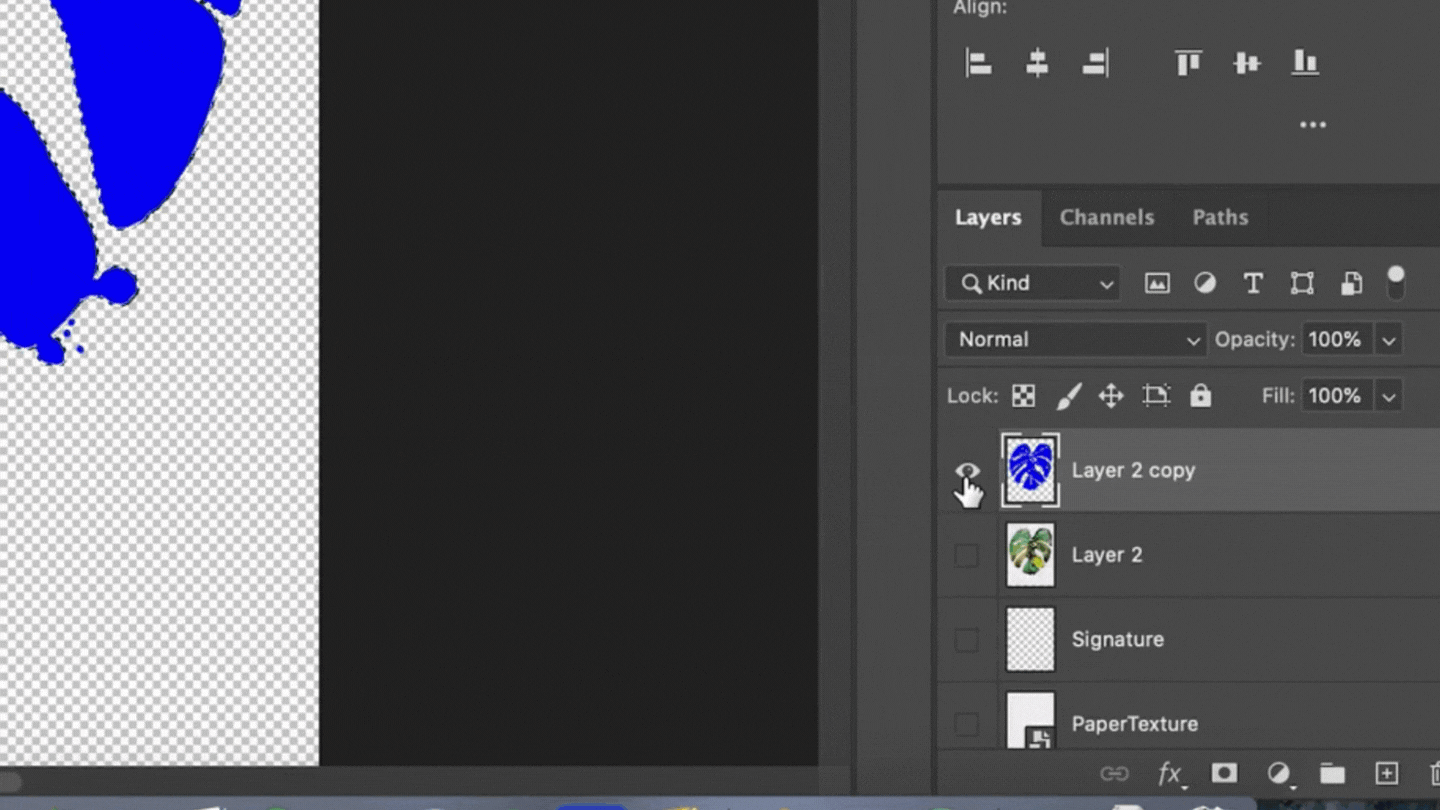
Make sure the layer is selected, click the Effects button on the layers panel (fx icon), and select Color Overlay.

Now pick a color that helps you see a lot of contrast between your illustration and the background.

Note that this isn’t turning your illustration a different color! You’re just temporarily using it to see what has been cut out and what needs to be added back in. When I zoom in on my illustration I can now clearly see which areas of the illustration were cut out that I want to add back in.

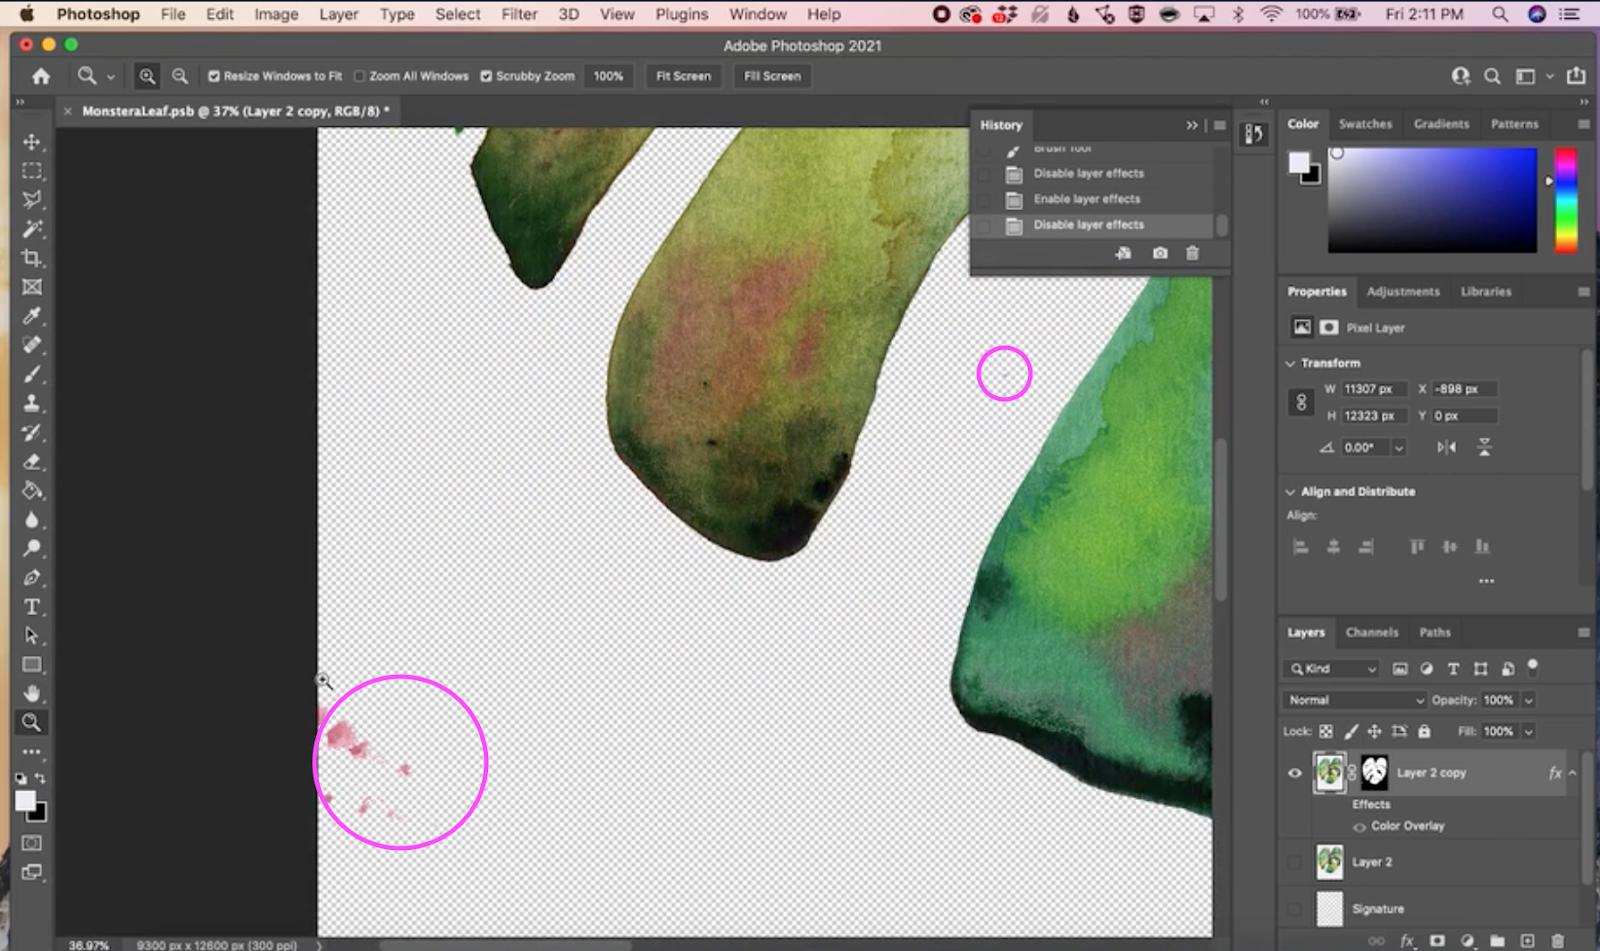
Now since we used a mask to hide the white background, we can paint back in those areas that got mistakenly removed. To do this select your brush tool (keyboard shortcut: B).

Now go to your layers panel and make sure the mask is selected. This is the black and white thumbnail next to your main layer thumbnail.
With a mask, white represents areas of the layer that are visible, and black represents areas that are hidden. To reveal hidden areas, make sure that you are painting with white. If your colors don’t look like this you can hit “D” on your keyboard to reset them to this default black and white.
Now you can simply paint over any areas that you want to bring back.

If there are any areas that you want to erase, you can use the same method but switch your foreground color to black using the keyboard shortcut “X.” In my example, I had some stray paint splatters I wanted to remove. So I switched my foreground color to black and painted those splatters away!

You can continue to follow these steps to clean up the rest of your illustration. I like to zoom in so I can make sure I’m not missing anything, and when I’m feeling like it’s all cleaned up I move on to one final step!
Final background removal
We’re almost done! But if you’re like me, you might have some lingering straggler areas on the background either from paint splatters, dust on the scanner, or water marks while painting. It would take a lot of time to go through and catch those all with the painting method we used in the last step, so I’ll show you a quick way to isolate your illustration and remove the background fully without worrying about those little extra pieces.
Note that this will only work if you have the original copy of your artwork beneath the layer that has the mask on it. We duplicated that layer in a previous step, so make sure you have that in place before moving on to this part.
Now hover over the layer name (not the thumbnail) of the masked layer, right-click, and select Rasterize Layer Style. What this does is flattens that layer with all of the work we’ve done like the mask and color overlay in place. So now we have the color overlay version of our illustration hovering over the original illustration.

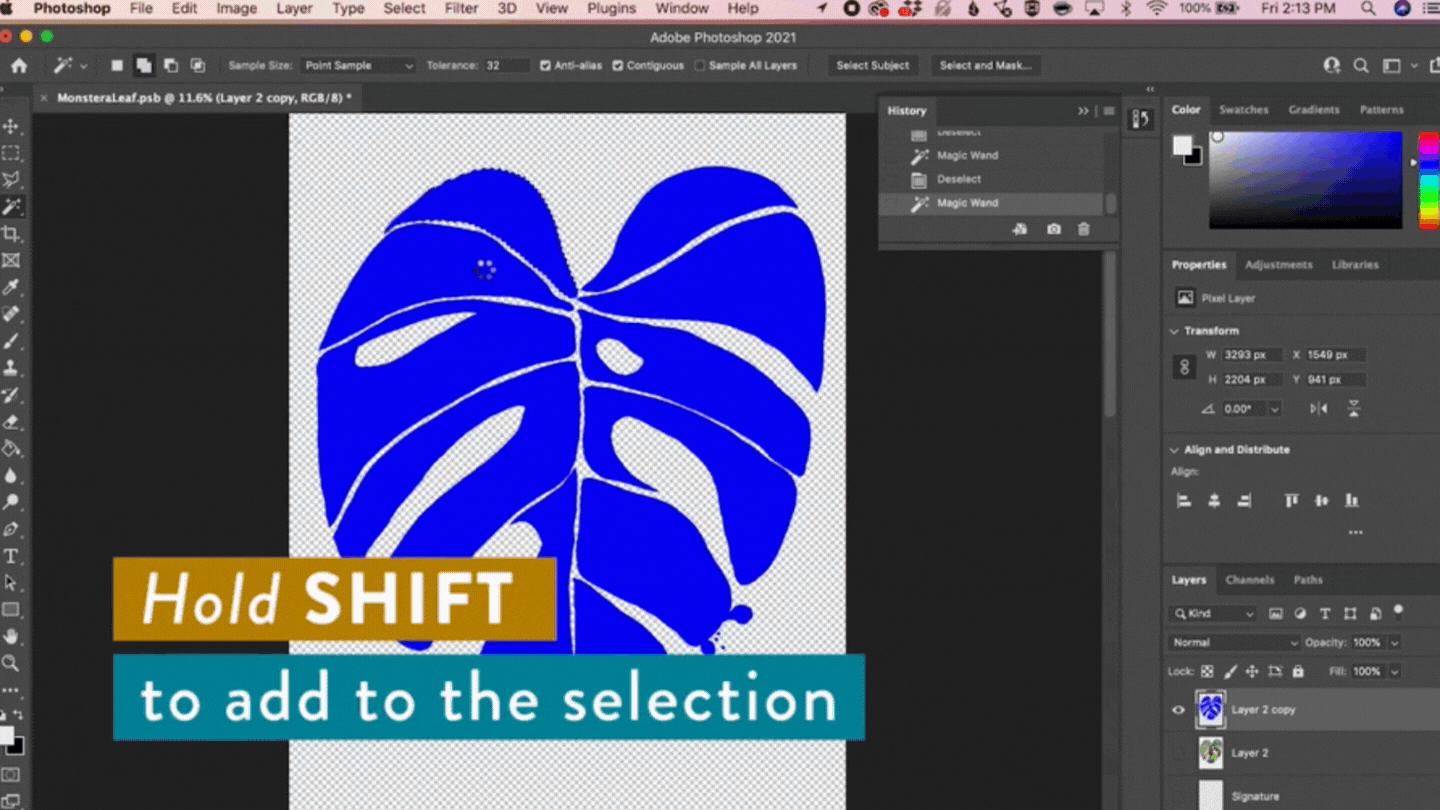
Next, we want to select only the main illustration, not those extra stragglers. To do this, we’re going to grab the magic wand again (keyboard shortcut: w) and this time make sure contiguous is turned on.
This means that when you select a part of your illustration it will only select the areas that are touching the part you selected. If we had contiguous turned off and tried to select the illustration it would select every blue thing on the canvas which we don’t want.

Now start to select the segments of your illustration one by one. Make sure to hold down shift the whole time so that every click adds to the previous selection.
Test to make sure that you got everything by going to Edit → Cut. If your whole illustration was removed, then you’ve got it all! Then use cmd + z to undo the cut and bring back your selection.
Now turn off the visibility on your solid color layer, turn on the visibility of your original illustration layer, and then use the key command cmd + J to duplicate the original layer. This copies the entire selection onto the new layer leaving us with a nice, clean, background-free version of the illustration.
Next, delete the original illustration layer and the mask layer. You can tell which one is the new layer because it will have a checkered background and the old one will still have a white background. So now we have our single artwork completely isolated from its paper background!

You can either export the file as a png to retain the transparent background or continue working on it depending on what your goal is.
There is so much more that you can do with your artwork once it’s digitized like this. You can create repeat patterns, add different backgrounds, or infuse metallic accents into your paintings just to name a few of the options!
If you want to dive deeper into learning how to digitize your artwork, check out my class, Digitize Your Art to Sell Online.
This class is a comprehensive guide to everything you need to know about turning your paintings into products. I walk you through the process every step of the way from painting a trending illustration that will sell well, to digitizing, to creating a pattern, to selling it on products!
Digitize Your Art to Sell Online is my most in-depth course yet where I share everything I’ve learned as a professional surface designer.
