Procreate Tutorial - Drawing with Texture in Procreate
Drawing in Procreate has become one of my favorite ways to create artwork. In this Procreate tutorial, I'll share my top tip for making your illustrations pop - adding texture! Using texture brushes is a great way to add dimension and a professional look to your artwork.
And the best part? It's a really simple technique! In this Procreate tutorial, I'll show you my two favorite ways to add texture to your illustrations.
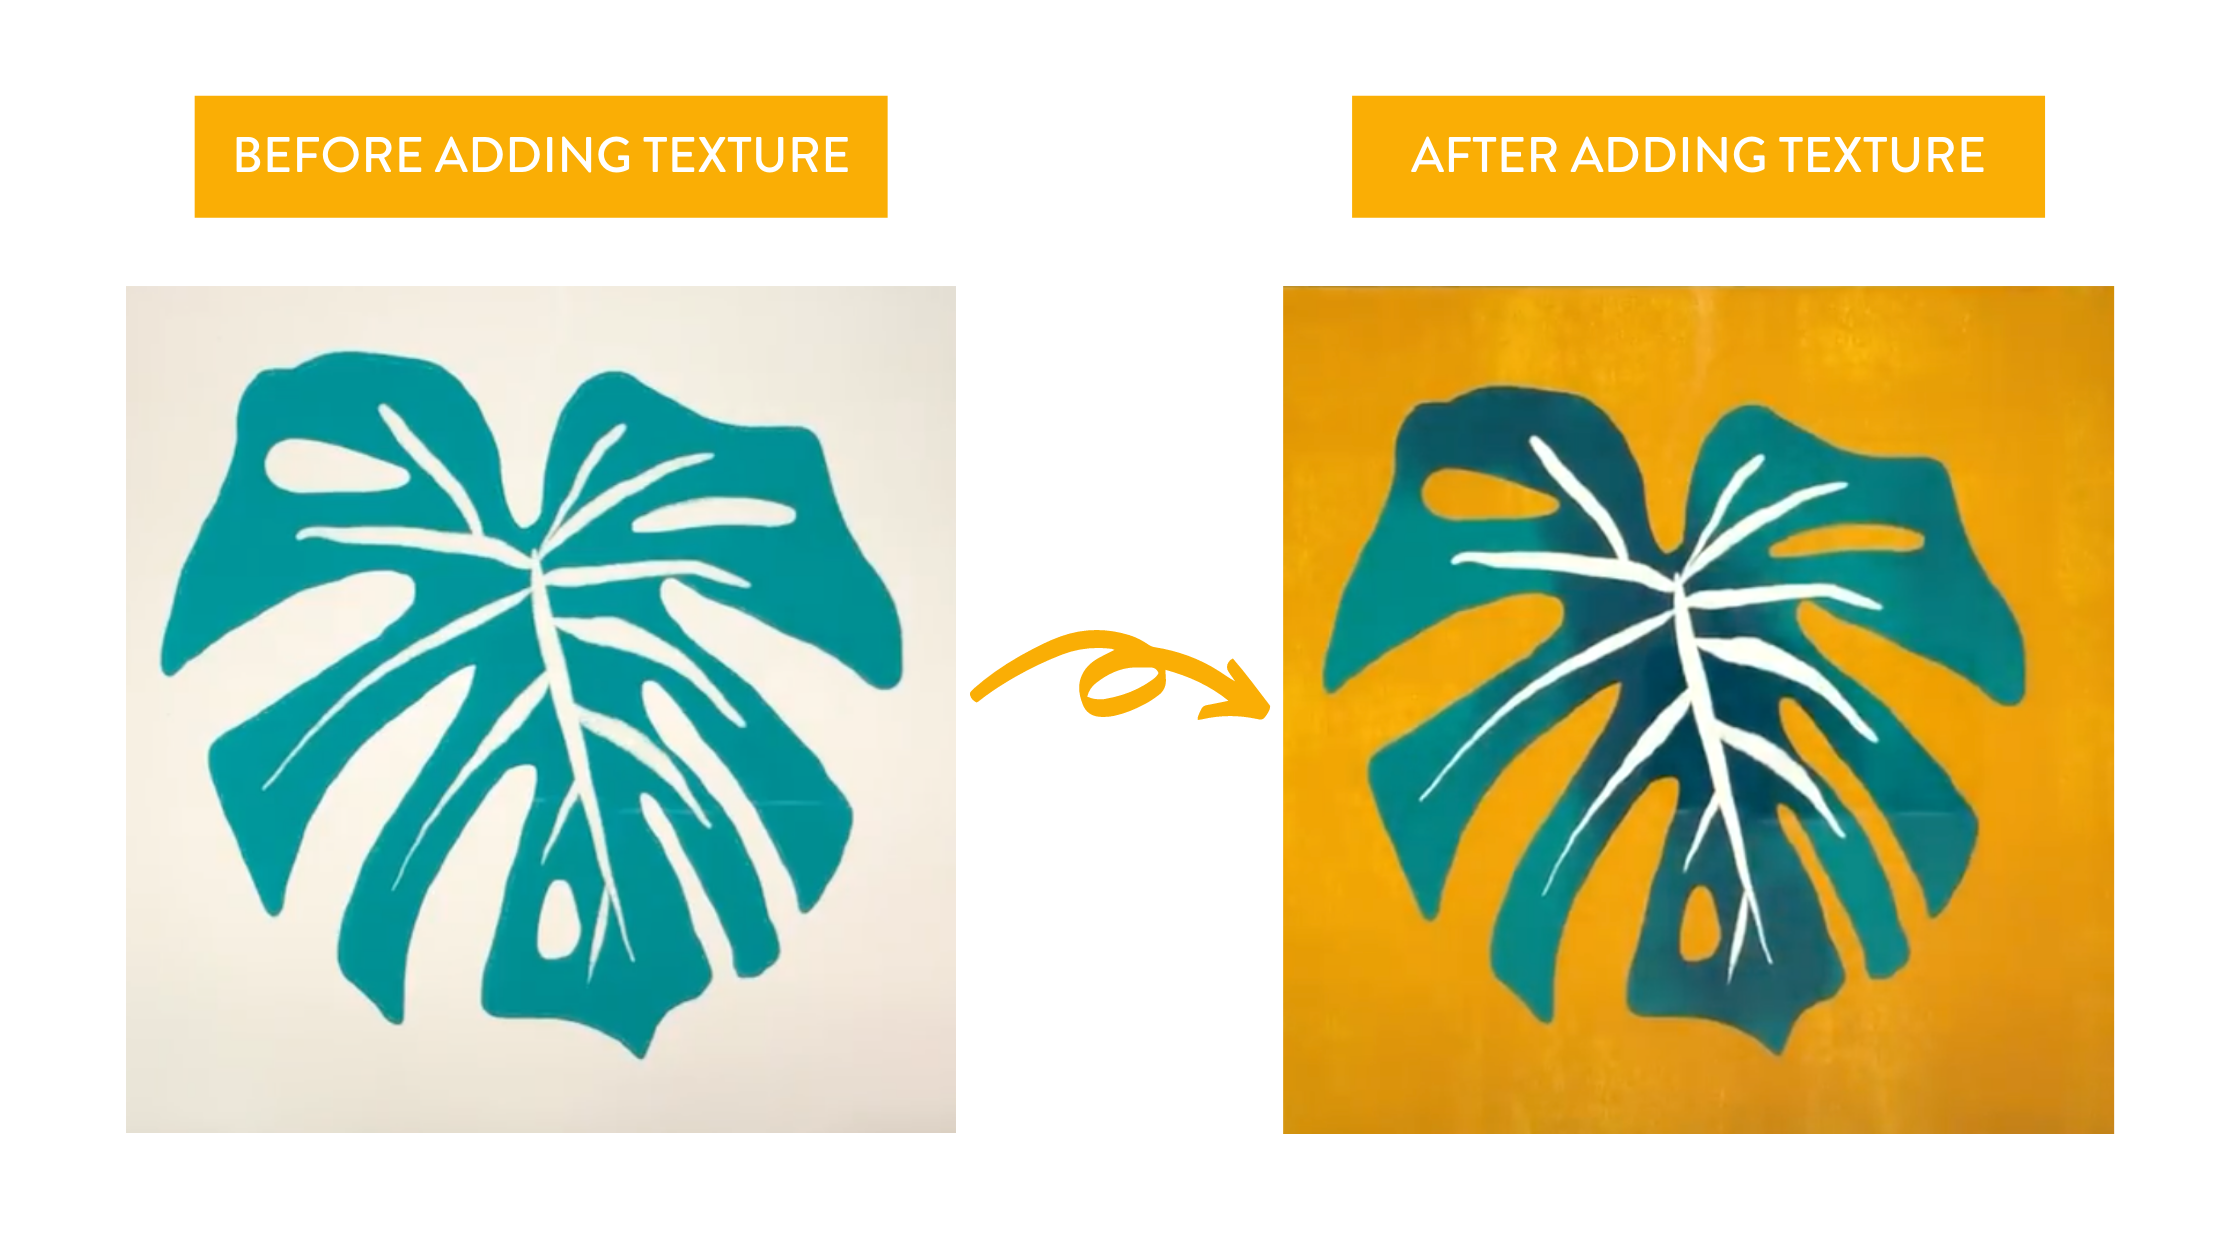
Here’s an example of a simple illustration in Procreate with and without texture. This simple Procreate technique will be a total game-changer for your artwork!
Supplies You’ll Need:
The Procreate iPad App (you can download it here)
An iPad to draw on (I use this iPad)
An Apple Pencil (I use this one. If you don’t have an Apple Pencil, you can use your finger, but I recommend an Apple Pencil for more control while drawing.)
Texture Brushes in Procreate (Procreate has some great texture brushes built into the app, but if you want to explore some more texture options I love the free brushes from True Grit Texture Supply. I also include free texture brushes in all of my Procreate classes. Download yours for free when you enroll in any of my Procreate classes!) Here’s an example of the free Procreate brushes you get when you enroll in my class, Draw Your Dream Home in Procreate!

More of a visual learner? I teach these texture techniques in all of my Procreate Skillshare classes. Plus, I include free texture brushes for my students inside each class! Here are three of my most popular Procreate classes that you can check out if you want to dive deep into textures and drawing in Procreate.


I’m constantly adding new classes so there’s always something new to learn!
Ready to level up your illustrations with texture? Let's dive in! ✍️
Technique #1: Clipping Mask
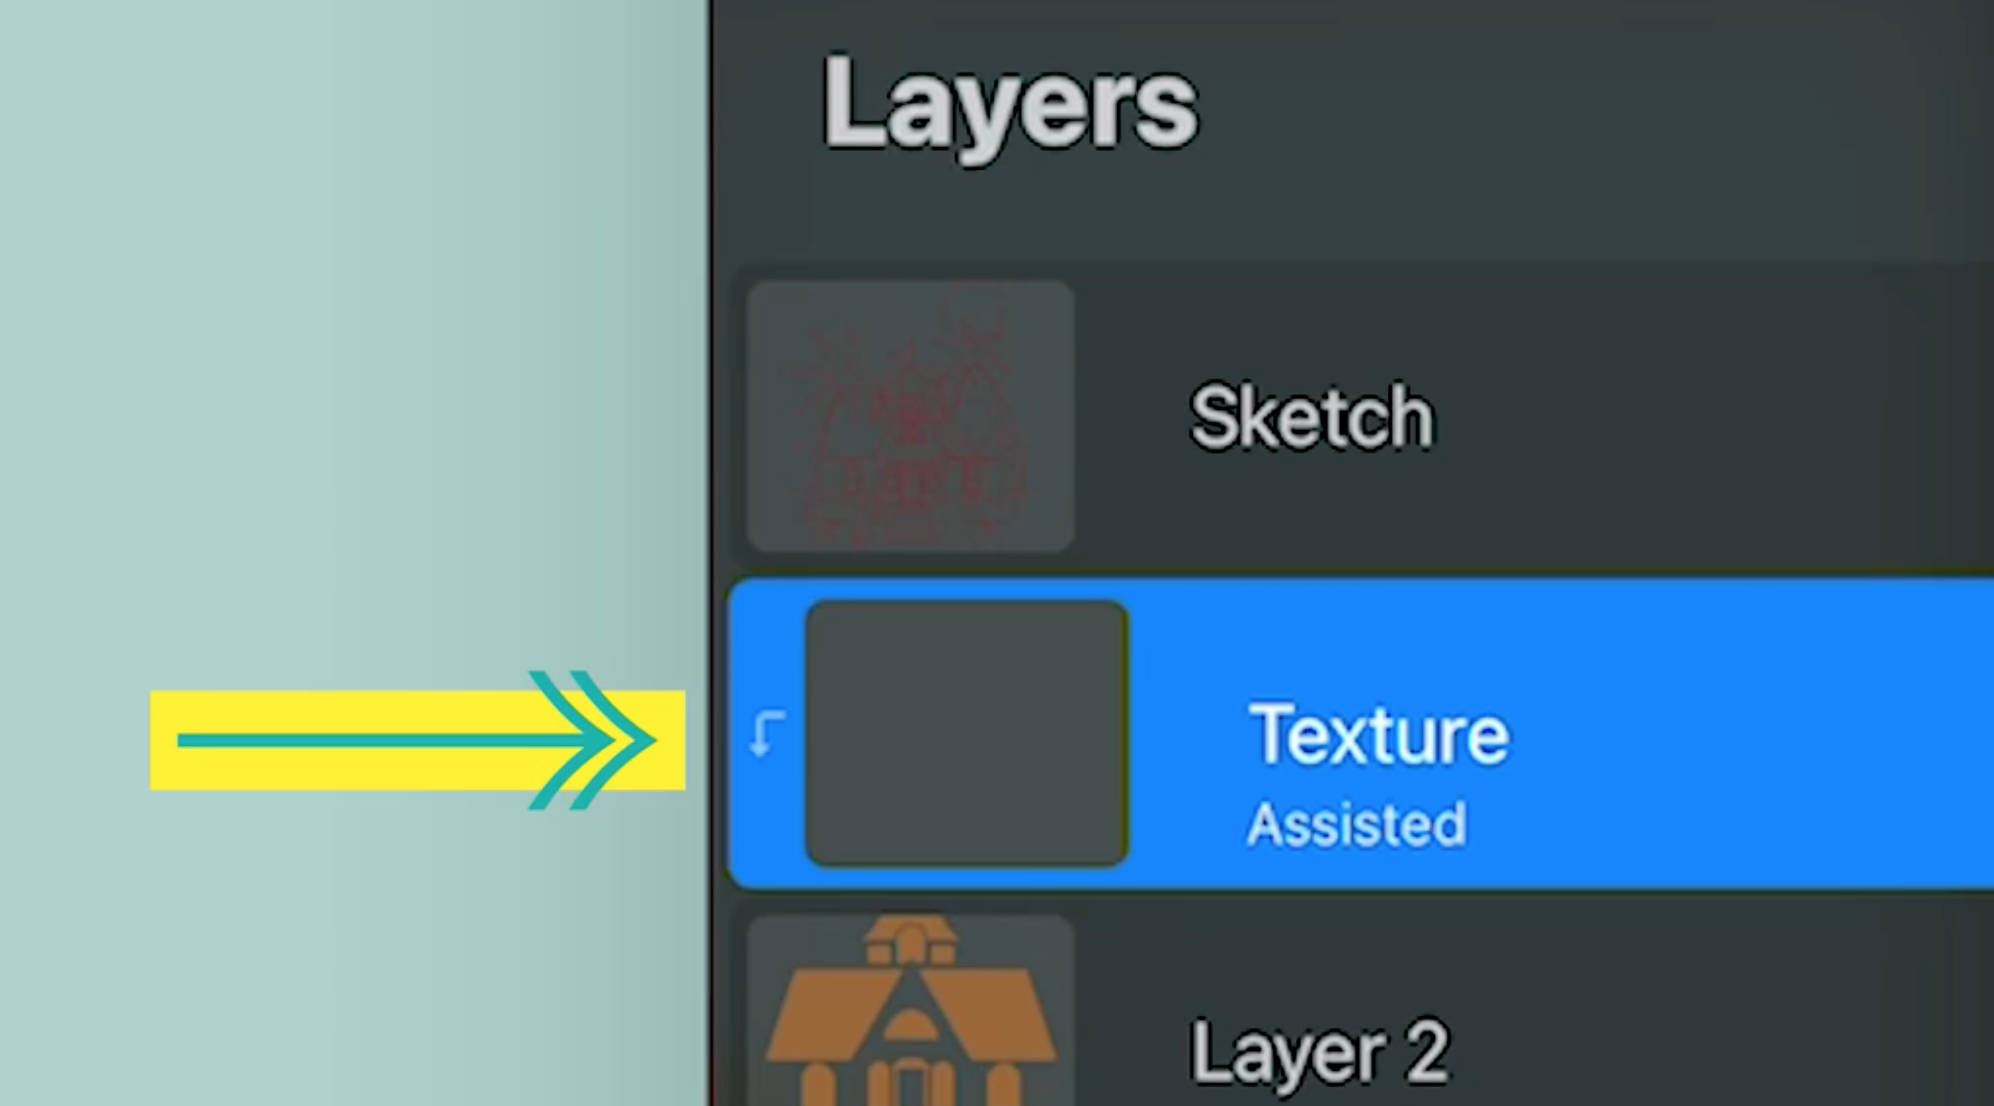
Start by creating a new layer on top of the layer that you want to add texture to.
Next, click the thumbnail of your new layer and select Clipping Mask from the menu that pops up.

You can confirm that the Clipping Mask is on because you’ll see a little arrow to the left of the layer pointing down.
The Clipping Mask will contain whatever you draw on your Texture layer to the shapes on the layer beneath it. So in this example, everything that we draw on the texture layer will be contained in the brown house illustration. Here’s an example of how the clipping mask works. You’ll see that I’m drawing a yellow line all over the canvas, but it only appears on the house illustration.

Now it’s time to actually add the texture! Procreate has a lot of built-in textures in the brush library that you can choose from. If you want to check out some other free texture brushes, I love these from True Grit Texture Supply.
Once you’ve got your texture brush selected, you can start painting it on your texture layer! Here’s how I started laying down the texture in this example. I put some darker texture on the tops of each part of the illustration to give it some depth. It’s subtle but has a big impact.

If you’re using a reference photo, you can take a peek at it to decide where to place your dark textures and highlights based on the darker and lighter areas in the photo. To change the color of your texture brush, click the colored circle on the top right, select Classic at the bottom of the Colors Menu, and from there you’ll be able to choose lighter and darker colors for your texture.

Once you’ve added in your texture, it should look a little something like this! Pretty simple, right? The next technique is just as simple as this one! Read on if you want to learn how to use Alpha Lock to achieve the same textured result.

Technique #2: Alpha Lock
You may be wondering what the difference is between Alpha Lock and a Clipping Mask. Alpha Lock functions similarly to a Clipping Mask, but instead of using two layers, it just works with one. You’ll enable it on the layer that you are adding texture to, and like a Clipping Mask, the texture will be contained on just the elements of that layer.
The biggest difference between the two is that a Clipping Mask allows for non-destructive editing. For example, if you use a Clipping Mask to add texture, you can always edit the texture in the future since it’s on its own layer. With Alpha Lock, the texture that you’re adding is more permanent. It’s part of the layer that you’re working on which makes it harder to undo if you want to make changes.
Both techniques are great! Just choose which one works for you based on the piece you’re creating.
To turn on Alpha Lock, simply click the Layer thumbnail of the Layer you want to add texture to and select Alpha Lock from the menu. You’ll be able to tell that Alpha Lock is on because your layer thumbnail will have a checkered background behind the illustration.
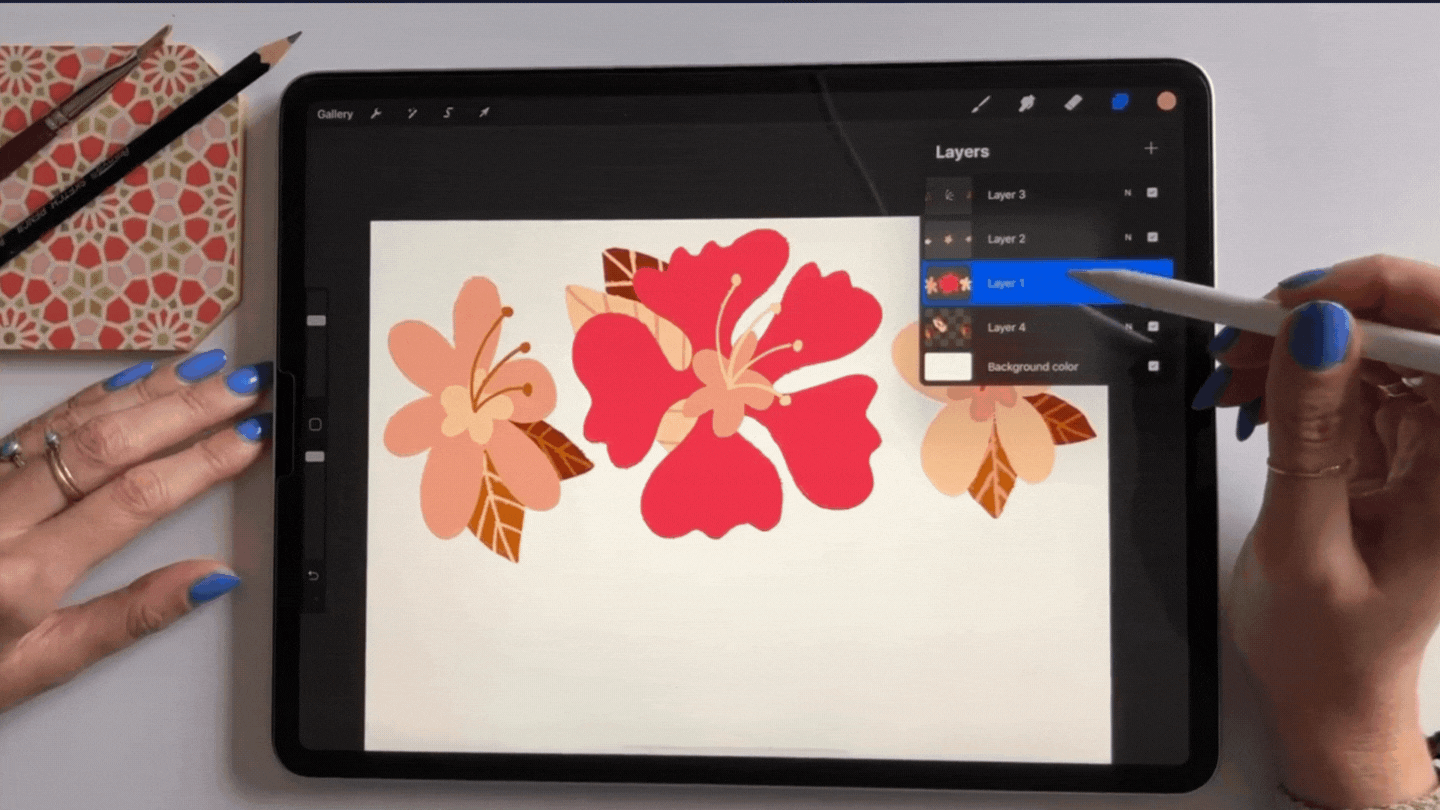
Now you’re free to start adding texture! In this example I added a splatter texture to these flowers like this:

Because I had Alpha Lock on, the splatter stayed contained within the flower Illustration and didn’t show up on the white background.
And there you have it! Now you can use either Alpha Lock or a Clipping Mask to start adding texture to your drawings in Procreate.
I hope this Procreate tutorial has been helpful. As you can see, it’s a simple process that has a big impact on your artwork! If you have any questions about Procreate or adding texture to your artwork, drop them in the comments!
When you create your textured artwork I’d love for you to share it on Instagram and tag me @catcoq so I can see what you make!
Want to dive deeper into Procreate?
If you’re interested in learning more about digital art, I’d love for you to join me in one of my classes! You can watch any of my classes for free when you sign up for a free trial with Skillshare!


