How to Paint a Watercolor Monstera Leaf
In this tutorial, you'll learn how to paint a watercolor Monstera leaf step-by-step. Botanicals are some of my favorite things to paint with watercolor. Plus, they're great if you're a watercolor beginner!
Of all the botanicals out there, I wanted to start with a Monstera leaf because they are hugely popular right now. Keying into trendy motifs has been key for me as I've built my creative business. Having a Monstera painting in your portfolio can help skyrocket your sales if you're selling your art online, and they're just plain fun to paint!
Supplies:
For this tutorial, you'll need:
Round Watercolor Brushes with a fine tip in large, medium, and small sizes
You don't have to worry about having the most high-end brand for any of these supplies. You'll be able to follow along regardless of what brand of materials you have. If you want to use what I'm using in this tutorial, you can check out all of my supply recommendations here.
Ready to get painting? Let's dive in!
Step 1: Sketch
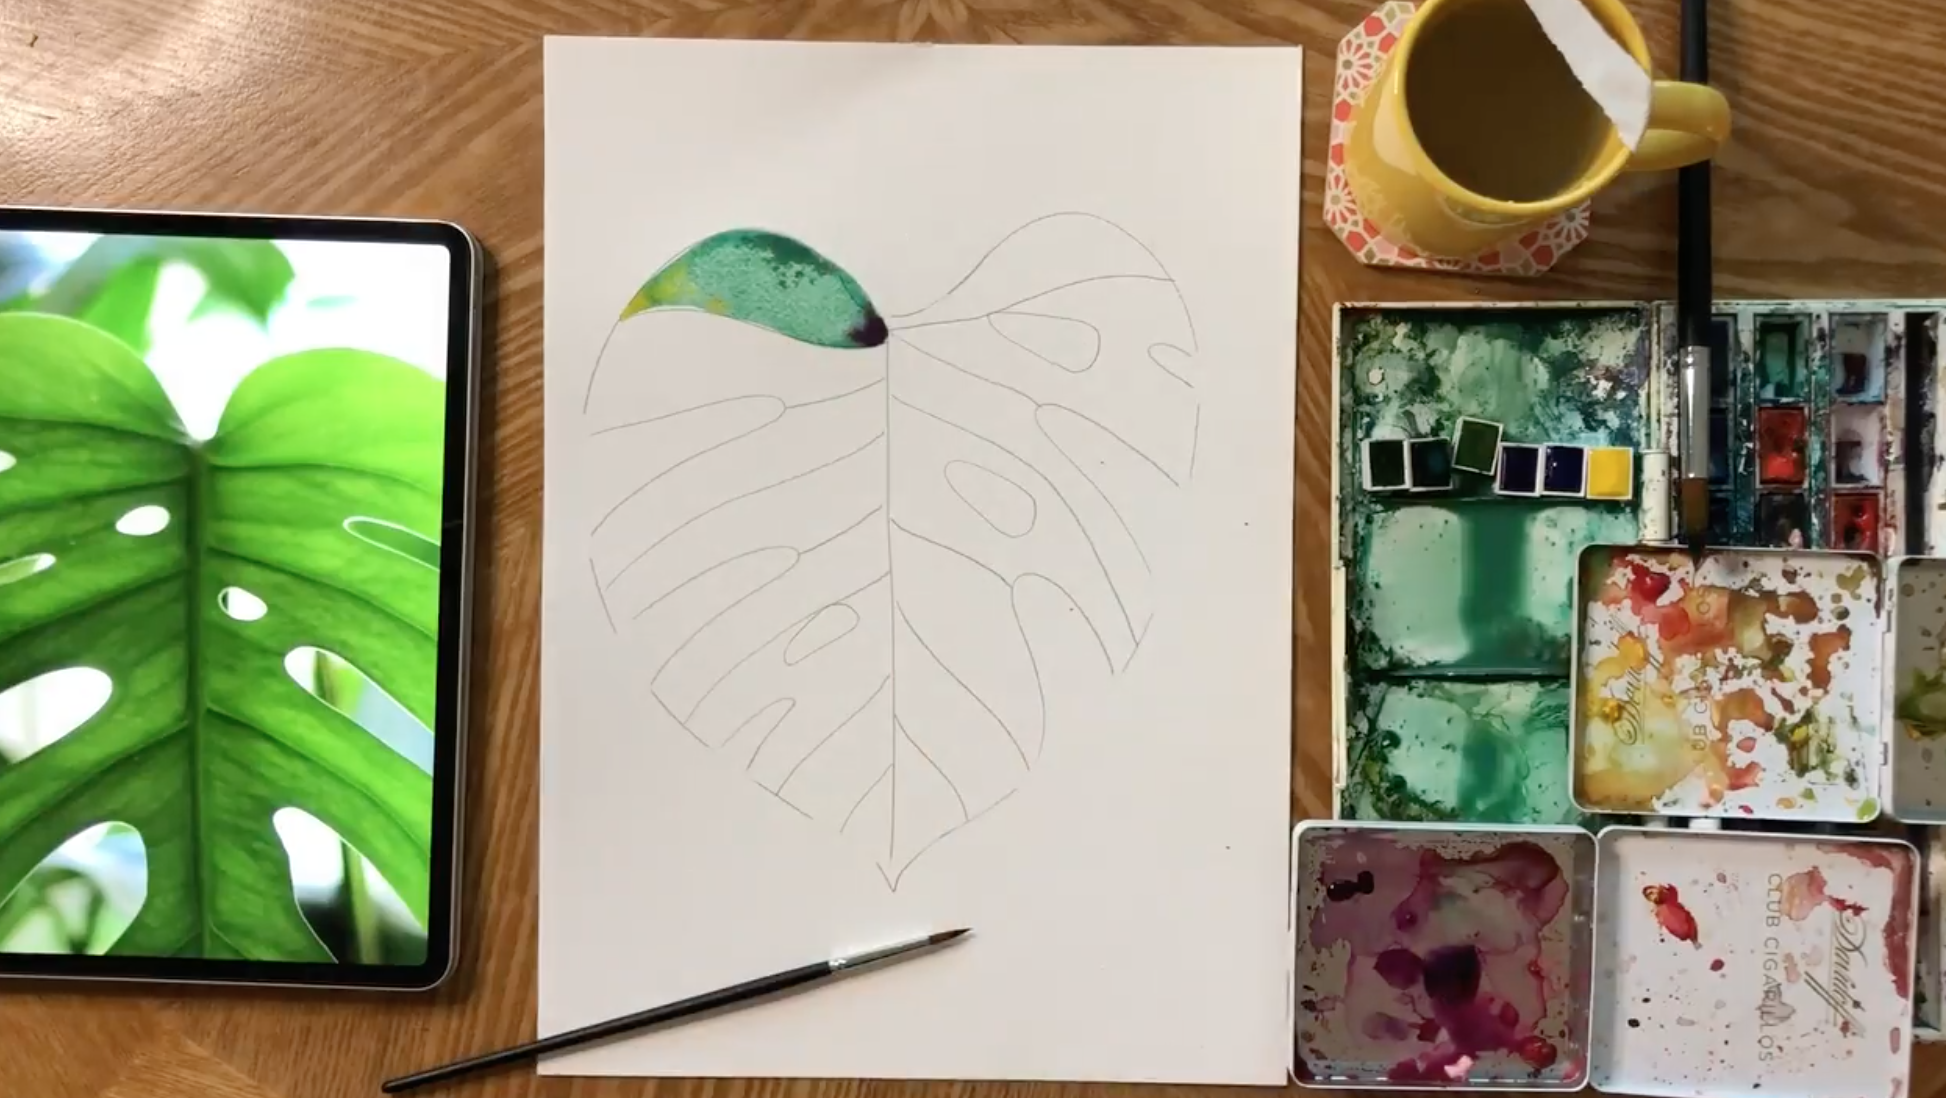
We'll start by sketching from a reference photo. You can use your own or reference the one I'm using.

One thing to note about sketching for watercolor is that you want the sketch to be very light. Since watercolor is a transparent medium, you'll be able to see any dark pencil marks that you accidentally paint over. I prefer using hard lead pencils (my favorite is 4H) when I'm sketching so that the sketch is as light as possible.
Take a look at the reference photo and take note of the main components of the motif. In this example, we have a straight line down the middle that we can use as the jumping-off point for our sketch. There is also a divet at the top and a fine point at the bottom.

Now it's just a matter of completing the curves. Don't worry about making this totally symmetrical, having some variation in your piece will make it look more realistic and interesting. The edges of this leaf are almost like a heart shape, so you can connect the divot at the top and the point at the bottom so it kind of resembles a heart!

Now we need to add in the hole areas. Monstera leaves have a lot of holes and divots that come in almost to the central vein of the leaf. Again, these don't have to be perfect. You can use the reference photo as a guide, but you can make this illustration your own by adding the divots where you want them to be.

Once you have the basic shape of the leaf, you'll draw in lines to break it up into segments where you see veining in the reference photo.
When I'm painting with watercolor, I like to segment out my pieces so that there is whitespace in between the different sections of the painting. There are a couple of reasons for this:
Watercolor dries fairly quickly, so you have to work quickly when you're painting large areas. By segmenting it into smaller chunks you'll know that you're able to complete the area you're working on without it drying.
Whitespace has become my signature look, and it's a great way to add a modern touch to your paintings.
This is what it will look like while you're painting:

Go ahead and add in some lines throughout your leaf to break it into smaller chunks like this.

Step 2: Paint
Now it's time to start painting! I’ll dive into the step-by-step painting instructions below, but first, let’s take a peek at what the finished product will look like!

There are a couple of things to go over before you start laying pigment down on paper.
Wet on Dry
First, we'll be using the wet-on-dry technique for this monstera leaf. This means that you'll paint with wet watercolor on dry paper. This allows for maximum control while painting and ensures that you get clean, crisp lines on each segment.
Whitespace & Brush Control
As I mentioned in the sketching step, we'll paint each segment of the leaf individually. Use the pencil marks as indicators of where your whitespace should be and try not to paint over them. If you do, it's no problem, but try to avoid it as much as possible.
I like to paint with three different-sized brushes so I have total control as I'm painting each segment. I start with a large round brush to lay the majority of water and pigment down. Then I use either a medium or small-sized detail brush to add in the fine details and get the edges clean.
Color
When it comes to color, I like to keep it very intuitive. I don't pick a certain palette or try to follow the reference photo exactly. However, I like to stay within the same general color family as my reference photo. For this leaf, I will be using different shades of green, teal, and blue.
Unexpected colors and multiple hues can make watercolor pieces look modern and interesting. This is one of the most fun and playful parts of painting with watercolor.

Paint!
Now it's time to start painting! Since I'm right-handed, I always start by painting from the top left segment downward so I don't accidentally smudge any of my paint as it's drying.
Start with the top segment and load your large round brush up with water and green pigment. Then paint within the pencil marks. Once you have the majority of the area covered, switch to your detail brush to finish the edges of the segment.

Now for my favorite part - color blending! The center of this leaf is a lot darker than the other parts, so we want to drop some pigment in the center to reflect that.
My favorite way to make a pigment darker is not to add black, but to add its complementary color. In this case, that’s red. Red and green are opposite on the color wheel, so when mixed they make black! This lends itself to a much more interesting darker green than if we were to add straight black.
While the segment is still wet, grab some red and simply dot it into the center of the segment. Then the watercolor will do the work for you. If you're dropping color into wet pigment it will bloom and mix together as it dries.

I also like to give a little extra dimension to each segment, so I'll drop some other colors in before it's dry too. In this example, I popped a few yellow spots in and added some darker green as well.
Now, all you have to do is repeat the process for the different segments of the leaf! Don't be afraid to explore different colors in each segment. That's where the magic happens!

I'd love to see your monstera paintings. Share them on Instagram using the hashtag #CreateWithCatCoq and tag me @catcoq so I can make sure to check them out! If you have any questions about this tutorial, drop them in the comments of this post!
Want to learn to paint more watercolor botanicals?
I teach a full-length class where you'll learn to paint three other watercolor botanicals - a sunflower, hibiscus, and succulent!
