How to Paint a Watercolor Succulent
In this watercolor tutorial, you’ll learn how to paint a watercolor succulent. Succulents are popular sellers and they are a fabulous motif to start with as a watercolor beginner. This tutorial is for all levels, so whether you’re a hobby artist just starting with watercolor, or a seasoned artist looking to learn a new skill, you’ll get something out of this watercolor tutorial! I love painting botanical motifs, and succulents are some of my favorites to paint. The mandala shape of a rosette succulent makes the process so meditative. Plus, this is a fabulous way to practice your brush control!

Before we dive into the watercolor tutorial, if you want to follow along with a more in-depth video version of this tutorial, check out my class, Watercolor Botanicals. In this class, I walk you through the process of painting four botanical paintings including this succulent! I share my painting process every step of the way so you can follow what I do exactly. And the best part? You can enroll in the class with a free trial to Skillshare. Cancel at any time.

Now let’s dive into painting a watercolor rosette succulent!
Supplies:
For this watercolor tutorial, you'll need:
Round Watercolor Brushes with a fine tip in large, medium, and small sizes
No worries if you don’t have these exact brands of these supplies. You'll be able to follow along regardless of what brand of materials you have. If you want to use what I'm using in this tutorial, you can check out all of my supply recommendations here.
Techniques You’ll Learn:
In this watercolor tutorial you’ll learn three key watercolor techniques:
Wet on dry painting
Color mixing on the page
Brush control
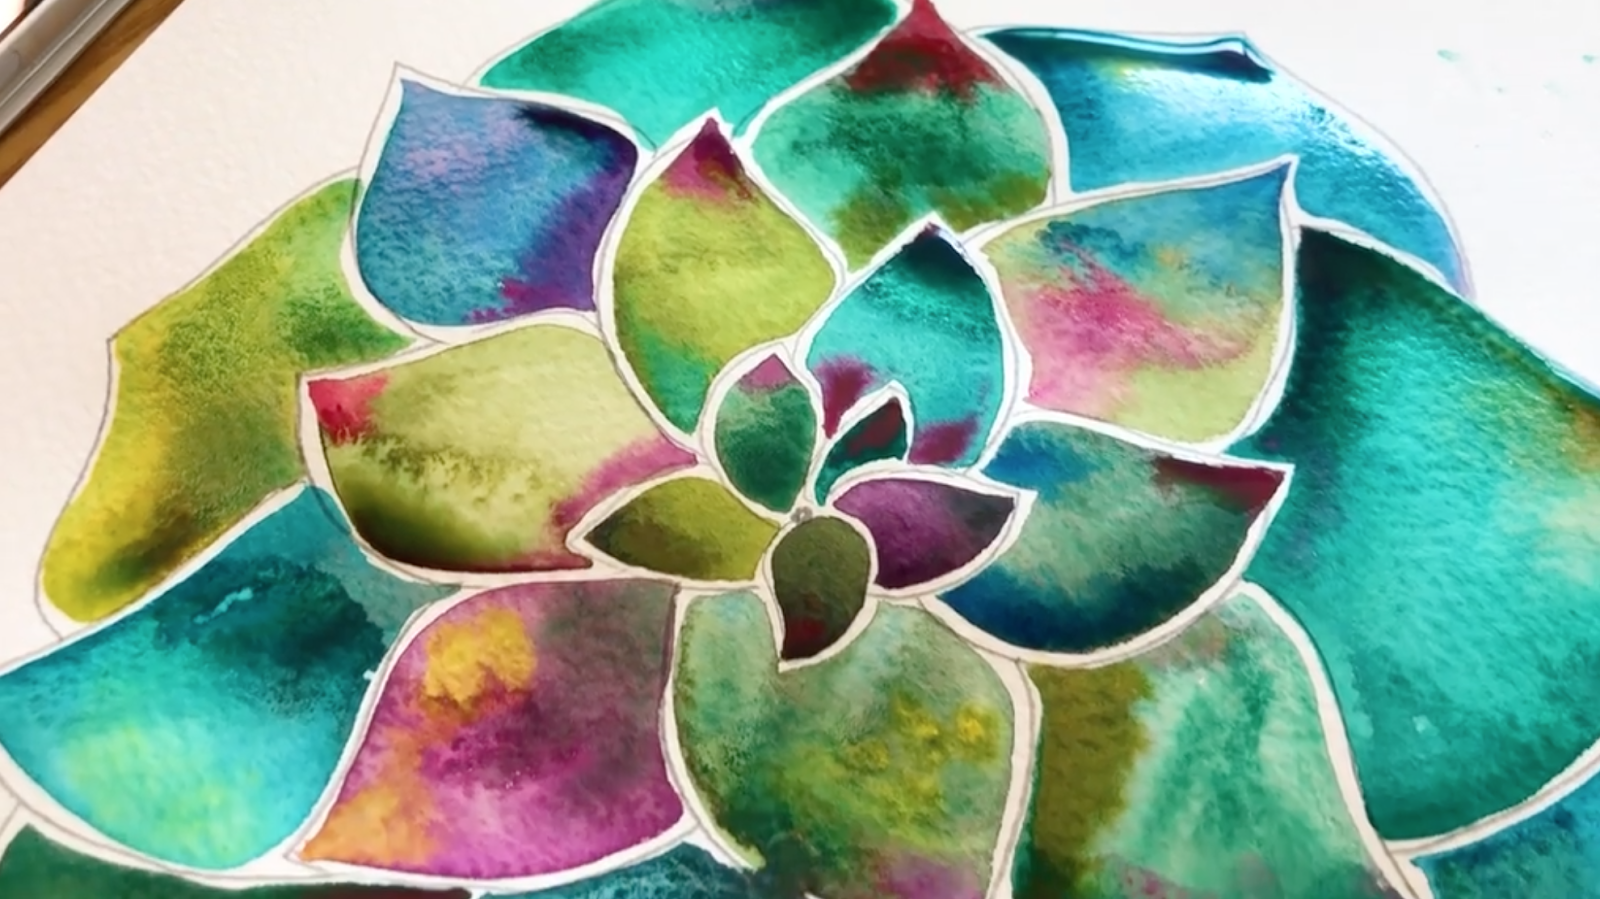
Here is a little sneak peek of what our final rosette succulent painting will look like.

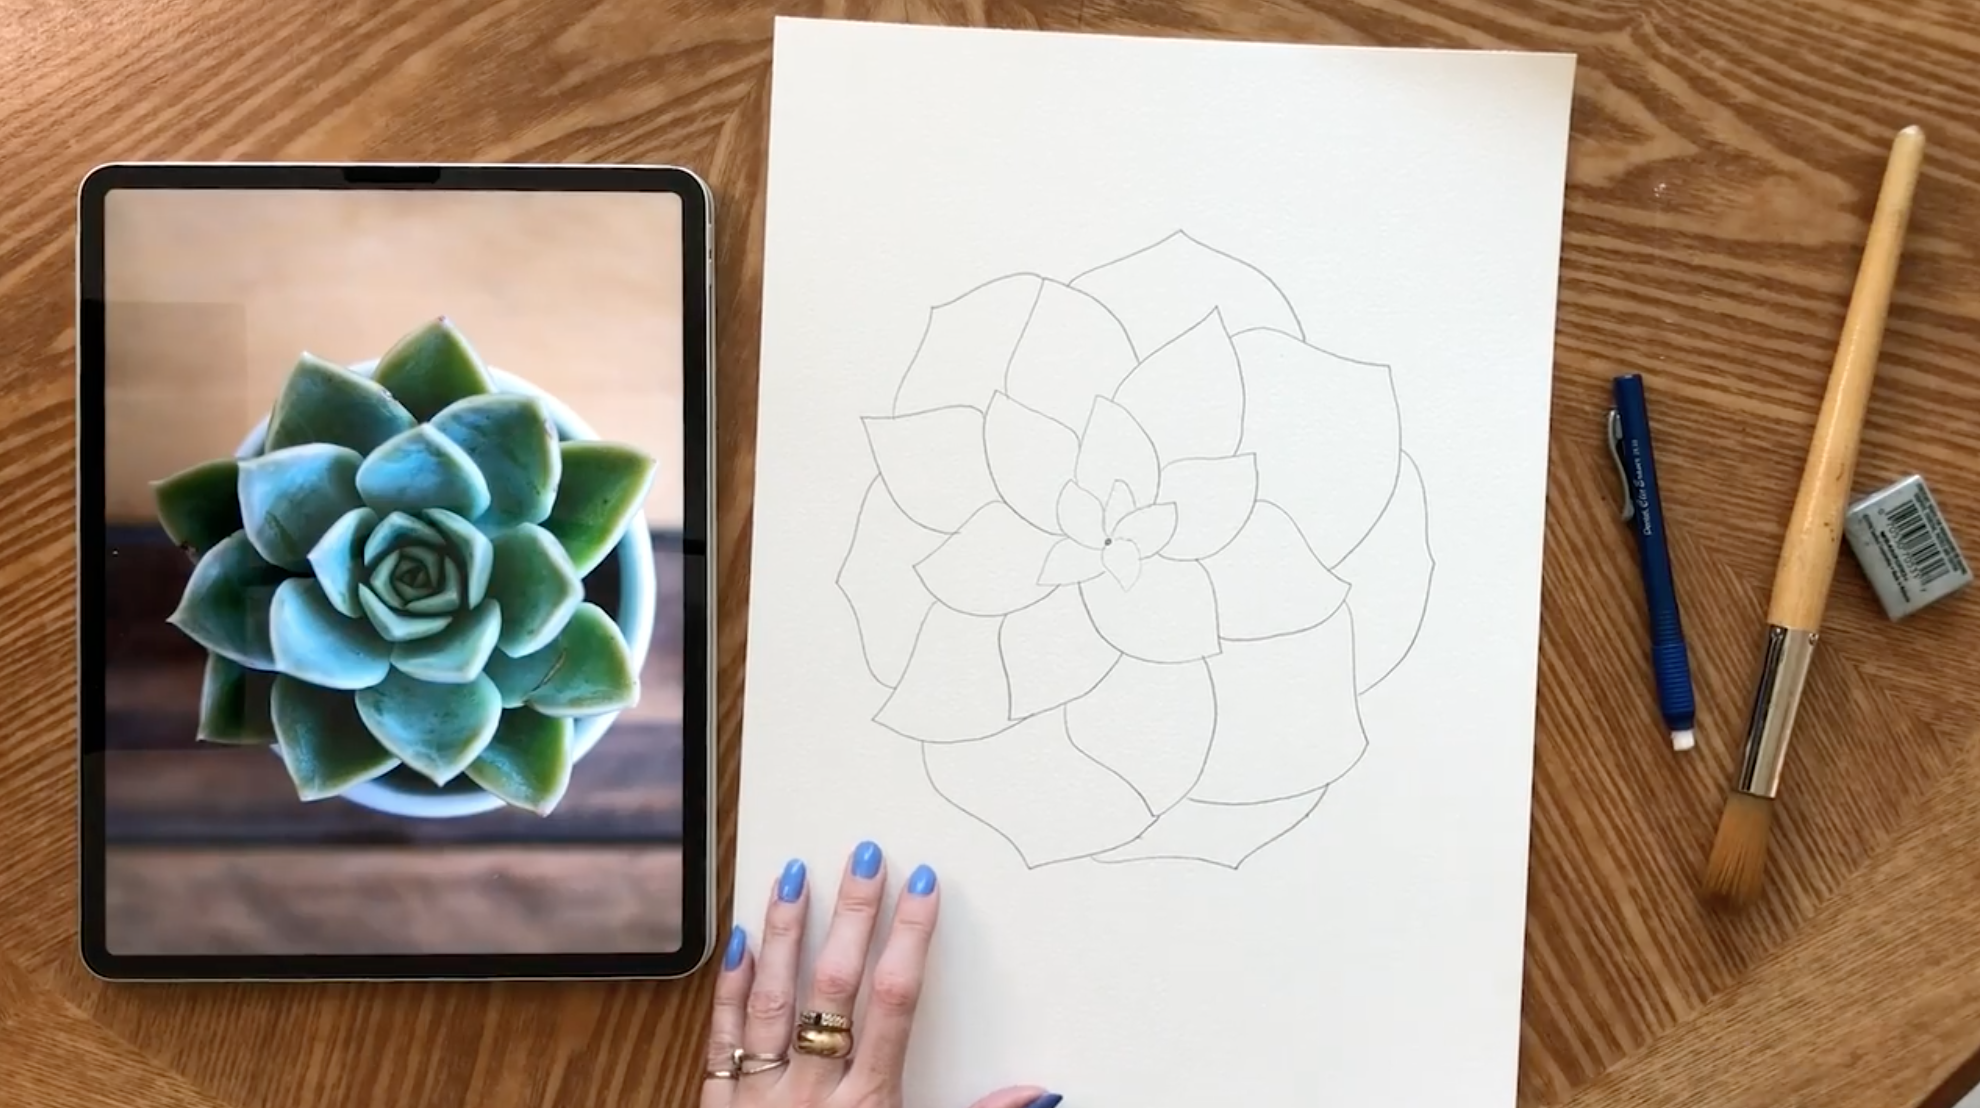
Step 1: Sketch
Step one is to sketch the succulent. I like to have a reference photo on hand when I’m sketching so I can visualize the different elements of the succulent.

Now in a similar way to how you would draw a mandala, start to draw small leaves stemming out from that center point. Since the leaves of the reference photo are smaller in the middle, we want to make sure these are nice and tight.

The second layer of leaves is a bit bigger than the first, so you can gradually increase the size with each layer you draw. Don’t worry about getting this exactly like the reference photo. Use it as a guide, but don’t be afraid to add your own interpretation to the sketch.

As the layers continue to get larger, a good way to figure out placement for the leaves is to see where the gap areas are and use that as a guide for the center point of the next leaf.

Continue to draw your leaves until you have a full succulent centered on your page.
Step 2: Color
The next step is to think through the color palette you want to use. The reference photo shows mostly different green tones, but I want you to get some practice with color mixing on the page in this tutorial, so let’s make our succulent unique with some rainbow tonalities to liven it up!

Exploring color palettes that are a little outside of what might be realistic is one of the most fun things you can do with watercolor. The key to making sure that the succulent is still recognizable is to keep the majority of the tones in the blue-ish green and cool-toned family. This will be the constant throughout the painting, but we’ll add in some unexpected tones while we paint as well. In my example, I’m going to be working with greens, teals, blues, purples, and a few brighter colors like lime green and yellow.
When it comes to actually creating the painting, I keep my color choices very intuitive. I don’t start out with a rigid plan for what colors I’m going to use in each section. I just let the color-picking process flow as I paint. I know this can be intimidating, but it’s a great lesson in trusting your creative intuition! Let go of the feeling that it has to be perfect, and enjoy the creative process. If you make a choice you don’t love, no problem! You can always start again. That’s the beauty of it!
Step 3: Paint
Now it’s time to put brush to paper and start creating our colorful succulents. For this painting, we will paint with a wet-on-dry technique. This means that you load your brush up with water and pigment and then paint onto dry paper with a wet brush.
Whitespace
I love painting with whitespace in my watercolor paintings because it means that you don’t have to wait for any of it to dry before moving on to the next section. I use the pencil marks that I draw during the sketching process as indicators of where I want to leave space in my paintings. When you’re painting the succulent leaves, you’ll paint within the pencil marks to create whitespace. When your painting is completely dry you can erase the pencil marks and you’ll be left with beautiful crisp lines between your painted sections.
(Tip: make sure your painting is completely dry before taking the eraser to it! I’ve been impatient a few times and have the smudged watercolors to show for it 🙈)
Start in the center of the succulent so that you can continue to paint outwards while the center elements are drying.
Brush Control
Staying within the pencil marks can be a bit of a learning curve but with practice, you’ll get the hang of brush control! When I’m working on a painting with varying sizes of sections I make sure to have a few different brush sizes on hand. I paint the larger areas with a #16 round brush and then switch to #4 and #0 for finishing out the details. If the area is really small like the sections in the center of the succulent I’ll start with my #4 brush for more control.

A tip for brush control is to make sure you have plenty of water on your brush. A well-hydrated brush gives you much more control since it allows your brush to glide smoothly over the paper. Beginners tend to shy away from loading their brushes up with water since they think it could cause them to lose control, but it’s actually the opposite!
And if you happen to paint over a pencil mark or if two sections bleed together by accident, don’t worry about it. These little imperfections are what make hand-painted pieces so special.
Color Mixing
I love to mix colors as I’m painting to create beautiful blooming effects when the paint dries. To do this, simply drop the color you want to mix into a wet area on the page.

If there is enough water on the page, the pigments will mix and bloom on their own. Let the watercolor do its thing and get ready for some fun blends when the paint dries!

In my example, I wanted to add some pops of color while also creating shadows. To create that effect, use the opposite color on the color wheel. We’re using a lot of greens in this painting, and the color opposite green on the color wheel is red.

By mixing the two you get a desaturated, dark color while still keeping some of the integrity of the red and green.

There are really no “wrong” colors that you can choose as you explore mixing on the page. Let this be a fun experiment to see what colors blend well together. Don’t be afraid to add some fun and unexpected colors to give your painting a vibrant look.
Now continue to fill in the leaves of your succulent selecting different colors as you go.

When you’re finished, your succulent should look something like this!

I hope you’ve enjoyed this watercolor tutorial! I’d love to see your succulents! Share what you paint on Instagram and be sure to tag me @catcoq so I can like and comment on your artwork!
Want to learn to paint more watercolor botanicals?
I teach a full-length class where you'll learn to paint three other watercolor botanicals - a sunflower, hibiscus, and succulent! And the best part? You can sign up for the class completely for free when you sign up for a free trial with Skillshare.
