How to Sketch From Reference Images in Procreate
When it comes to sketching in Procreate, I love that you have so much flexibility! In this tutorial, you’ll learn two ways to use reference images in Procreate. You’ll learn how to place a reference image to the side of your canvas to reference as you freehand draw, and you’ll also learn how to sketch directly on top of a reference image. And bonus! I’ll share a tip for how to insert a photo in Procreate so that it doesn’t show up in your final illustration timelapse!
Being able to trace directly over reference photos is one of my favorite things about using Procreate. There is no shame in using reference photos for your artwork - I use them all the time to help me make sure I’m getting proportions correct and that what I’m drawing is recognizable.
This doesn’t mean that I’m stealing or copying from a photo, but instead, I’m using it to get a solid starting point for my sketch. For example, in this illustration, I used reference images to trace the bunnies to make sure I was getting the proportions correct, but everything else about this image is unique to my style. The stylization of the characters, the colors, and the composition all make it unique, even though I used reference images as a jumping-off point.

One tip I have for choosing reference photos is to use a site like Unsplash which has a license that allows you to use their photos for free including for commercial purposes. This is my go-to site for reference images!
Now, let’s dive into the two ways to sketch from a reference image in Procreate!
Freehand Sketch from a Reference Image
This first method of sketching is similar to what you would do in an analog sketch. Procreate allows you to pull up a small reference image next to your canvas that you can reference to create your sketch. To open up the reference image window in Procreate, tap the wrench icon, tap Canvas, and toggle on the switch next to “Reference.”
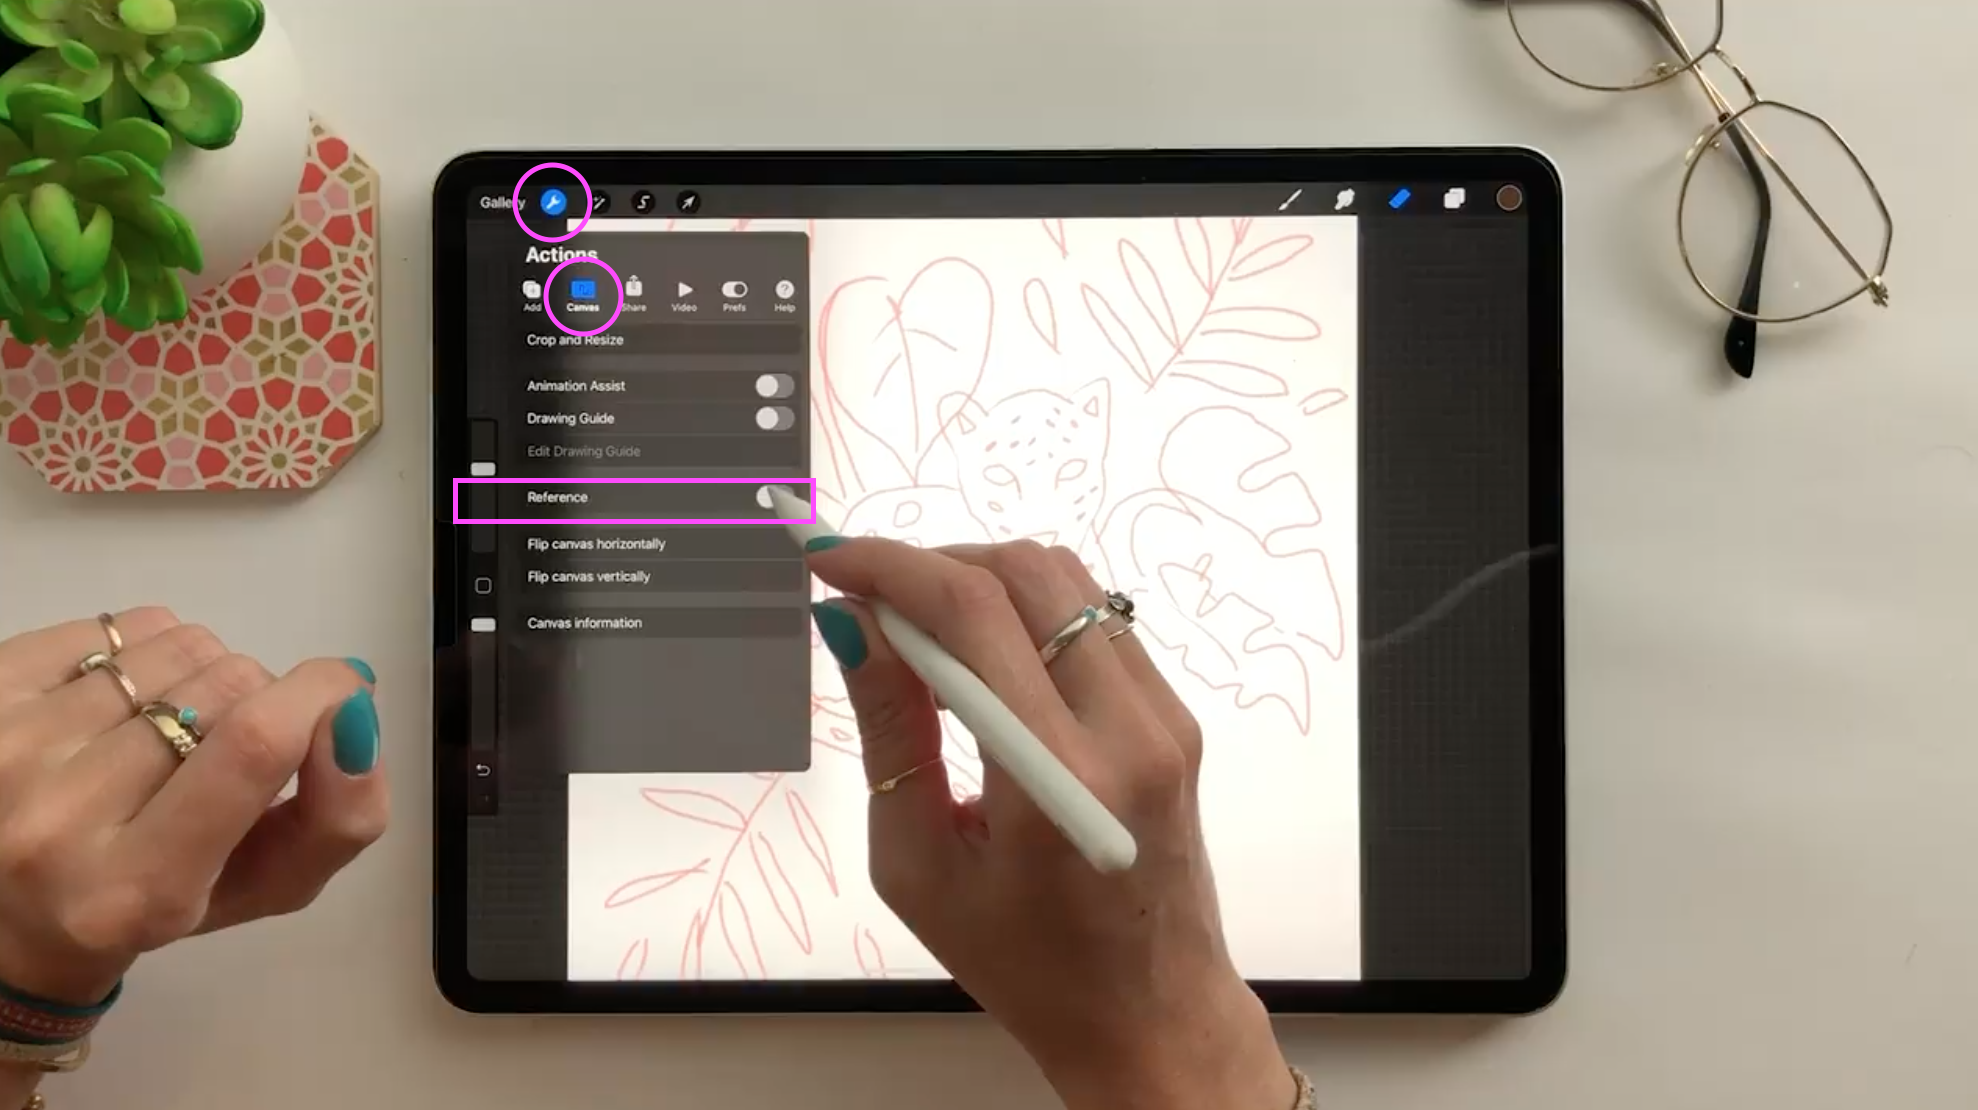
Now you can select a reference image by tapping Image and choosing a photo from your library. You can zoom in on the image and manipulate the reference screen as you would on your regular canvas. You can also move the reference box around on your screen to place it in a spot that works best for you as you’re drawing.

Now you can start to sketch from your reference image on your canvas! I also use this to reference color palettes when I’m inking my artwork. One thing to note about this is that the reference box counts as a layer, so keep this in mind if you’re working under a tight layer limit! (P.S. You can learn more about working within strict layer limits in my class, Blooms & Shrooms: Draw Fun & Funky Artwork in Procreate!)
Trace Directly Over a Reference Image
Now it’s time to talk about my favorite way to use reference images in Procreate - tracing! As I mentioned above, there is no shame in tracing over reference images in your artwork. It can be a huge help in speeding up your workflow. And the best part? Procreate has a tool that allows you to trace over an image without the image showing up in the final time-lapse video of your art process.
The first step is to insert a photo of your reference image onto your Procreate canvas. You have two options when inserting a photo in Procreate - inserting a photo or inserting a private photo. If you don’t want your photo to show up as part of your final time-lapse video you’ll want to choose a private photo when inserting reference images.
To do this, tap the wrench icon, tap Add, and then where it says “Insert a Photo” swipe left and you’ll see the option to insert a private photo. Tap “Insert a Private Photo” and choose your reference photo from your library to add it to your canvas.

You can repeat this process as many times as you like to add multiple private photos to your canvas. I often use different parts of different reference images to put together a unique composition, so it’s helpful for me to add them all individually. When you add multiple photos they will each show up on a new layer so you can manipulate them individually.
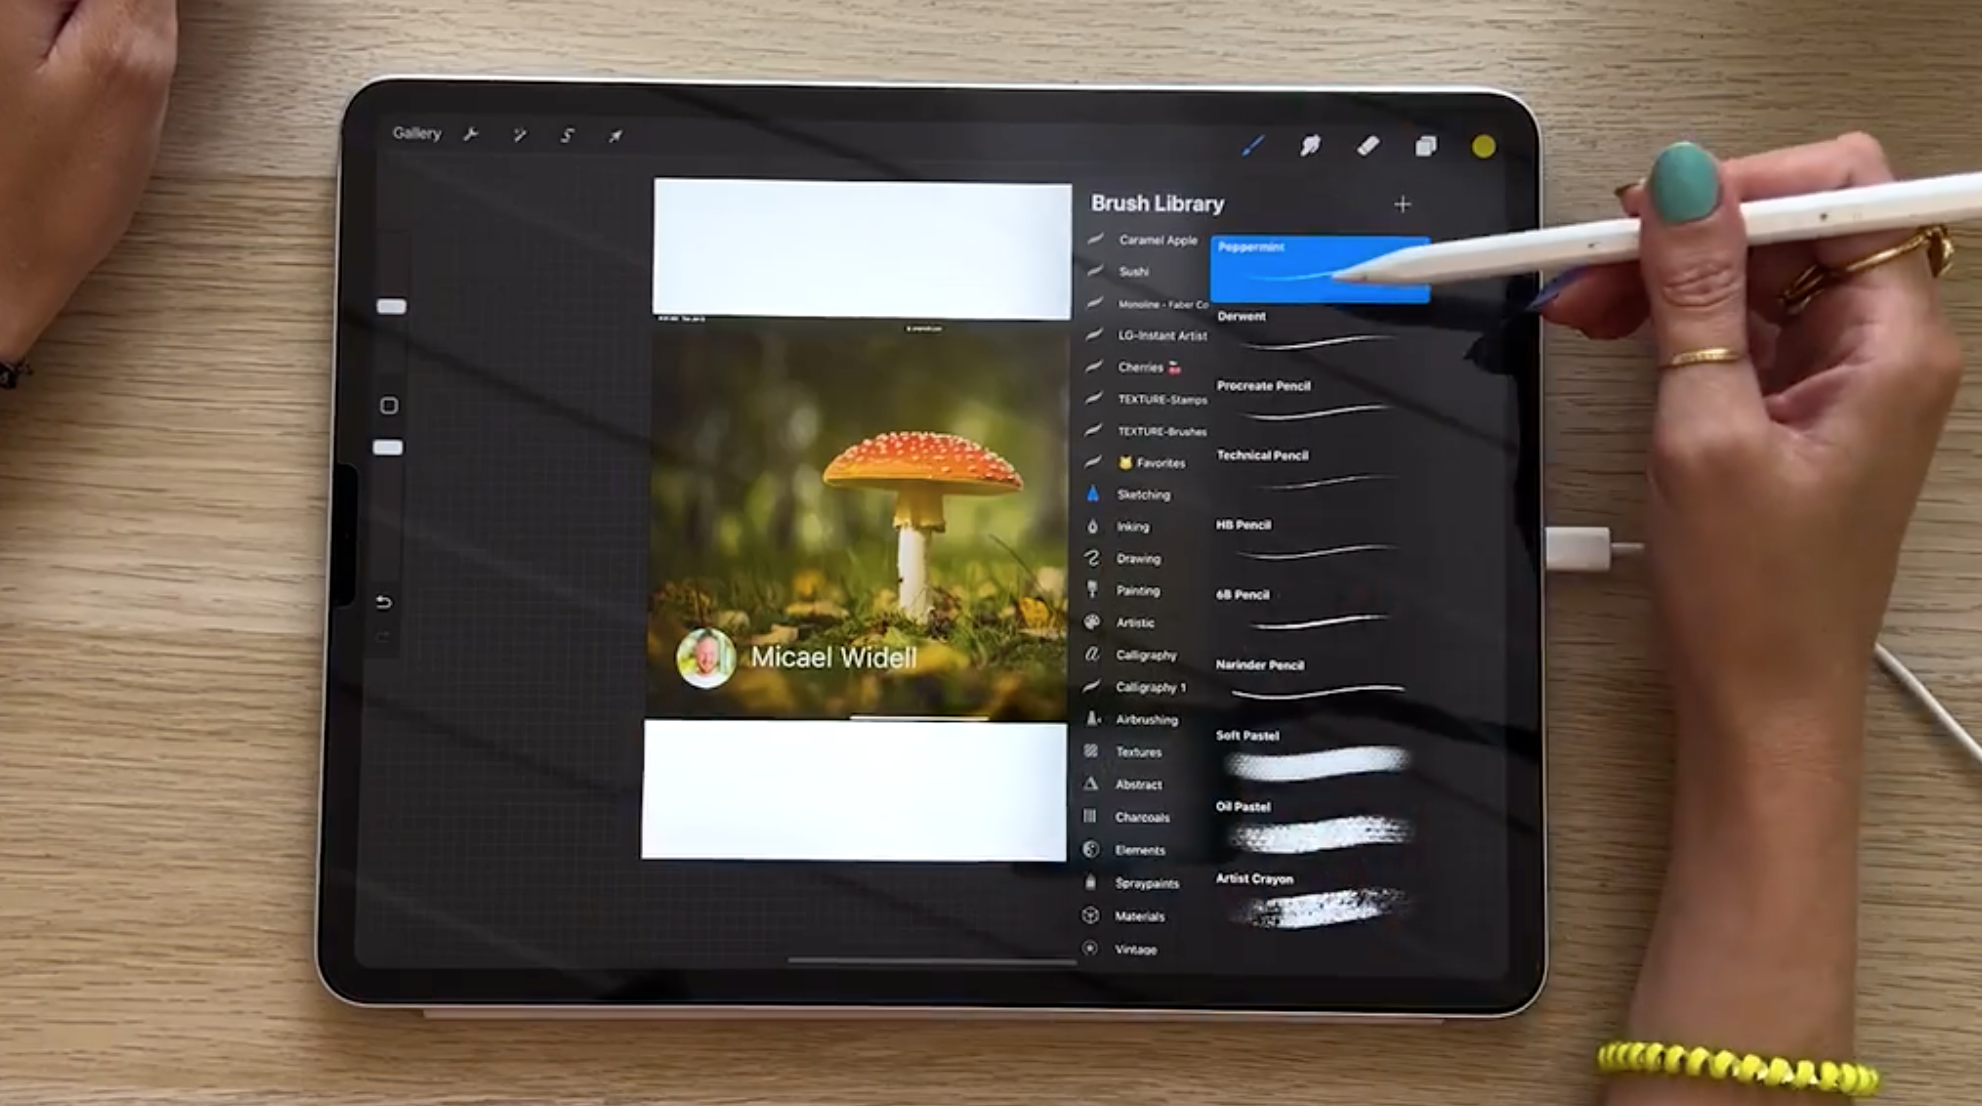
Now onto the actual sketch! Add a new layer for your sketch on top of the reference image layers. This way you can delete your reference photos later after you’re finished using them. My favorite sketching brush is called “Peppermint.” It’s a default Procreate brush and you can find it under the “Sketching” brush library.
I also prefer to sketch in bright red. This allows me to see the sketch more clearly over a reference image than if I were to use black or gray. Grab a red by selecting the color swatch at the top right side of your canvas. Then use the Disc option to select a bright red.

The last step I like to do before sketching on top of my reference photo is to turn down the opacity of the reference image. You can do this by selecting the “N” next to the layer thumbnail. Then drag the scrubber to turn down the opacity of that layer.

Now you’re ready to trace! I keep my sketches super loose. The goal is to get the main forms of whatever I’m drawing down, not to capture every single detail. So in his jaguar example, I just captured the main shapes of the image and a few of the smaller details that would be helpful for my final illustration like the shape of the spots on his body.

Once your loose sketch is complete you can delete your reference photo layers and start inking and refining your illustration!
Want to learn more about taking your illustrations from sketch to final illustration in Procreate?
Join me in one of my popular Procreate classes: Blooms & Shrooms, where you’ll learn the step-by-step process for creating a stunning illustration from start to finish. You’ll learn how to add texture and shading, tips for using symmetry, how to create large-scale artwork under strict layer limitations, color exploration and so much more. Plus, all of my Procreate classes come with free color palettes and free Procreate brushes! Check them out if you want to dive deeper into learning how to use Procreate as an illustrator!

Procreate for Beginners
This is a comprehensive, all-in-one Procreate course. You’ll create five cool illustrations, each lesson focusing on a core skill in Procreate.


Drawing Animals in Procreate
In this class, you'll learn step-by-step how to draw artwork on your iPad. This class is also packed with art licensing tips to help you elevate your portfolio!
Blooms & Shrooms: Fun & Funky Art in Procreate
In this class you’ll learn how to illustrate a trending motif using skills like adding texture, and figuring out layer limits in Procreate!