Procreate Tutorial - How to Create Perfectly Symmetrical Illustrations in Procreate
The Procreate iPad app is an incredible drawing tool. In this Procreate tutorial, I'll share how you can create perfectly symmetrical drawings with ease using one of my favorite Procreate app features. You won't need any special brushes for this tutorial - you can use any of the free Procreate brushes that are already in the app.
The Procreate tip we're going to learn today is going to save you so much time and will have a huge impact on your Procreate drawings. It's called Assisted Drawing. When you turn on Assisted Drawing in Procreate, whatever you draw on one section of your canvas will be automatically illustrated in other sections to create perfect symmetry. Basically, it's magic! This is what it will look like when you turn on Assisted Drawing. So satisfying, right?

Supplies You’ll Need:
An Apple Pencil (I use this one. If you don’t have an Apple Pencil, you can use your finger, but I recommend an Apple Pencil for more control while drawing.)
Ready to level up your Procreate drawings and harness the power of symmetry? Let's dive in!
Step 1: Set Up Drawing Guides
The first step to take if you want to use Assisted Drawing is to set up your Drawing Guide. A Drawing Guide is a grid overlay on your canvas that you can use as a reference to line up your illustrations perfectly. The Drawing Guide is for visual reference and isn't actually a part of your illustration. You can turn it off at any time, and it won't show up when you export your artwork.
To turn on the Drawing Guide, tap the wrench icon on the top right of your canvas. Select Canvas, and you'll see the option for Drawing Guide pop up. Toggle on the switch next to Drawing Guide, and you're good to go!
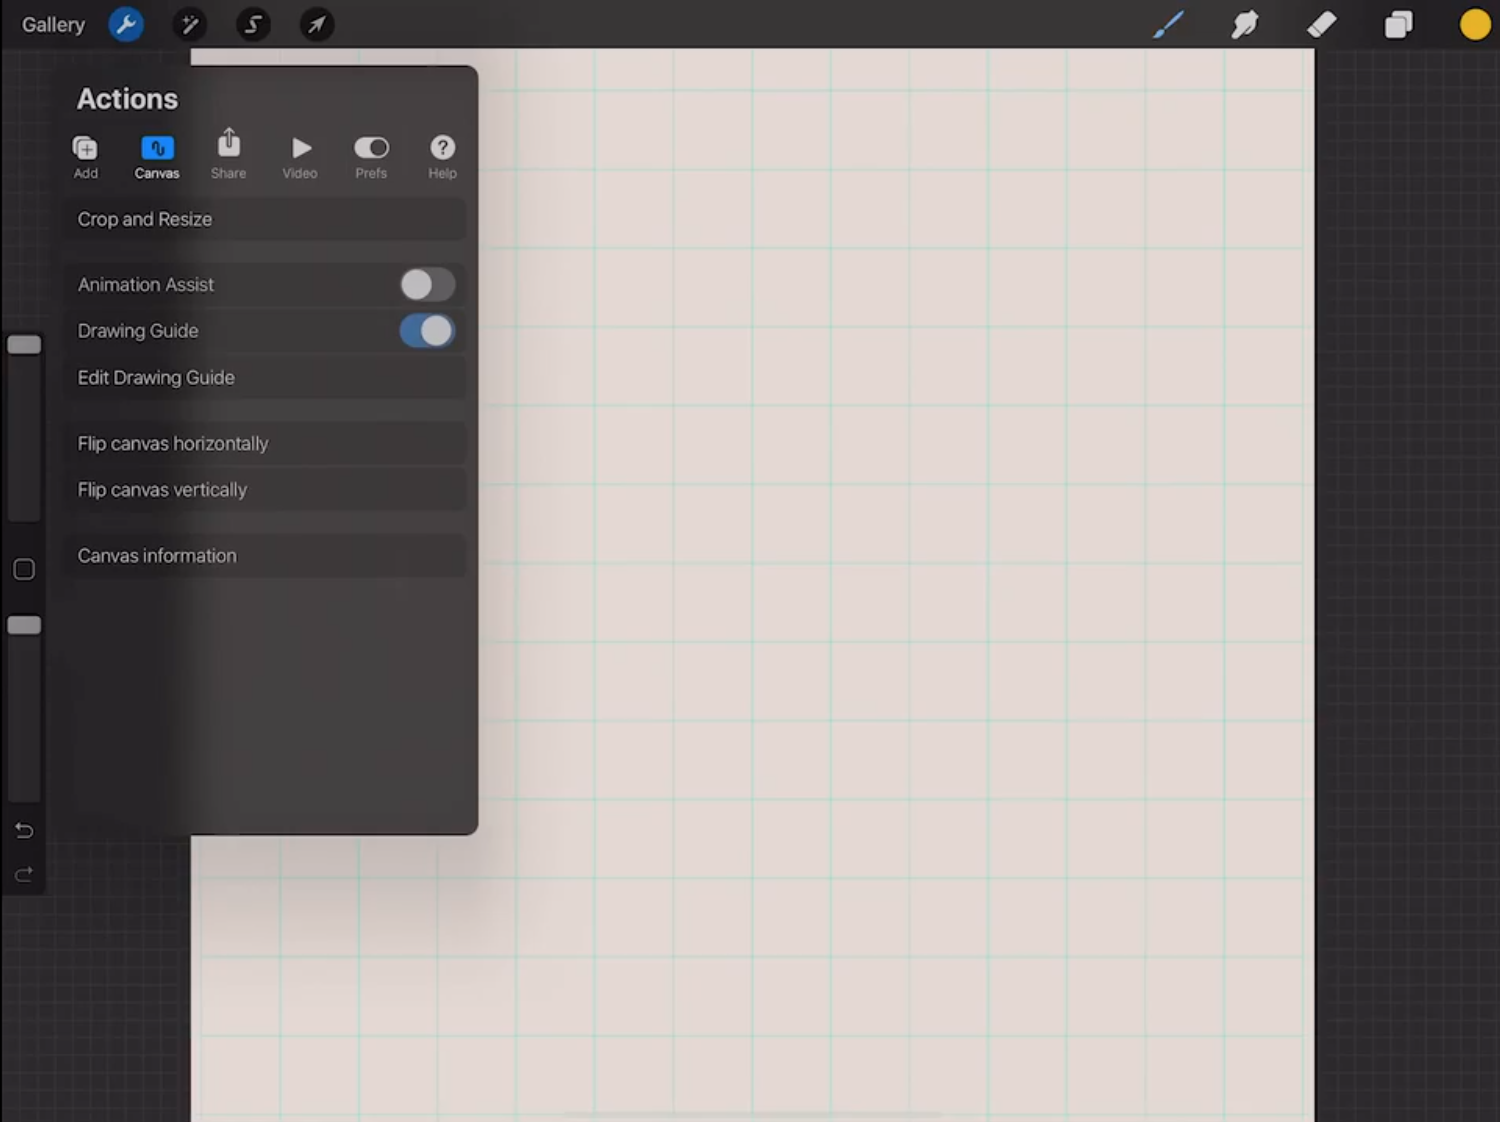
Next, tap Edit Drawing Guide to edit the features of the guide.

There are a lot of options that you can play around with when it comes to editing your Drawing Guide, but the one we're going to focus on in this tutorial is Symmetry. Tap Symmetry at the bottom of the screen to pull up the different options for symmetrical drawing in Procreate. This is where you'll set up your Assisted Drawing features and choose what type of symmetry you're going to be working with.

Step 2: Choosing What Kind of Symmetry to Use
The default symmetry type is vertical symmetry. I love using this if I'm illustrating things that have mirrored elements like butterflies or dragonflies. It helps me achieve a totally symmetrical look for all of the elements in those kinds of illustrations. I also use this when I'm doing more architectural drawings like houses. I teach the concept of vertical symmetry in more detail in my class, Drawing Your Dream Home in Procreate. Here's an example of what vertical symmetry looks like.

If you want to draw with vertical symmetry, simply tap Options on the bottom right and make sure that Assisted Drawing is toggled on and Rotational Symmetry is toggled off.

If you want to explore other types of symmetry, you can also do that in this Options menu. You have a few different types of symmetry to play with. Horizontal symmetry is similar to vertical, but the axis is flipped so that it is horizontal, not vertical like I showed you above. The next is quadrant symmetry which means that your canvas will be split into four equal sections or quadrants. The final option is radial symmetry.
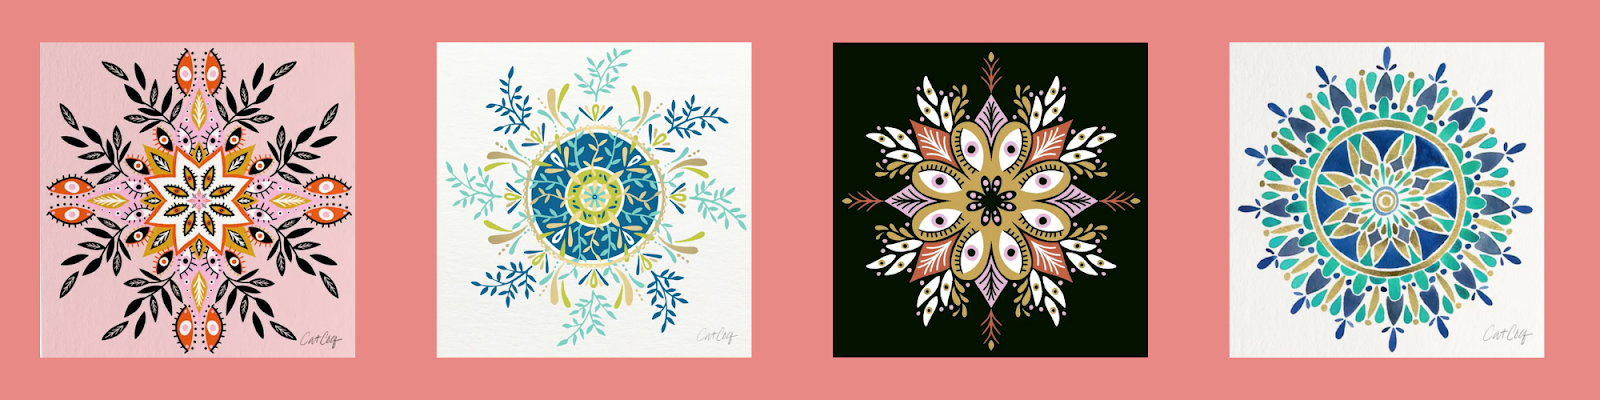
Aside from vertical symmetry, this is the option I use most frequently in Procreate. Radial symmetry is fantastic for drawing mandalas which are one of my favorite motifs. They're hugely popular sellers, and are so fun and relaxing to draw in Procreate.
In this Procreate tutorial, I'll focus on radial symmetry, but know that you can play around with any of the other symmetry options and achieve similar results. To turn on radial symmetry, tap Radial on the far right of the options menu.
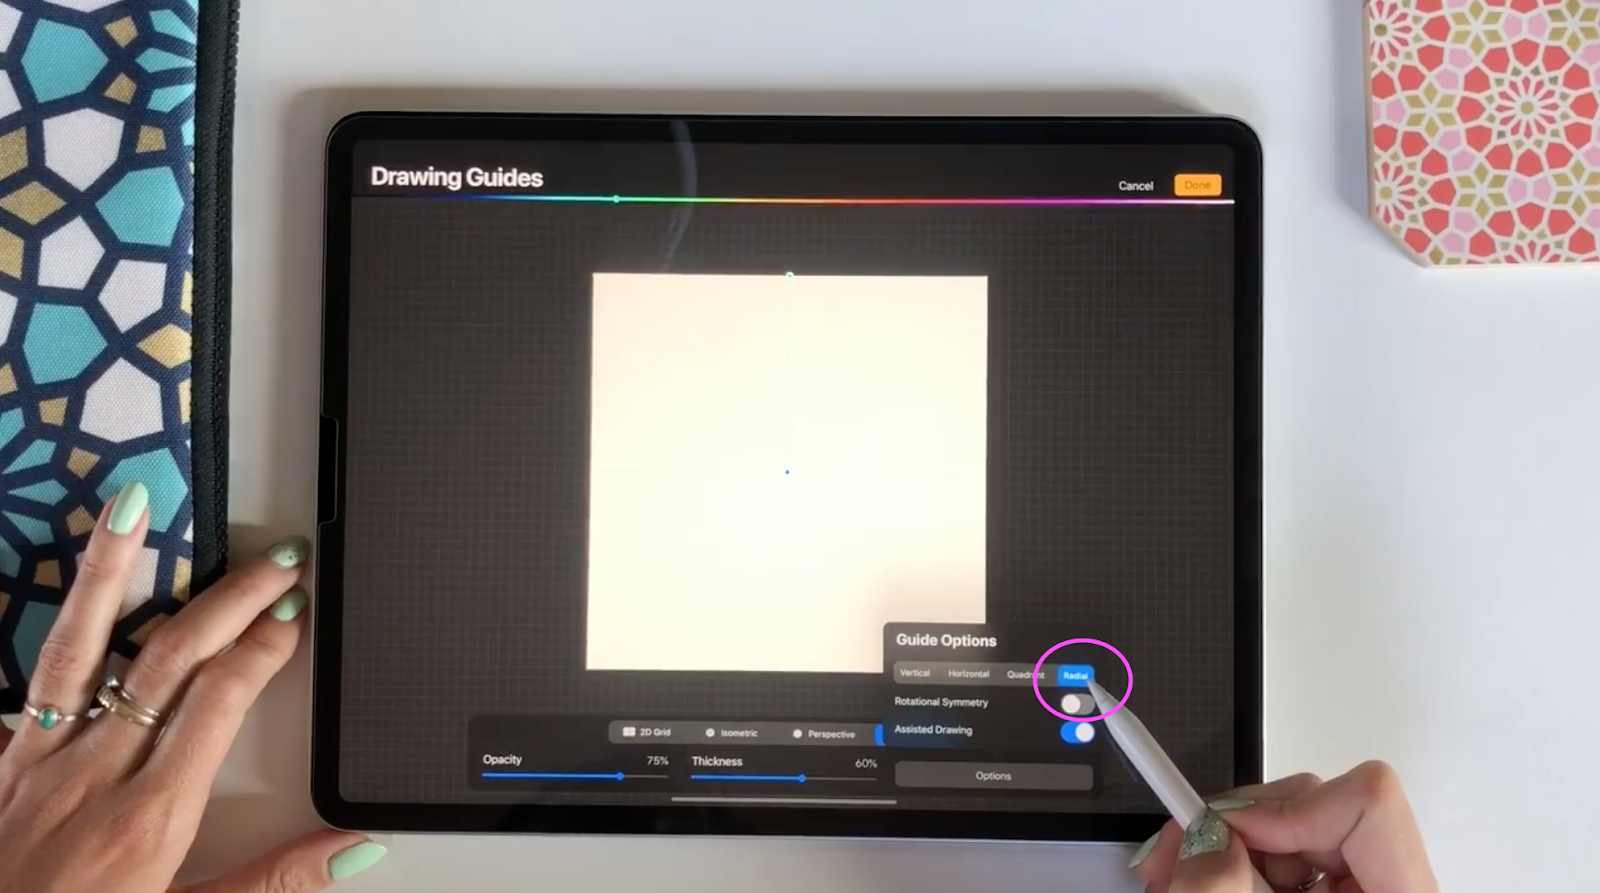
Now you'll see that all of the Drawing Guide lines converge right on the center. Make sure that Assisted Drawing is toggled on, and Rotational Symmetry is toggled off. Tap Done in the top right corner, and you're all set to start drawing with Assisted Drawing!
Step 3: Using Assisted Drawing
To draw with Assisted Drawing, simply select your favorite Procreate brush and get started! Everything that you draw will be repeated along the radial axis and will keep things perfectly symmetrical.
If you add a new layer to your illustration, Assisted Drawing won't be applied to that new layer. This means that it won't repeat like the original layer unless you manually turn on Assisted Drawing on the new layer.
You can check if Assisted Drawing is turned on by looking at your layers panel. Any layer with the word "Assisted" underneath the layer title has assisted drawing turned on. In this example, Layer 1 has Assisted Drawing turned on, but Layer 2 does not.

To turn on Assisted Drawing on the new layer, you can follow the same process we did before.
With your new layer selected, tap the Wrench icon on the left, tap Canvas, tap Edit Drawing Guide, tap Options, and toggle on Assisted Drawing.
Now you should see the word "Assisted" under both layers when you go into your layers panel.

There's also a shortcut for turning on Assisted Drawing without having to go all the way back into the Drawing Guide menu. You can simply tap your layer thumbnail which opens a menu of options. Select Drawing Assist on the menu, and it will apply Assisted Drawing to that layer.

Now you can let your creativity run wild! Assisted Drawing is so fun to play with, and it saves so much time when you're working on symmetrical illustrations. Have questions about symmetrical illustrations? Feel free to ask them in the comments of this post! There is so much room for creative freedom with Assisted Drawing, and I'd love to see what you create. Be sure to tag me @catcoq on Instagram so I can see your symmetrical illustrations!
Want to dive deeper into Procreate?
We covered the basics of Assisted Drawing today, but if you want a more in-depth look into what kinds of Procreate drawings you can create using this tool, check out my Procreate classes! You can watch any of my classes for free when you sign up for a free trial with Skillshare!


