Mastering Blending Modes in Procreate
Procreate has emerged as a powerful tool for artists to bring their visions to life. One of the key features that sets Procreate apart is its versatile use of layers and blending modes. Understanding how to effectively utilize these tools can bring your digital art to another level.
In this blog post, we'll explore the intricacies of mastering layers and blending modes in Procreate, providing you with the knowledge to unlock your full creative potential.
What is a Blending Mode?
This is a setting within the layers panel in Procreate that allows you to choose how two layers interact. When you apply a Blending Mode, it essentially blends the two layers together so that they are more integrated.
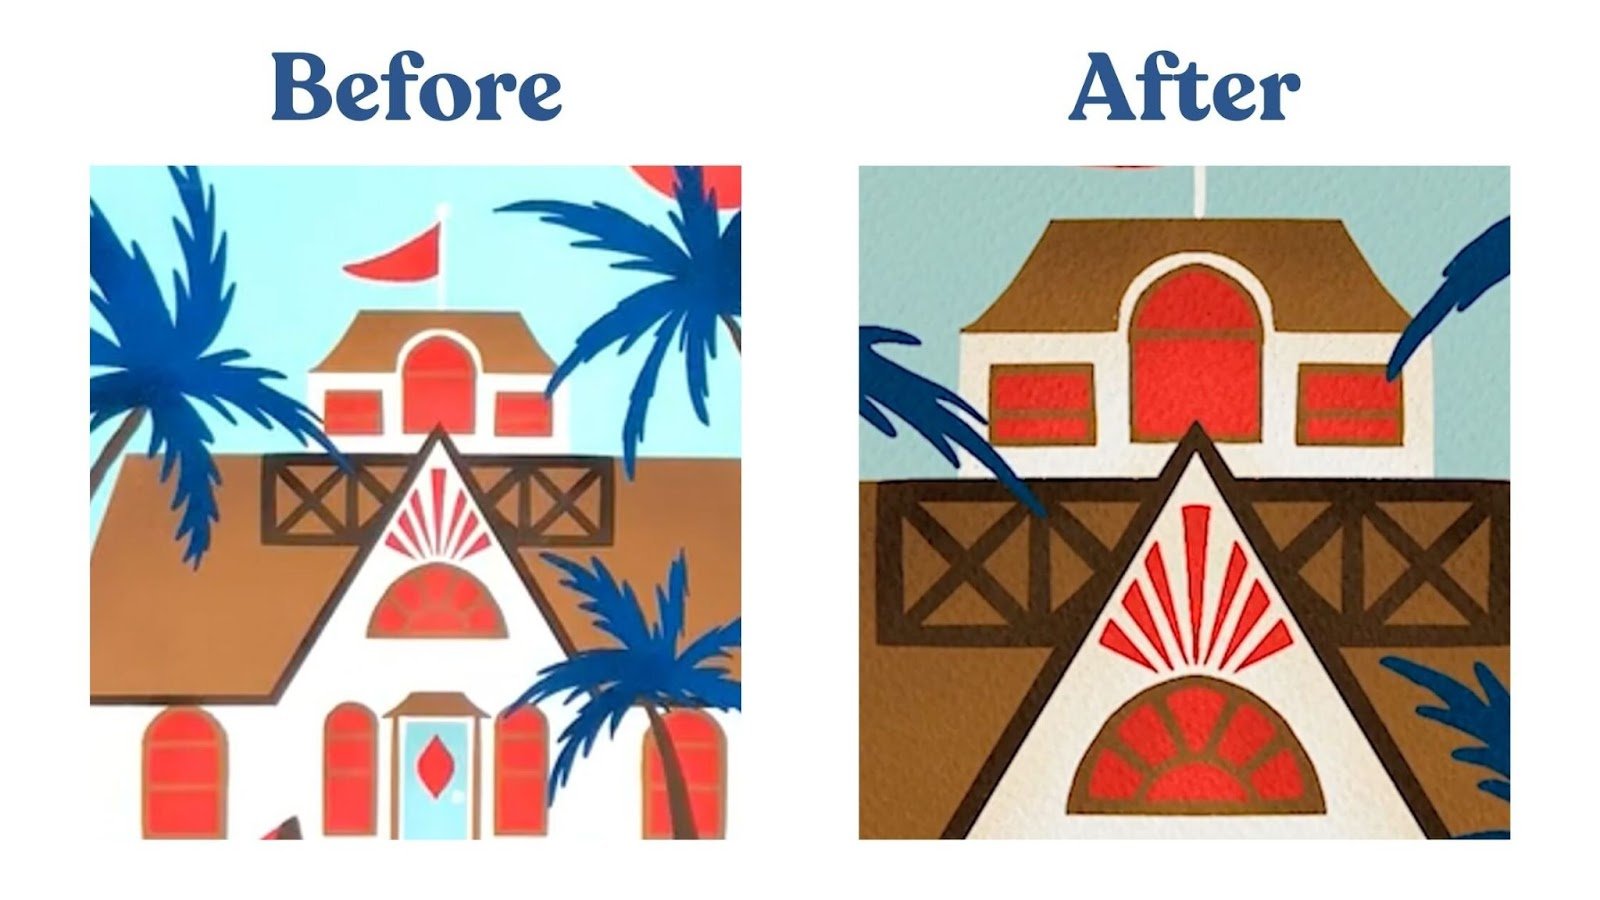
The most common example of this in my own artwork is when I’m utilizing texture or watercolor elements. For example, I love to add paper texture backgrounds to all of my digital illustrations. This gives them a more hand-drawn feel even though they were created on my iPad. I love the elevated feeling that this brings to digital art.
But if I were to just put the paper texture layer beneath my illustration, the digital illustration would just “sit on top” of it and cover it up. So how do I get the digital illustration to sink into the paper texture so that it looks like it was actually drawn on paper? Blending Modes! I typically use the “Multiply” Blending Mode, but I always experiment to see which one I like best based on the illustration.
I have a more in-depth blog post about how I use Blending Modes in Procreate and Photoshop to add paper texture backgrounds to my illustrations. You can check it out here!
So with that in mind, let’s explore the different Blending Modes and how you can use them in your own digital art.
Exploring the Blend Modes
Layers serve as the foundation for any digital illustration, allowing artists to organize and manipulate elements independently. But there is more to the layers panel than just creating new layers to isolate individual elements in your design.
Procreate's user-friendly interface makes it easy to experiment with Blending Modes. Located in the Layers Panel, a simple tap on the layer icon (the overlapping square symbol) will reveal all your available layers.
You can find the active Blend Mode on the layer itself. By default, the Normal mode (N) is the active blend mode when you create a new layer. To change the Blending Mode, simply tap on the “N” on the layer that you want to blend!

Adjusting the Blending Mode is a straightforward process. The Blending Modes menu displays the current mode's name and an Opacity slider. Scroll through the modes, previewing their effect on your layer. Once you find the perfect blending mode, tap outside the list to close it. The Opacity slider allows you to control the transparency of the entire layer, offering a dynamic range of visual effects.

Procreate's extensive array of blending modes allows artists to experiment with different ways of combining layers, creating unique and captivating effects. Understanding how each blending mode works can significantly improve the mood and style of your artwork.
Learning the Blend Mode Types
These are the general uses for the Blending Modes, but keep in mind that the effect will vary based on the type of artwork you’ve created and the intensity of the effect. I always recommend experimenting and exploring each blending mode to find the perfect fit for your illustration.
Darkening
The blend modes on the top of the list bring a darkening touch to your artwork. For instance, Multiply works its magic by blending the top color with the one below and darkening the result. It's a fantastic tool for adding rich shadows to your work, and the added bonus is that you can still appreciate the underlying texture. Fine-tune the effect with the Opacity slider to achieve the perfect balance.
Lightening
Moving on to lightening effects, the next blend modes bring brightness to your compositions. For instance, Screen– in contrast to Multiply, divides the color above by the one below. Color Dodge and Add contribute to a burning light effect that can illuminate your work.
Contrasting
Starting from Overlay and going down, several blend modes offer a combination of effects to enhance the contrast in your artwork. Overlay, acting like a blend of Multiply and Screen, brings both lightening and darkening elements, resulting in high contrast and vibrant outcomes.
Coloring
From Hue downward, various blend modes provide opportunities to recolor your artwork. These blend modes, when combined with the Opacity slider, allow you to introduce a versatile range of color tints to your layers, adding a creative touch to your composition.
Blending Modes in Procreate are incredible tools that expand your options and results when creating your illustrations. Experimenting with these modes will help you discover unique visual effects, which can improve and elevate your digital artwork to a professional level.
If you want a comprehensive overview of how to navigate Procreate while creating five unique illustrations, check out my Procreate for Beginners class!