How to Add a Paper Texture Background to Digital Illustrations
Want to learn the easiest technique to elevate your digital art and make it look like it was illustrated by hand? Cue: Digitally adding a paper background. This technique works no matter what digital art medium you use, whether it's Procreate for the iPad, Adobe Illustrator, or Adobe Photoshop, this simple technique is a game-changer for digital art. It's subtle, but extremely impactful. And spoiler alert, it's actually really simple once you get the hang of it.
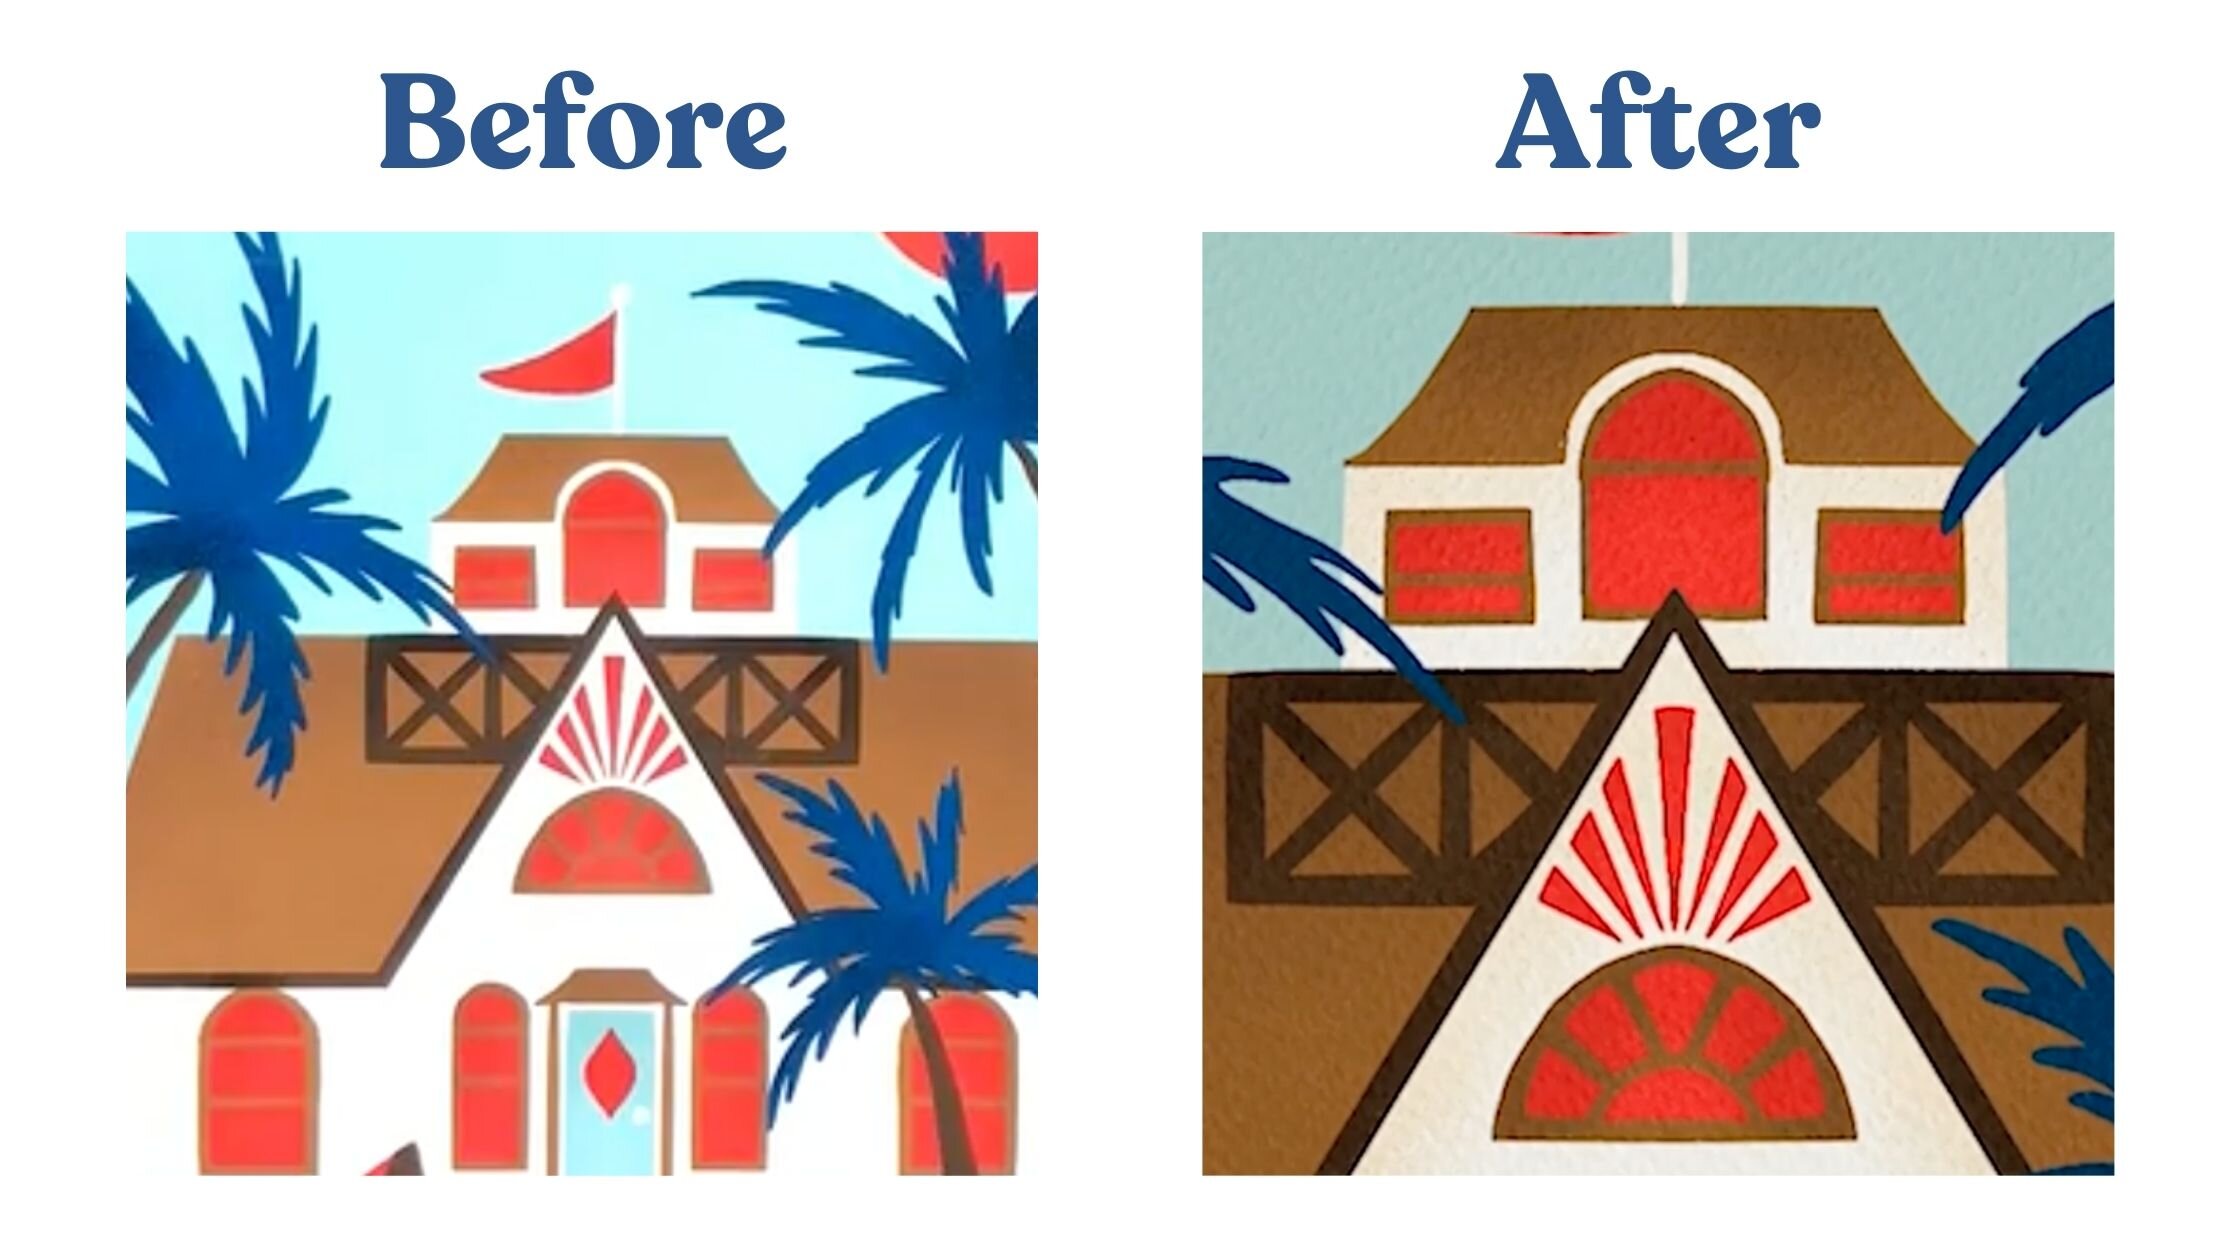
Here is an example of an Illustration I did in Procreate before I added a paper texture and after. The before photo is great, but it's a bit flat. Adding in the paper texture in the after photo gives the illustration a much more elevated and hand-drawn look.
I sell my artwork on print on demand products and teach other artists how to sell art online. The final step I always take when I'm creating artwork for print on demand is to add a paper texture background digitally.
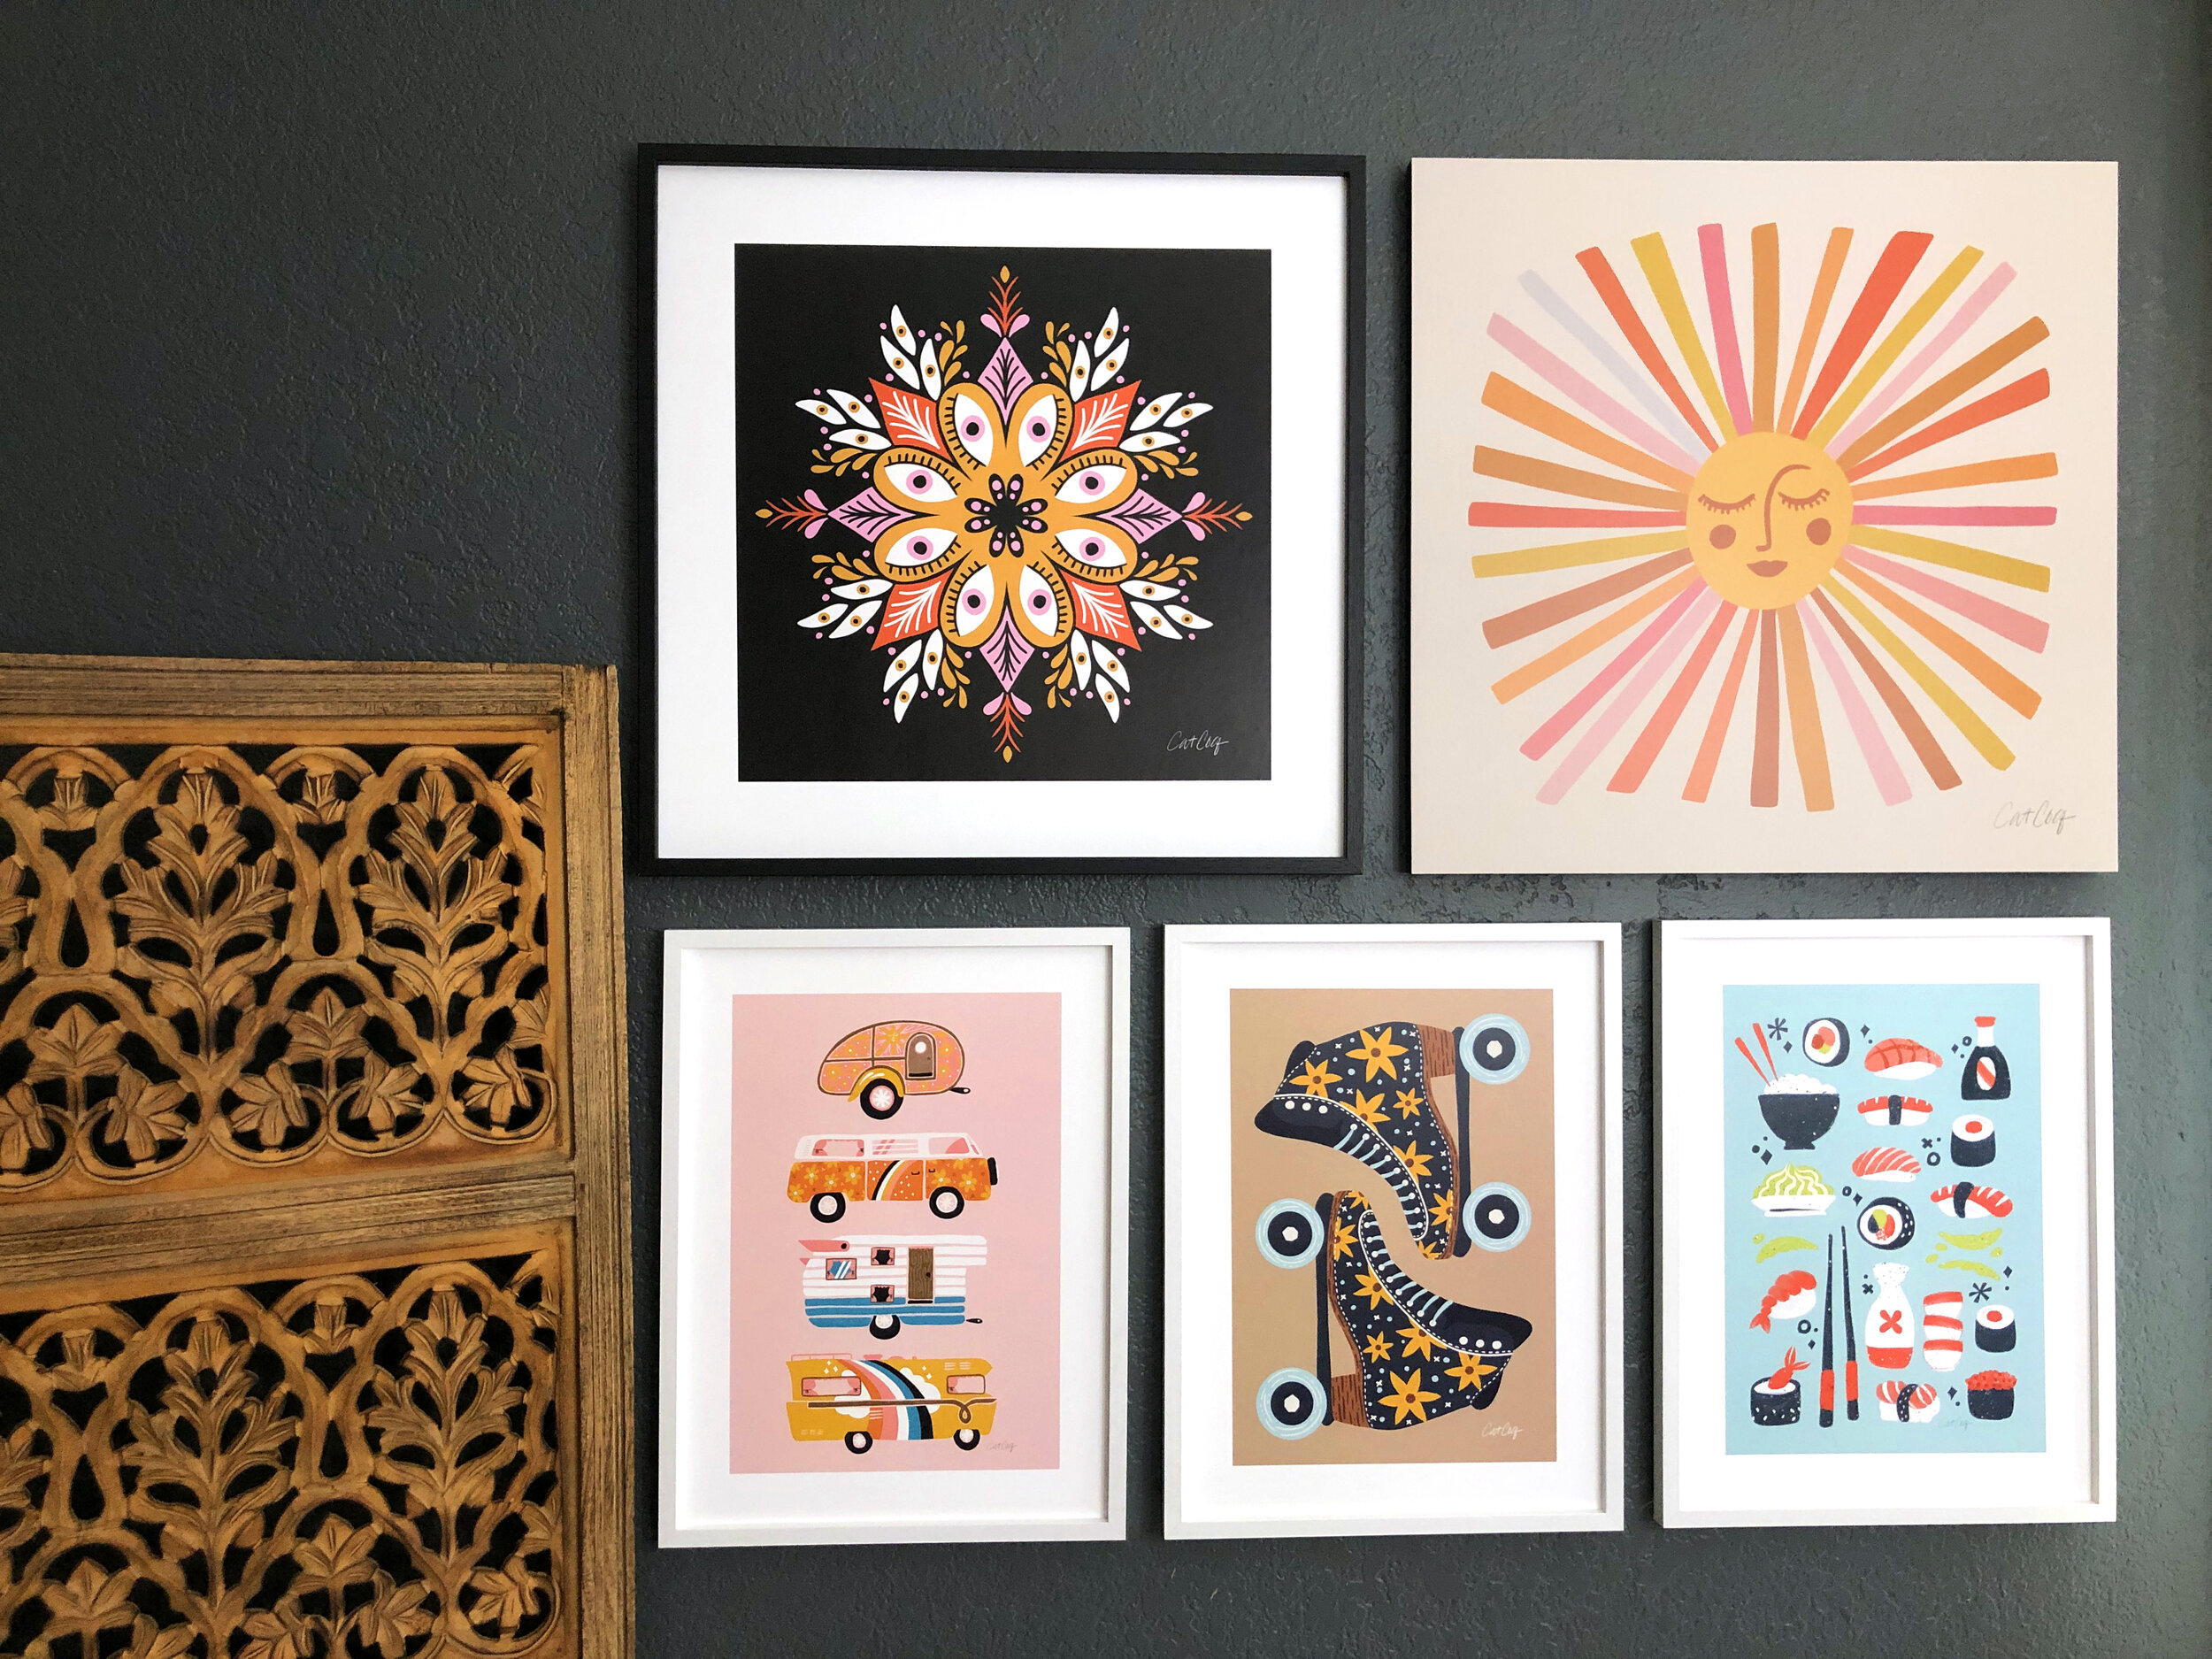
This helps me stand out on competitive print on demand platforms and makes my art prints look more dynamic and realistic. These are all illustrations I created digitally before adding a paper background.
Whether you want to sell your art online or are a beginner artist looking for digital art tutorials, this will help take your pieces to the next level!
In this tutorial, I'll share two techniques for adding a paper texture background. One using Procreate, and one in Photoshop.
What You’ll Need:
Either Procreate or Adobe Photoshop (sign up for a free trial here)
A piece of digital art
A digital paper texture background
Don't have a paper texture background? I've got you! You can download the digital paper background that I use for my artwork here for free:
Ready to level up your digital art? Let’s dive in!
How to Add a Paper Texture Background in Procreate
To start, you'll want to make sure that you get the paper texture background onto your iPad. My favorite way to move files from my mac to my iPad is by using Airdrop.
Once it's on your iPad, pull up the illustration that you want to add it to. To add the paper texture, select the wrench icon, then select Add, and select Insert a Photo.

Then you'll be able to choose the paper texture from your camera roll. Once it's selected, it will be added to a new layer in your illustration. If the paper texture doesn't fit your background exactly, you can grab the anchor points at the edges and size it so that it fits your canvas.

Once you have the paper texture flush with your canvas, navigate to your layers panel and drag the paper texture layer above all of the other layers.

Now, we'll use some of the transparency effects in Procreate to seamlessly blend that paper texture and the illustration.
Tap the "N" on the right hand side of your paper texture layer. From there you'll see a menu of effects, and you can toggle through each one to see how they create different blending effects between the paper texture and the illustration.

You can explore the different options and see what looks best for your illustration! My favorite blending modes for paper textures are "Multiply" and "Linear Burn."

Multiply tends to be a bit more subtle, and Linear Burn is a bit more heavy-handed. Here's what my illustration looks like after adding the paper texture background with the Linear Burn blending mode. This added so much dimension to my illustration and took it from looking flat to looking much more deep and interesting.

How to Add a Paper Texture Background in Photoshop
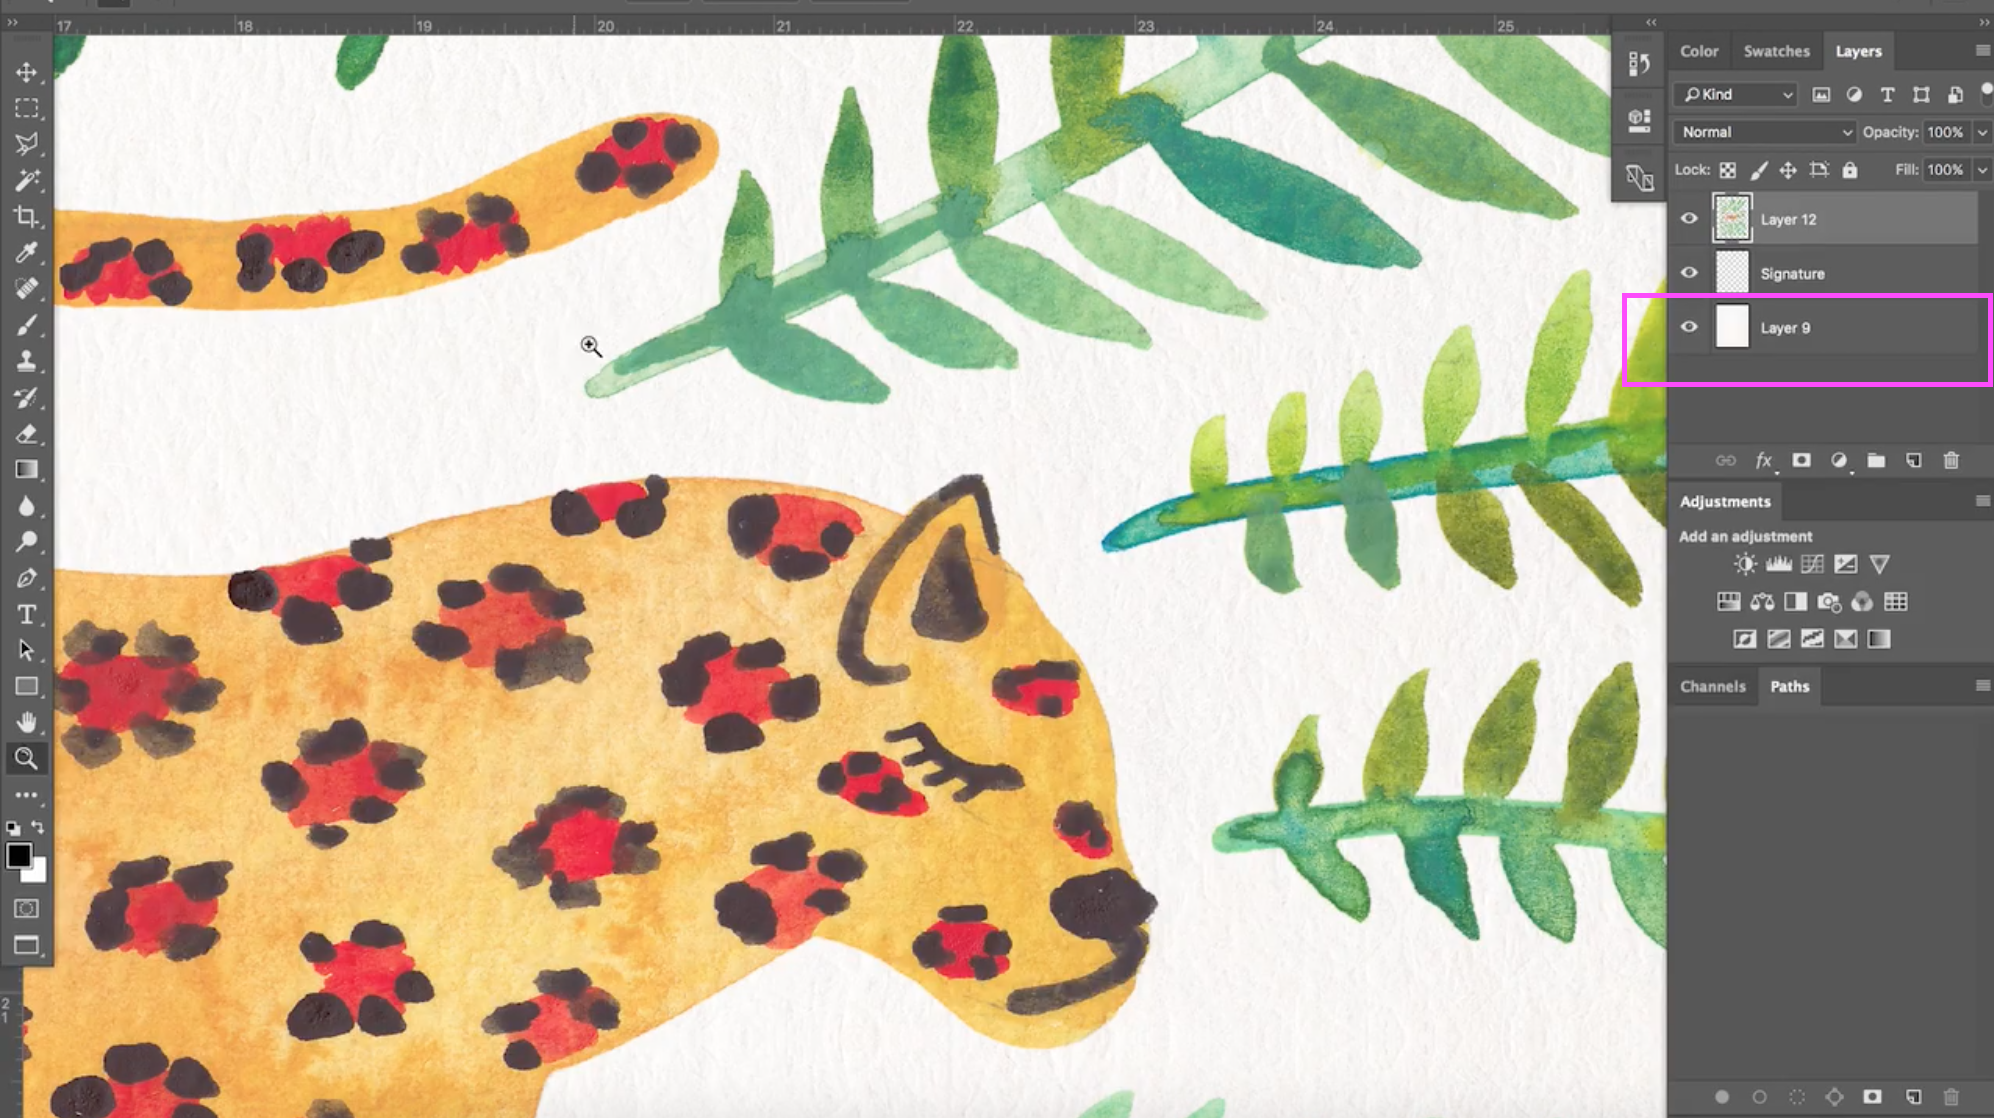
The process for adding a paper texture background in Photoshop is very similar to how we did it in Procreate. You'll want to start by opening up the illustration you want to add it to in Photoshop, and then dragging and dropping in the paper texture file. Make sure it's on its own layer below your illustration.
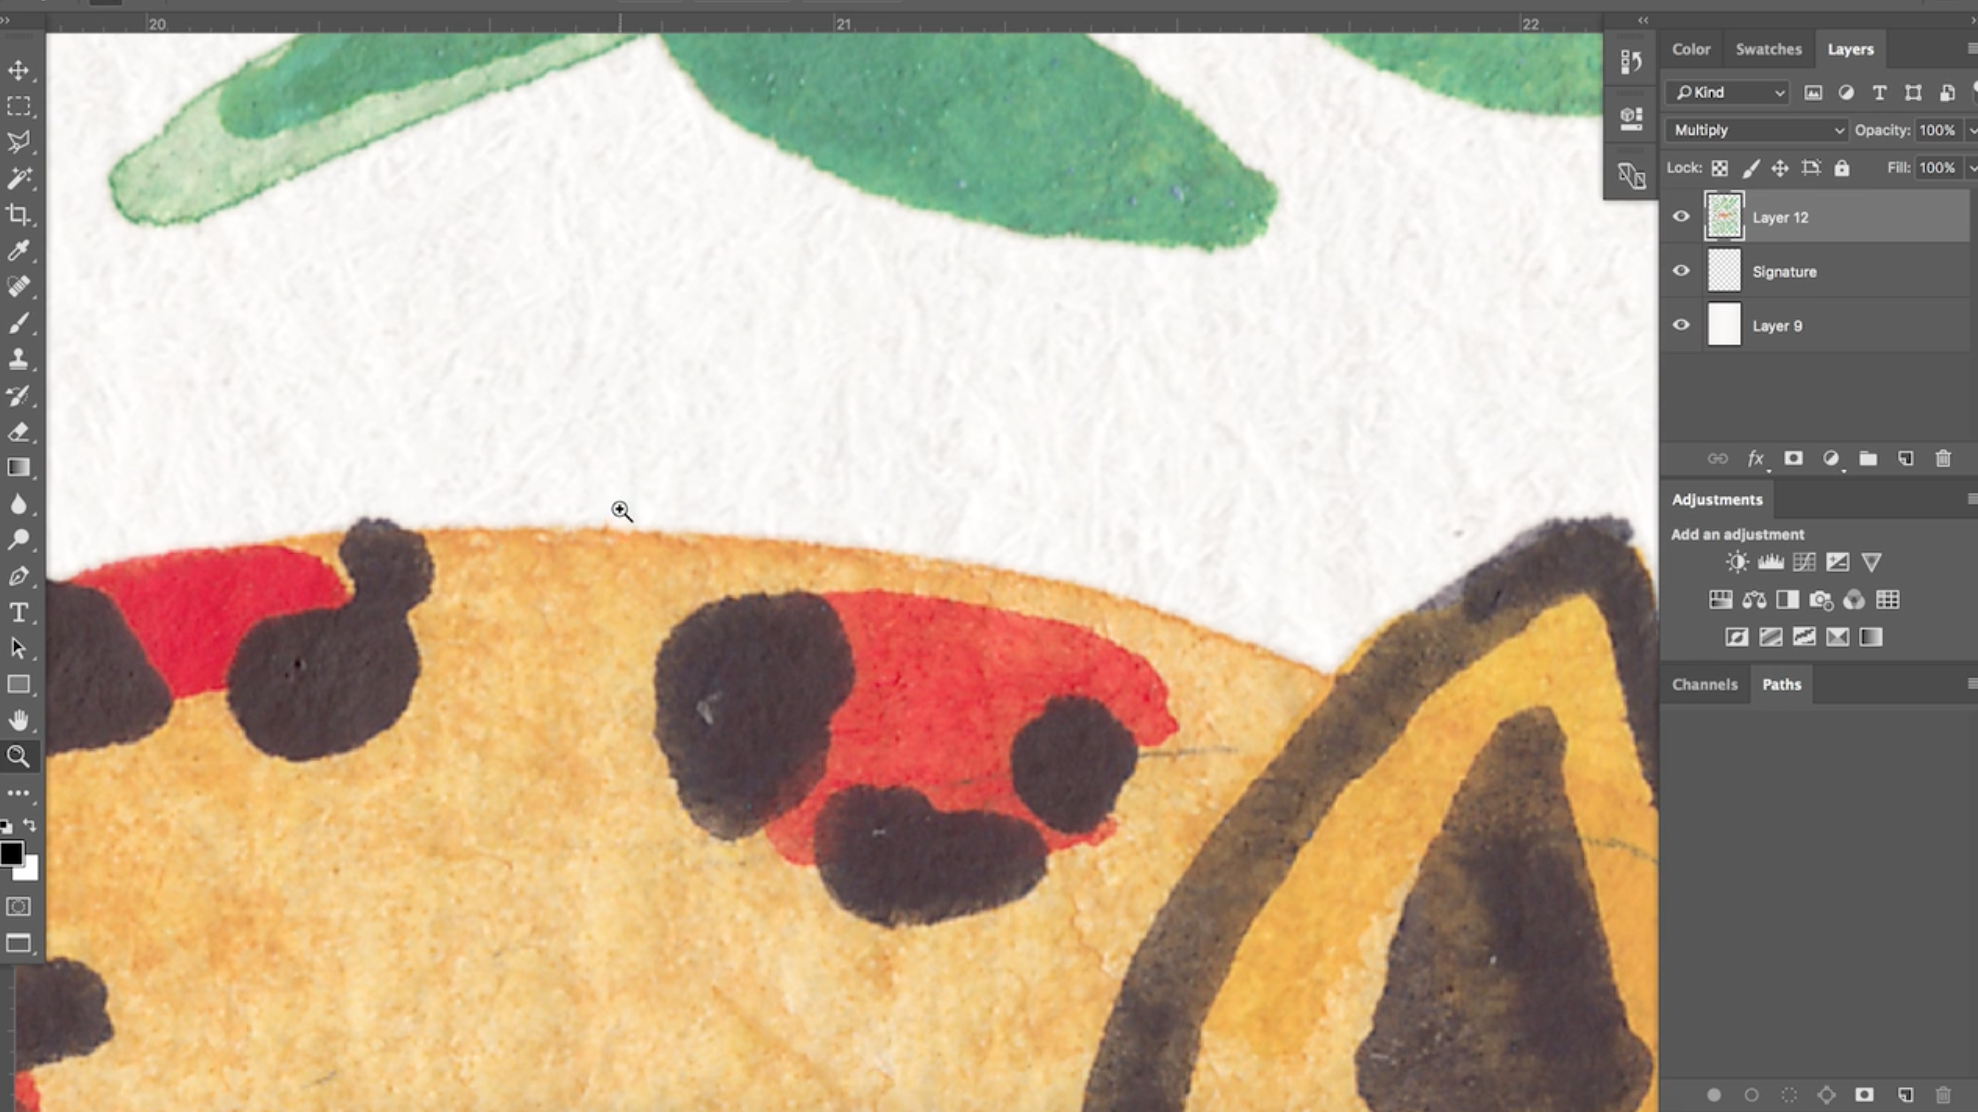
Now, we want to blend these two so that the illustration really sinks into the paper texture and looks like it was actually painted on this piece of paper. Just like we did with Procreate, you'll select the transparency effects menu in your layers panel where it says "Normal." Then select "Multiply" from the drop-down menu.

The effect here is subtle, but you can see that the illustration has gotten a little bit darker as it sank into the paper texture background with the Multiply effect. This helps your illustration look more integrated and realistic.
I hope this paper texture background tutorial has been helpful! If you have any questions please post them in the comments below. I'd also love to see what you create with your paper texture background! You can share your art with me by sharing it on Instagram with the hashtag, #CreateWithCatCoq. Be sure to tag me as well @catcoq so I can see what you create!
Want to learn more about digitizing art?
There is so much more to learn about digitizing your artwork, and I teach a lot of those skills in my classes. The best part? You can take these classes for free when you sign up for a free trial with Skillshare!
Here are a few of my classes that focus on digital art:

Check out the full tutorial for turning painted elements into seamless patterns in this class:

Want to dive deep into digitizing artwork?
Digitize Your Art to Sell Online: Prep Your Paintings for Print-On-Demand
