How to Add Metallic Textures in Procreate
Are you ready to take your art to the next level and add a touch of shimmer and shine to your creations? If so, you're in the right place. Metallic textures are just the design elements you need to add a little extra razzle dazzle, glam, and elegance to your artwork! In this blog, we're diving into how you can use metallic textures to make your artwork truly pop. So, grab your iPad, fire up Procreate, and let's get started!
Want to follow along step-by-step? I’ve created a collection of free metallic textures just for you. And the best part? These are royalty-free for commercial use. That means you can use them in your artwork even if you plan to sell it. Download the metallic textures here.
Download the metallic textures onto your iPad
First things first, let's get our hands on some dazzling metallic textures. When you open up the free metallic textures I’ve provided, you’ll be directed to a Dropbox folder. From there, you have a couple of options for getting those files onto your iPad. You can either download them directly onto your iPad by opening this link on your iPad’s web browser. Or you can download them on a Mac computer and send them to your iPad using Airdrop.
If you need help getting the metallic textures onto your iPad, check out this YouTube Video.
Import the metallic texture
Next, it’s time to open your metallic textures in Procreate. To open a metallic texture in a Procreate project,, follow these simple steps:
Open Procreate and select the artwork where you want to add a metallic texture.
Then, go to the 'Actions' menu and select 'Add'
Select 'Insert a Photo” or “Insert a File” depending on where you saved your texture.
Choose the metallic texture you want to use from your device's gallery, and it will be added as a new layer.
If you encounter any issues while importing your metallic texture, don't fret. You can always check out this blog post on troubleshooting common Procreate problems for some handy tips and tricks.
Choose Which Layer to Transform with Gold
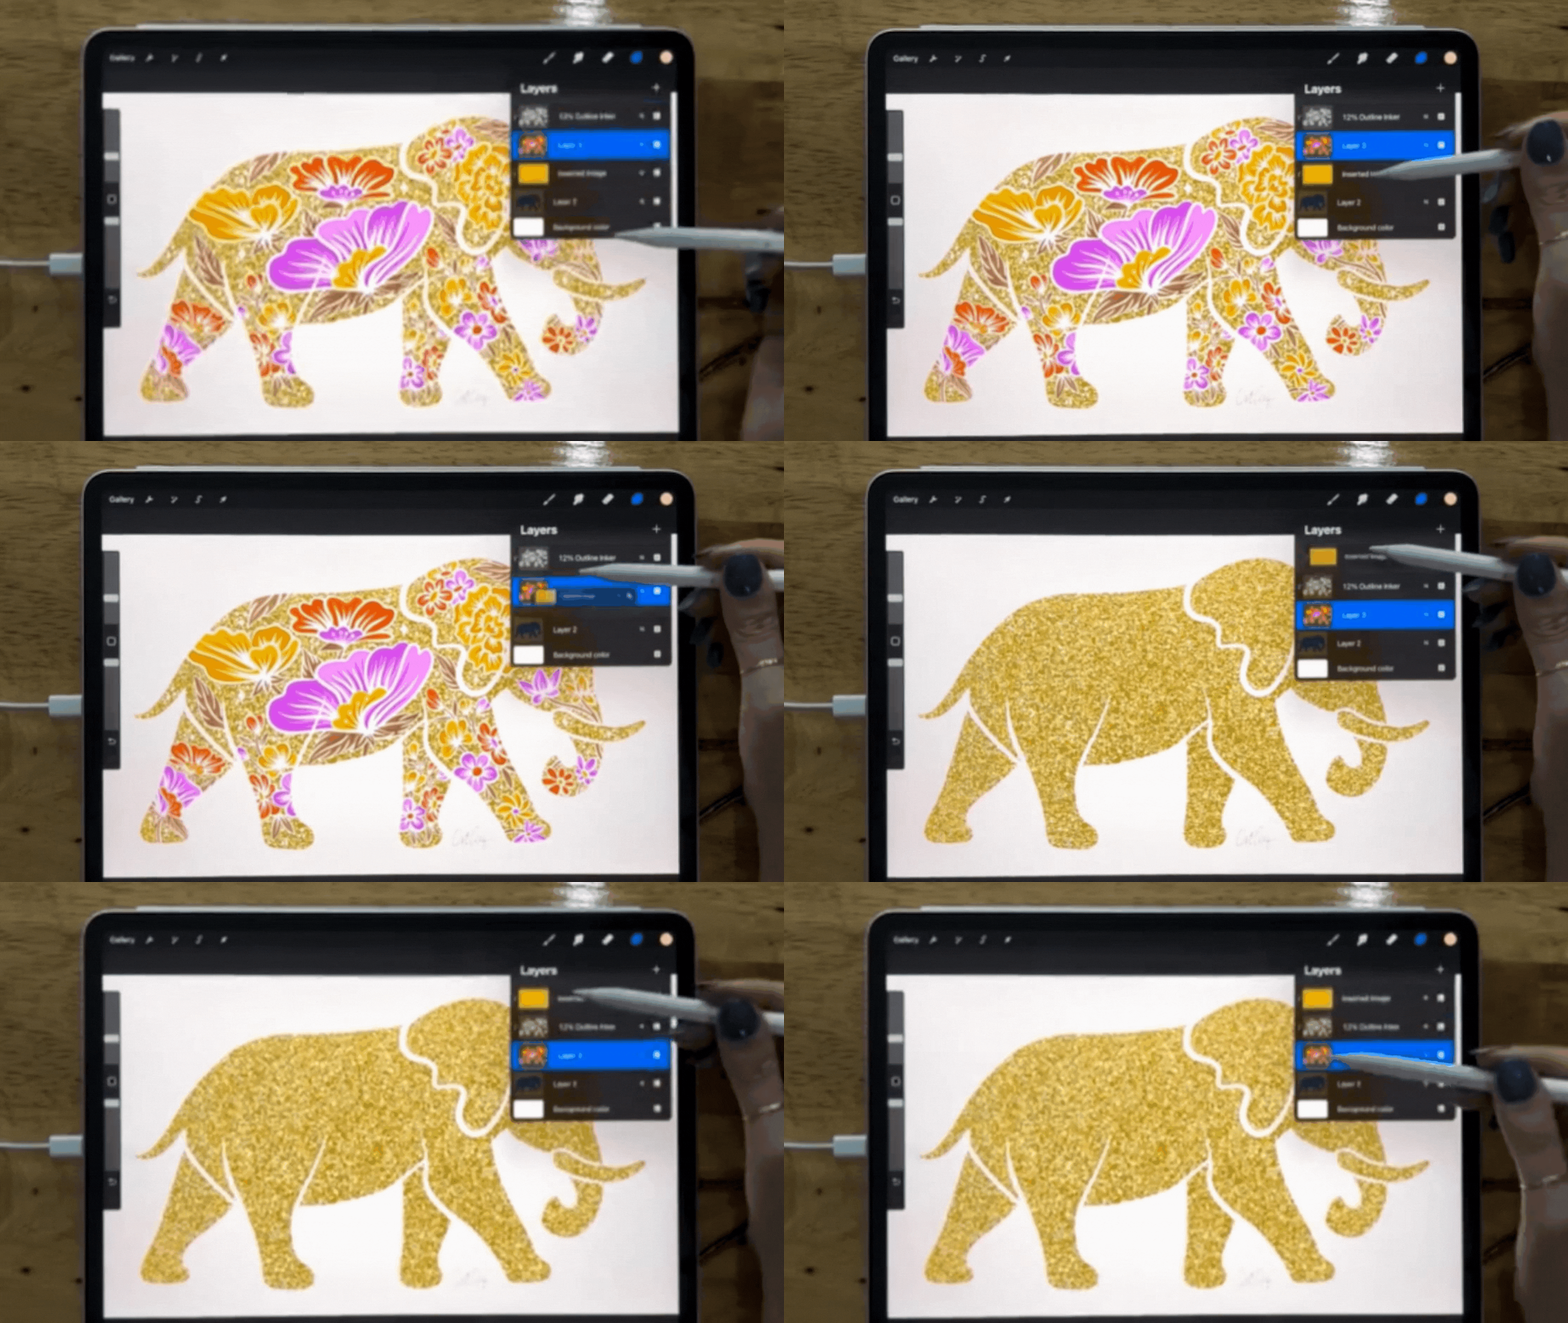
Now that you've got your metallic texture ready, it's time to decide where you want to add that golden touch. Adding metallic accents strategically can make your artwork stand out. In this example, I'm going to use it to highlight the outlines of my illustration. Think about where you want to add some extra glam to your piece.
Add the Metallic Texture
First, tap on the layer that you want to turn into a metallic texture. It could be your outlines, a specific object, or any element you want to shine.
To begin the transformation, tap on the thumbnail of the selected layer, and then choose 'Select.' After that, select 'Invert.'
Now comes the fun part. With your selection still active, swipe down on the layer with three fingers. This will create a mask that applies the metallic texture only to the selected area. To finalize it, select 'Cut.'
Bonus Tip: Customize the Metallic Texture
Want to get even more creative with your metallic textures? You can change their color to match your artistic vision. Here's how:
Adjust Hue, Saturation, and Brightness: Tap on the metallic texture layer and then go to the 'Adjustments' menu. Choose 'Hue, Saturation, and Brightness.' Play around with the sliders to get the perfect shade you desire.
To achieve a more refined metallic look, consider desaturating the texture slightly. This can give it that authentic, polished appearance.
And there you have it, folks! Adding metallic textures to your artwork is a fantastic way to bring a touch of glamor and sophistication to your creations. Whether you're accentuating outlines, creating metallic objects, or experimenting with colors, the possibilities are endless.
Don't forget to download your free metallic textures right here! These textures will save you time and add a whole new dimension to your digital art. So, go ahead and let your creativity shine!


