How to Open Downloaded Assets in Procreate
If you’ve ever downloaded Procreate brushes or color palettes, getting them from your downloads into the Procreate app can be a little confusing. If you’re wondering how to open assets like brushes or swatches in Procreate, I’ll walk you through the process step-by-step. It’s pretty simple once you get the hang of it! Feel free to read on for the step-by-step instructions, or check out this YouTube video where I walk through the same process in video format.
In my classes, I give out tons of freebies like free Procreate brushes, color palettes, and paper texture backgrounds. In this blog post, we’ll go over how to get three different types of files from your downloads to your iPad:
Procreate Brushes (file extension = .brushset)
Procreate Swatches (file extension = .swatches)
Static Images (file extension = .jpg)
Procreate brushes and swatches are specifically made to be compatible with Procreate and cannot be opened in any other program. So let’s dive into learning how to open these different file types!
Typically files like this are delivered via Dropbox. That’s how I do it when I share freebies with my students and email subscribers! So that’s what we’ll go over today. (P.S. If you want to enroll in my classes to snag some of these free brushes and swatches, you can try out a free month of Skillshare with this special link!)
There are two options for getting these files onto your iPad. The first is if you are opening the files from your Mac computer. The second is if you are opening them from your iPad.
I recommend reading through this whole post if this is your first time learning this, but if you are here for a refresher and want to quickly reference how to open up a certain file type, here are some quick links for you!
Mac to iPad (AirDrop - the easy way!)
Mac to iPad
The fastest and easiest way to open downloaded files on your iPad is to use a Mac computer. If you don’t have a mac, no problem. Click here to skip past this section to learn how to open files directly from your iPad.
The simplest way to get these files from your computer to your iPad is to use the AirDrop feature. AirDrop is a file-sharing feature that only works with Apple products, so this will only work if you’re going from a Mac computer to an iPad.
First, open up the Dropbox link where the files are housed on your Mac. Then click “Download.”
Note: You don’t need a Dropbox account to be able to download these files. If it prompts you to sign up for an account, just ignore it. You’ll be able to download the files without signing in.
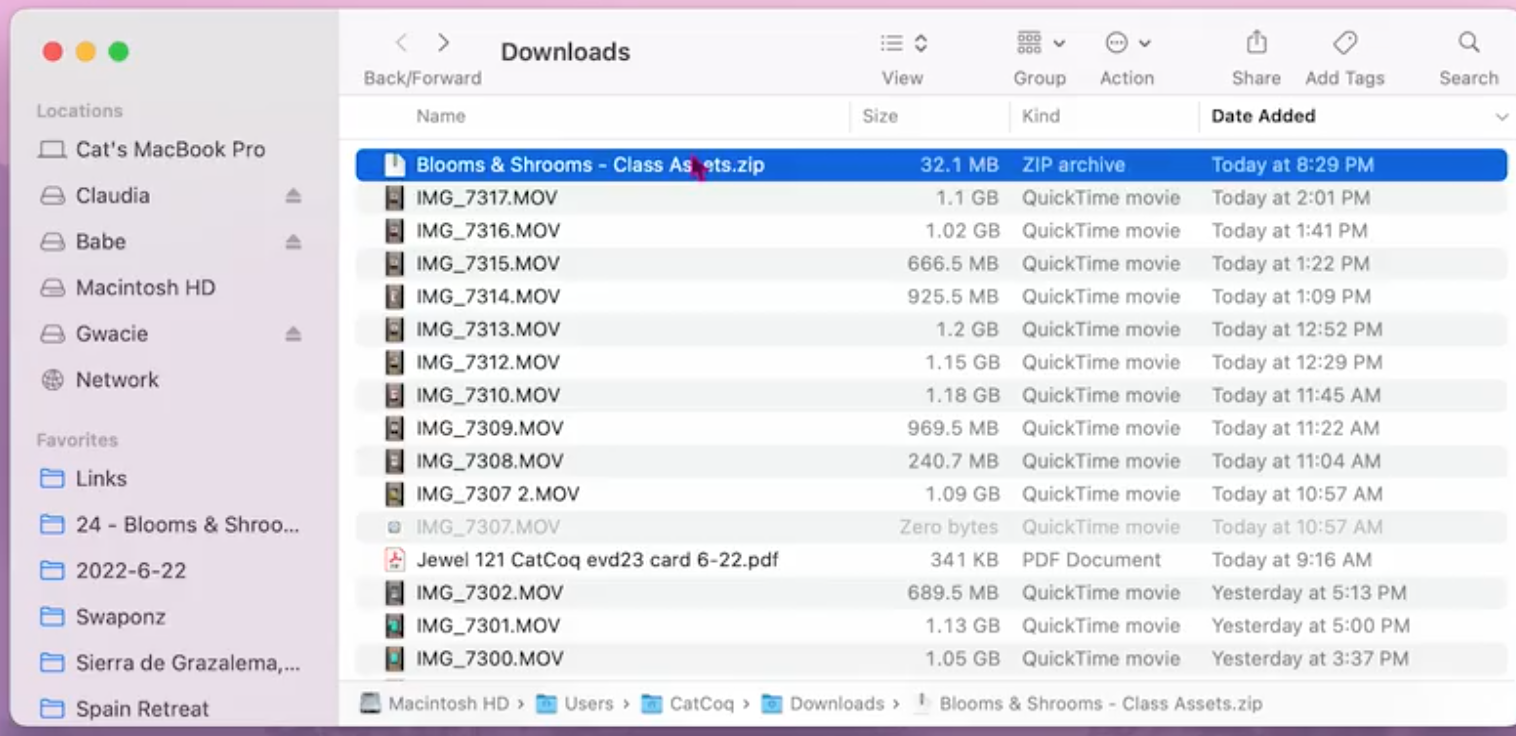
If you’re downloading a file with multiple assets inside, it will download as a zip file. In this example, we’re downloading color palettes, brushes, and a jpg file so they will all come zipped together when they download from Dropbox. Navigate to your downloads folder using Finder and click the zip file to expand it.
Now, you can go through each file and send them to your iPad. I’ll walk you through how to do this.
AirDropping Color Palettes (.swatches)
Open up the folder containing the color palettes and select all of the files. You can do this by clicking the first file, holding shift on your keyboard, and clicking the last file. Then right-click, hover over “Share” and choose “AirDrop.”
Make sure that AirDrop is turned on on both your computer and your iPad. When you click AirDrop, your iPad will pop up as an option to send the files to. Click it, and your files will automatically be sent to your iPad.
Swatch and Brush files are super smart. When you send them to the iPad you’ll get a prompt to open them in Procreate. Tap Procreate, and they will automatically load right into the app.
To find the color palettes inside Procreate, tap the colored circle at the top right corner of your app and you’ll see all of the color palettes in the palettes menu. New palettes will generally end up at the bottom of the palette list, so if you don’t see them, scroll down and they should be at the bottom!
AirDropping Brushes (.brushset)
To import brushes using AirDrop, follow the exact same steps as with the swatches above. Depending on your iPad, the imported brushes can show up in a couple of different places.
Sometimes my imported brushes show up in the “Imported” folder at the very bottom of the brush library menu.
Other times, they pop up in their own folder.
Just be aware of this and know that you might have to look around a little bit to find your brushes, but they are there!
AirDropping Images (.jpg)
To AirDrop .jpg files, follow the same process using AirDrop. The jpg file will import into your iPad in the photo library. You can access these photos and add them to your canvas by tapping the wrench icon, tapping “Add”, and tapping “Insert a Photo.”
iPad to iPad
If you don’t have a mac computer, you can get the files into Procreate by downloading them directly onto your iPad. Start by opening up the Dropbox link where the files are located with your iPad internet browser.
Now, you’ll want to click each folder and download the assets individually.
Color Palettes (.swatches)
First, I’ll start with the color palettes. Open up the folder containing the different .swatches file. And tap “Download.”
It will ask you to confirm the download. Tap “Download” to confirm.
When the download is complete, tap the download icon at the top of the browser. It looks like a circle with an arrow inside.
Tap the magnifying glass next to any of the downloaded swatches and it will open up the Downloads folder.
My new downloads usually show up at the very bottom of the list, so scroll down until you see them.
Tap the zip file to expand it, and then click into the expanded folder where you’ll see all of the swatches.
Tap each swatch individually to import it into Procreate.
Once you’ve imported all of the swatches you’ll see them at the very bottom of the Palettes menu.
Procreate Brushes (.brushset)
To download Procreate brushes, navigate back to the Dropbox folder on your iPad’s internet browser and click on the folder with the brushes. You might see a screen like this saying that you can’t preview the files. That’s no problem. The reason that shows up is that the brush file type is only compatible with Procreate.
Tap download to grab the brushes.
From here, confirm the download.
When the download is complete, tap the download icon at the top. Instead of using the magnifying glass this time, just click directly on the brush pack file and it will automatically import into Procreate.
To find your imported brushes, click the brush icon at the top of your canvas. Sometimes my imported brushes show up in the “Imported” folder at the very bottom of the brush library menu.
Other times, they pop up in their own folder.
Image Files (.jpg)
To open a .jpg file simply tap Download, and confirm it just like you did with the swatches.
When the download is complete, click the download icon at the top right of the browser again to open it up in your Downloads folder.
Find the image in your downloads folder and tap it to open it.
To get the image into your photo library, tap the icon on the top right of the menu bar, and click “Save Image.”
Now the photo is in your photo library. You can access the downloaded photo and add it to your Procreate canvas by tapping the wrench icon in Procreate, tapping “Add”, and tapping “Insert a Photo.”
I hope this walkthrough was helpful! If you prefer to follow along with a video tutorial of how to access these Downloads, check out my class Blooms & Shrooms!
Check out all of my Procreate classes!
Want to take your Procreate learning to the next level? Join me in one of my Procreate classes for in-depth tutorials and tips I’ve learned from using Procreate as a professional surface designer.
Drawing Animals in Procreate
Wondering what to draw in Procreate? In this class, you'll learn step-by-step how to draw artwork on your iPad.
Drawing Seamless Patterns in Procreate
In this class, you will learn how to use your artwork to illustrate professional, repeat patterns that easily line up into perfect pattern blocks.


