How to Make a Seamless Pattern in Photoshop with Pattern Preview
In this tutorial, you’ll learn how to make a seamless or repeat pattern in Photoshop using the pattern preview tool. The pattern preview tool has been an absolute game changer in how I make patterns in Photoshop, so I’m so excited to share it with you!
First, let me give you a brief rundown of how seamless patterns work. A seamless pattern is a block of artwork that can be repeated infinitely without any visible seams or interruptions. The golden rule of repeat patterns is that anything that gets cut off on one side of the pattern block must be repeated on the other side so that the pattern can be repeated seamlessly.
Before pattern preview, you had to manually calculate this any time you moved an element off of the canvas. Now, Photoshop allows us to arrange our pattern block and see what the full pattern will look like in real-time.
Before you dive into this tutorial you’ll want to make sure that you have digitized the elements that you want to turn into a pattern and have prepped them so that they’re each on their own layer. If you’re unsure of how to do this, check out these helpful blog posts to get you started:
There is a lot that goes into making a seamless pattern. I want to make the process as simple as possible, but I understand that this can feel complicated when you’re first learning how to do it. If you’re more of a visual learner and want to see how the process works step-by-step, check out my class, Watercolor a Seamless Pattern: Surface Design in Adobe Photoshop.
This class is a comprehensive guide to the entire seamless pattern process that I use as a professional surface designer. I highly recommend checking it out to get an in-depth understanding of seamless patterns in Photoshop.

Getting Started
To start, you’ll need a few elements that you can arrange into a pattern. In my example, I’ll be using some watercolor citrus elements that I painted, scanned, and digitized. If you’re going to be working with painted elements, it’s important to remove the white paper background first. If you want to learn how to do this, head on over to this tutorial before starting on your seamless pattern. The tutorial will walk you through my step-by-step process for removing the background on your illustrations in Photoshop.
Now, let’s dive into learning how to use the Pattern Preview tool!
Prepping the canvas and your elements
Start by opening up a square canvas in Photoshop. I always use a 12,000 x 12,000 pixel canvas for my pattern blocks because I want the flexibility to use them on large products. But this is a really massive canvas size, so if you’re just practicing or don’t want to use your patterns on large-scale products you can use a smaller size. Just make sure it’s a perfect square!
Now you can pull in the elements that you’ll be arranging into a seamless pattern. Make sure that the white paper background is removed and that the elements are all on their own layer.
If you haven’t isolated each element on its own layer you can do so by selecting your Lasso tool (keyboard shortcut: L). I like to use the Polygonal Lasso for this. Select each element with your lasso, cut it with the keyboard shortcut cmd + X, and paste it in place with the keyboard shortcut cmd + shift + V. This pastes the element exactly where it was before, but on its own layer!
The last thing you need to do to prep your elements is to make each one a smart object. A smart object is basically an advanced version of whatever is on that layer. It gives you more flexibility with non-destructive editing. But all you really need to know is that Pattern Preview only works with smart objects.
To turn each element into a smart object, select the layer, click the layer menu, hover over smart objects, and click “Conver to Smart Object.”

You’ll be able to confirm that it’s a smart object by checking to see that there is a small box on the layer thumbnail. This is Photoshop’s way of indicating that it’s a smart object.

Once you’ve made all of your elements into smart objects, don’t forget to hit save before moving on to the next step!
Arrange the seamless pattern block with Pattern Preview
Now that all of your elements are on their own layer and turned into smart objects, your square canvas should look something like this.

In my example, all of my pattern elements are stacked on top of each other in the corner, but that’s totally ok for now. We’re about to start arranging them into a pattern!
Next, make sure that Auto-Select is turned on. This will allow you to automatically select an element when you click it. Use the keyboard shortcut: v to select the move tool. From there, check up in the top left corner and make sure that the box next to “Auto-Select” is checked.

Now it’s time to start arranging! Turn Pattern Preview on by clicking the “View” menu and selecting “Pattern Preview.”
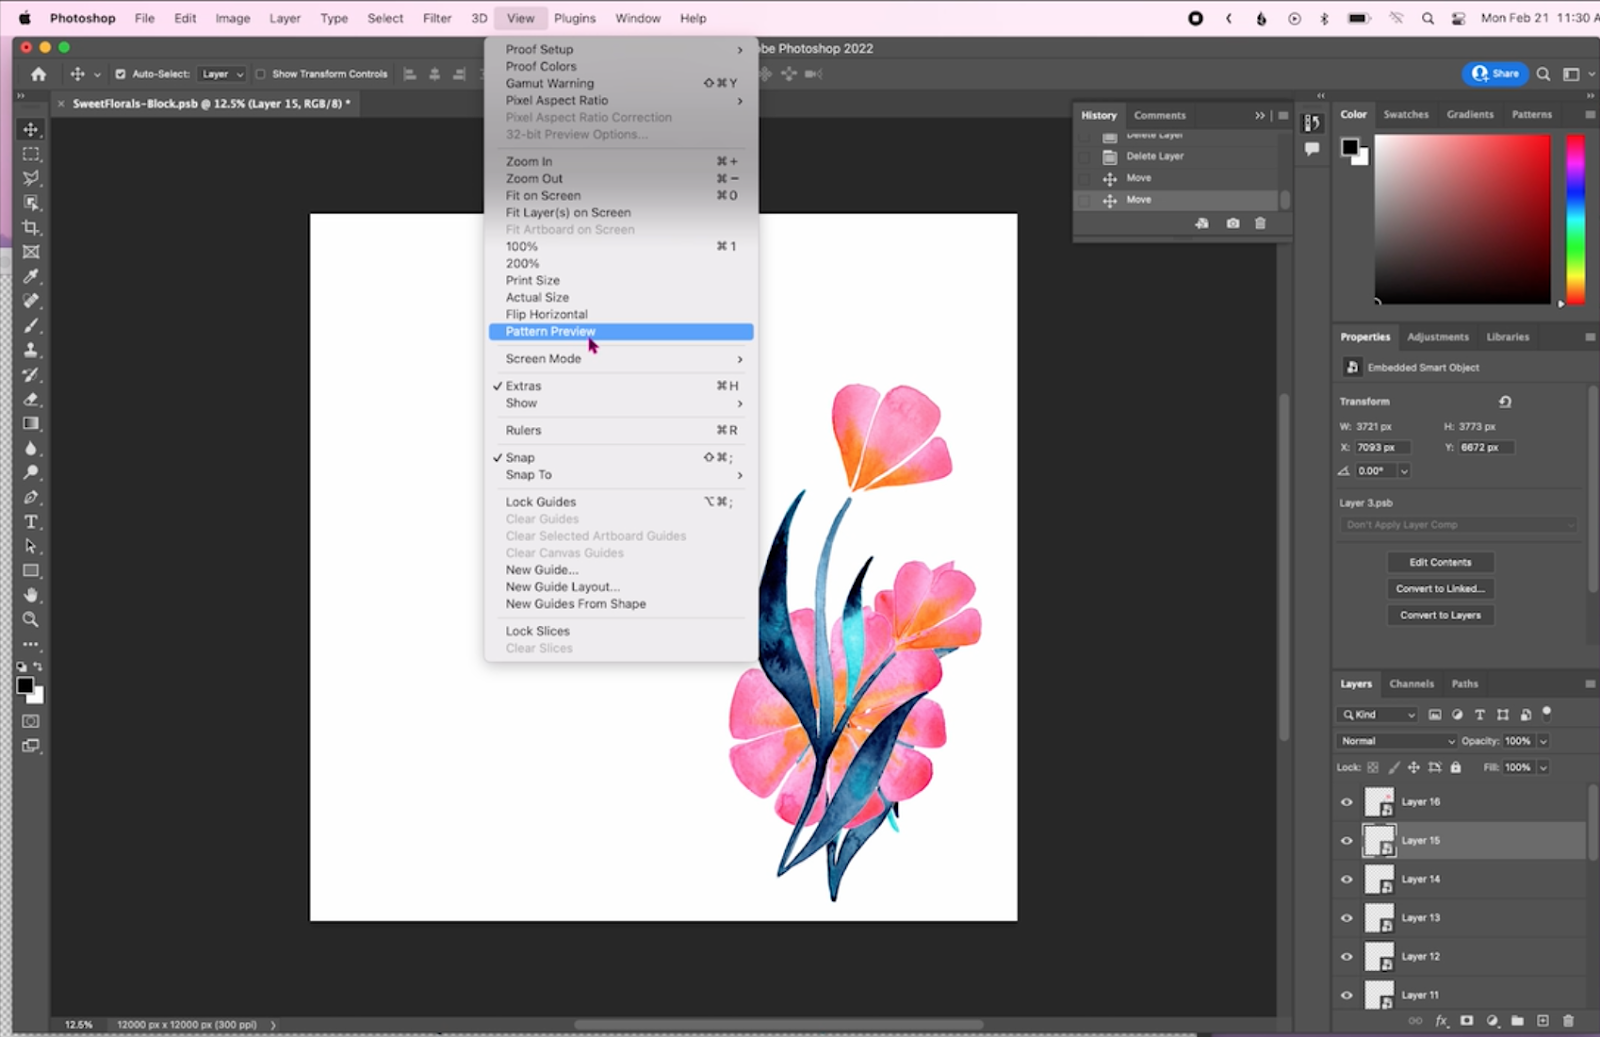
If you zoom out you’ll see that it’s already duplicating the elements and showing you what the pattern will look like.

To start arranging the pattern block, make sure the move tool is selected, and start to move the elements one by one!
In my example, you can see that the part of the flower that gets cut off on the top of the block is automatically repeated at the bottom. This is the magic of Pattern Preview!

Tips for arranging your elements
Here are some quick tips for arranging your elements. When I’m working on seamless patterns, I always start by placing the largest elements, then move on to the medium elements, and finish by adding the smaller elements in the in-between areas.
The goal with a seamless pattern is that the whole image looks fluid. You shouldn’t be able to see where it starts and stops, and you don’t want your elements to look too repetitive. To combat this, I use the same elements multiple times, but I rotate them, flip them, or resize them so that they’re not too similar.

How to duplicate and resize elements
Duplicate
Select the element that you want to duplicate and use the keyboard shortcut: cmd + j to copy the element and paste it onto a new layer. It won’t look like anything happened, but you’ll be able to see in your layers panel that you have a duplicate of that layer.

The new element is directly on top of the old one, so separate them by selecting your move tool, clicking on the element, and dragging it to a new position on your pattern block.
Rotate and Resize
If you want to rotate or resize your element, use the keyboard shortcut: t to get the Transform tool. This pops a bounding box around the element. From here you rotate the element or grab the corners of the bounding box to resize it.
Flip
Flipping your elements can add a little more variation to your pattern. To flip an element, make sure it’s selected, then right-click it, and select “flip horizontal” or “flip vertical” depending on how you want to transform it.

Final tips
When you have your pattern block in a good place, I recommend zooming out to get a bigger picture and see if there are any parts of the pattern that could be a little more fluid. In my example, there were a few gaps in the pattern that I saw once I zoomed out. I ended up filling these with other elements so that the pattern felt more cohesive.

If you ever turn off Pattern Preview, you’ll see that some of the “cut-off” elements are missing. Don’t worry! You haven’t lost any of your work. The repeated elements are only visible in Pattern Preview. When you turn it back on, those elements will show back up.

I hope you enjoyed this walkthrough of the Pattern Preview tool! This tool has been a game-changer for my workflow and I hope it will be for you too!
This tutorial just scratches the surface when it comes to pattern-making. If you want to learn how to create professional seamless patterns from your hand-painted artwork I’d love for you to join me in my class, Watercolor a Seamless Pattern: Surface Design in Adobe Photoshop.
In this class you’ll learn:
How to paint elements with a seamless pattern in mind
How to digitize your painted elements
Tips for creating patterns that will sell well
How to adjust the color of your patterns in Photoshop
How to add metallic accents to patterns in Photoshop
Uploading your patterns to print on demand sites like Society6, Spoonflower, and Redbubble
And so many more tips and tricks along the way!
