How to Make a Checkered Seamless Pattern in Procreate
In this quick blog tutorial, I’ll walk through the process for creating a checkered repeat pattern in Procreate. If you’re brand new to pattern-making and want a better understanding of what makes a repeat or seamless pattern, check out this post first.
If you’re familiar with Procreate and the concept of seamless patterns, then this tutorial is for you! You’ll learn a few quick steps to take to build a checkered pattern with ease.

Step 1: Prep your canvas
To make a checkered repeat pattern you’ll need to start with a square canvas. Choose a canvas size that works for you and your iPad. Keep in mind that if you want to sell your art online with print on demand that you’ll need to work with a large canvas size so your artwork file is as high-res as possible.
In my example, I’m going to use a canvas sized at 3,000 x 3,000 pixels.
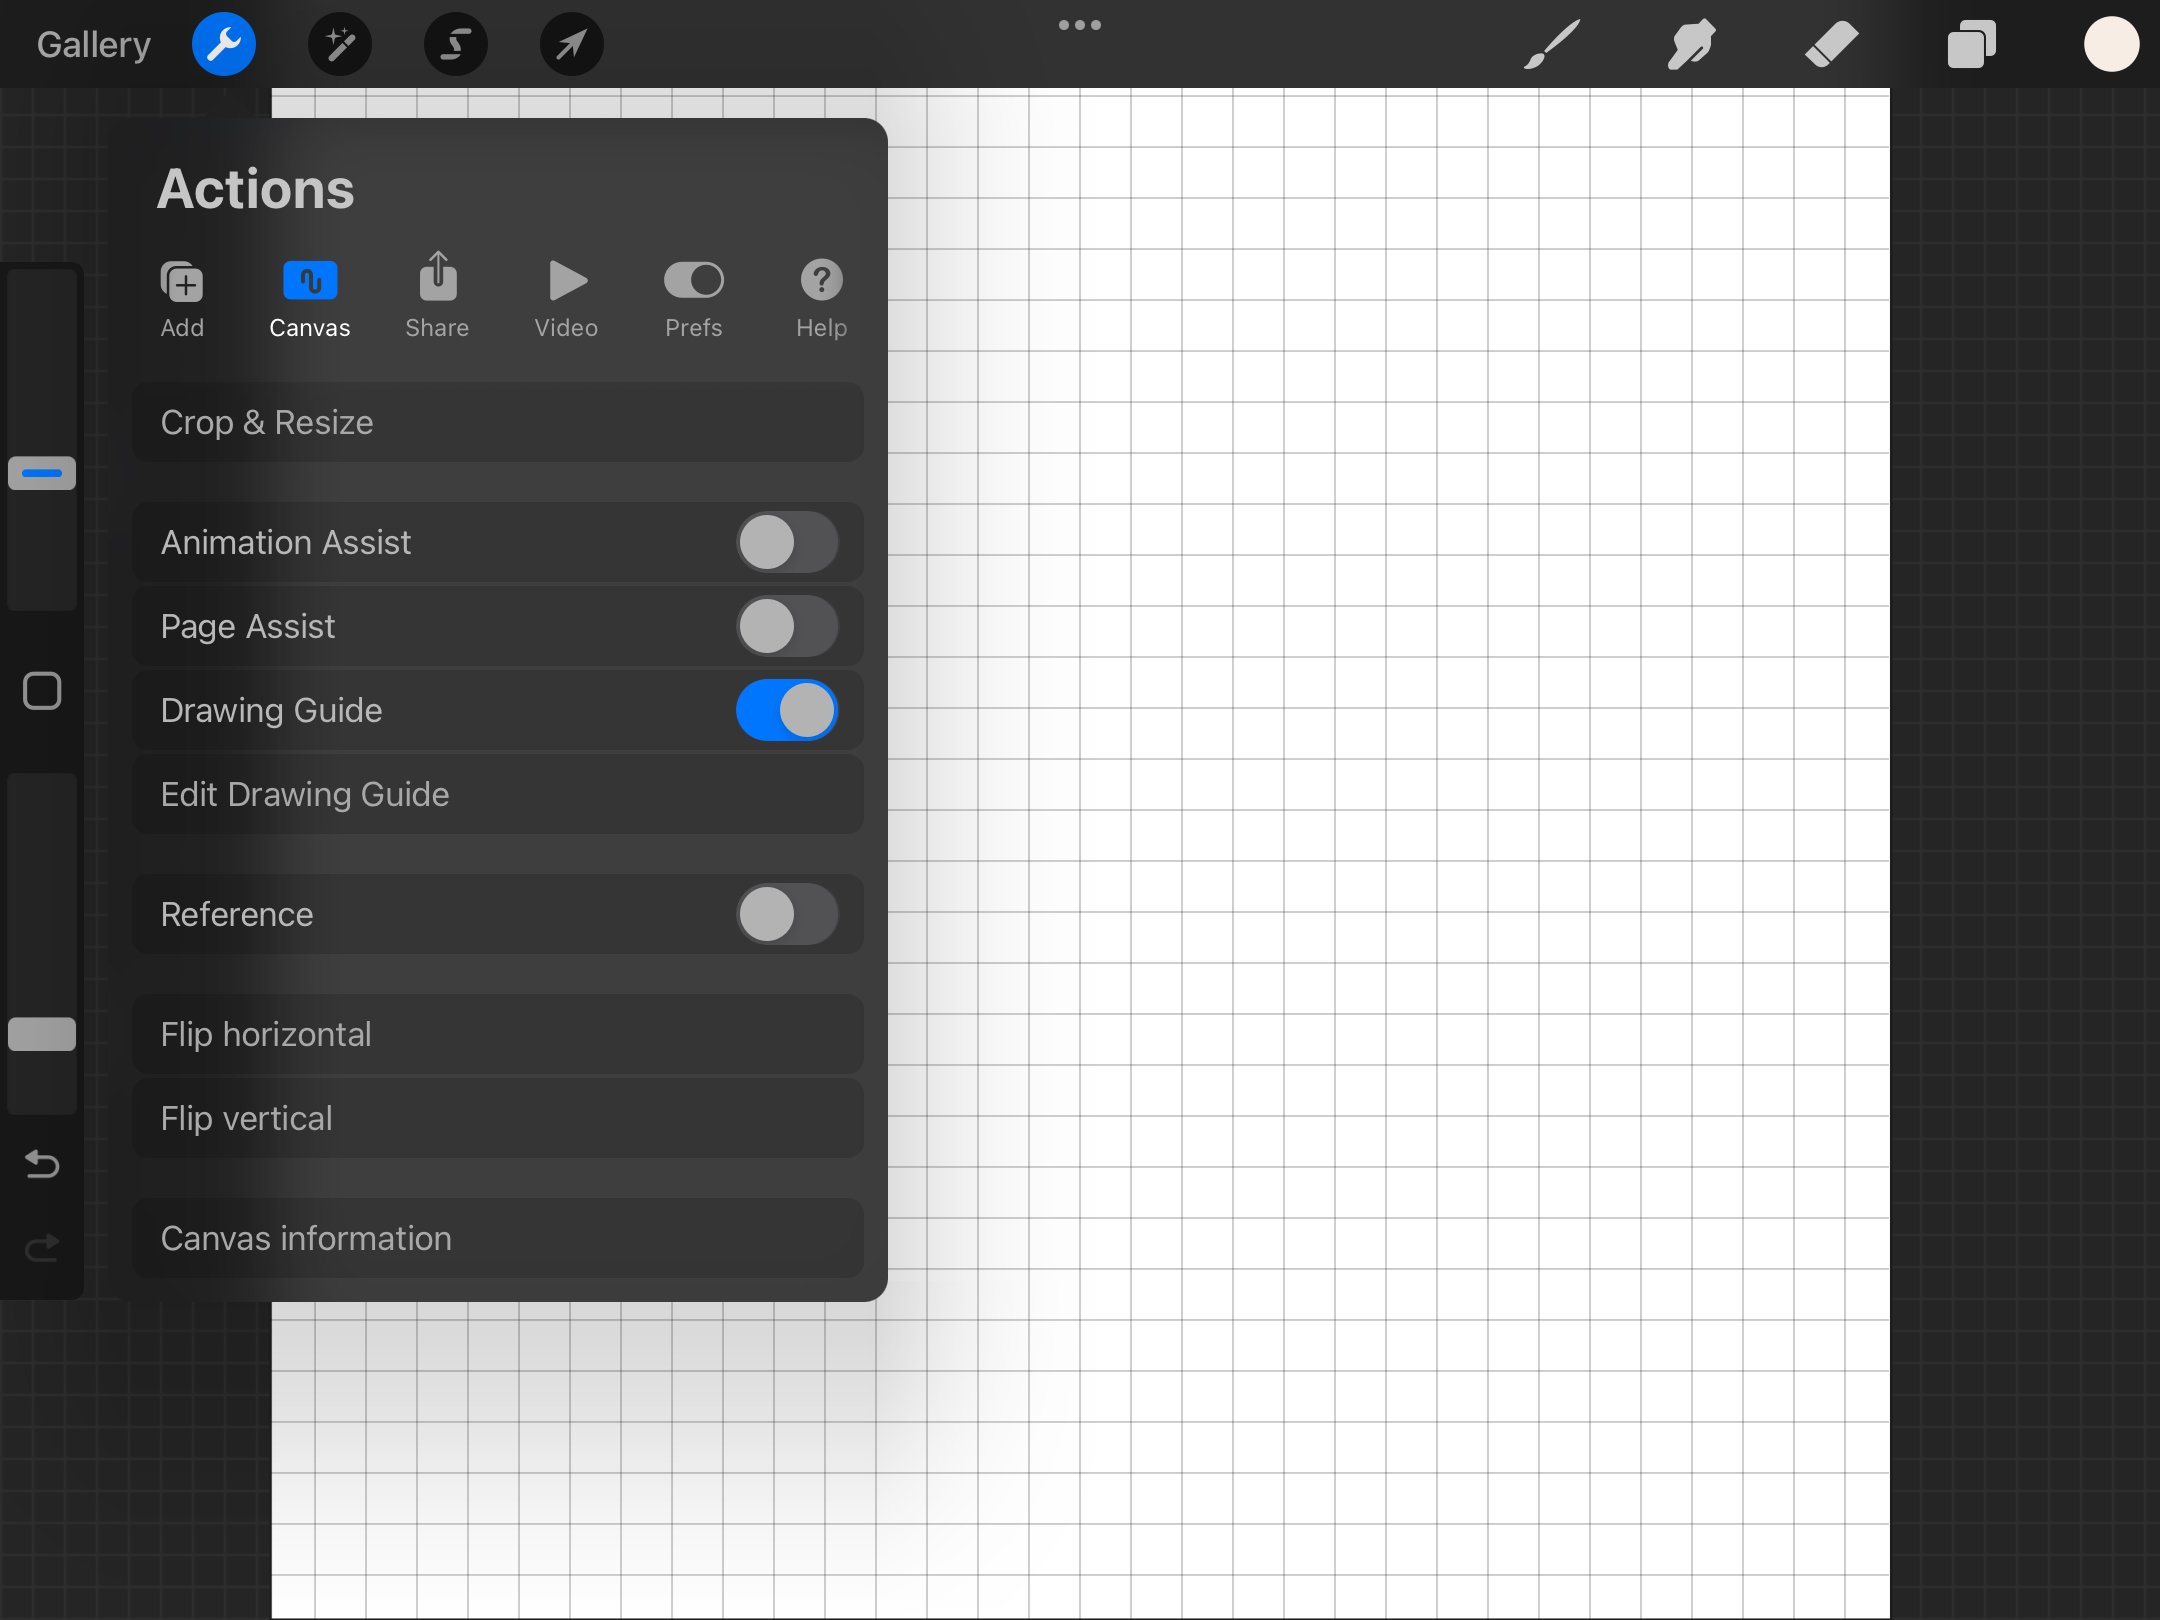
Now you want to turn on the Drawing Guides. This will help make sure that your checkered elements snap to the grid so they can repeat endlessly without any issues. Turn on Drawing Guides by tapping the wrench icon and toggling on the switch next to Drawing Guides.
Now we want to edit the guide, so tap “Edit Drawing Guide” in the same menu. Next, tap the number next to “Grid size” on the bottom menu. The goal is to create a grid with four main quadrants and four smaller quadrants inside each one (stick with me - this will make sense, I promise!).

Now divide the number of pixels you used for your canvas size by 4. So in my example 3,000 / 4 = 750. I’m going to type 750 into the “Length” portion of the Grid size editor.
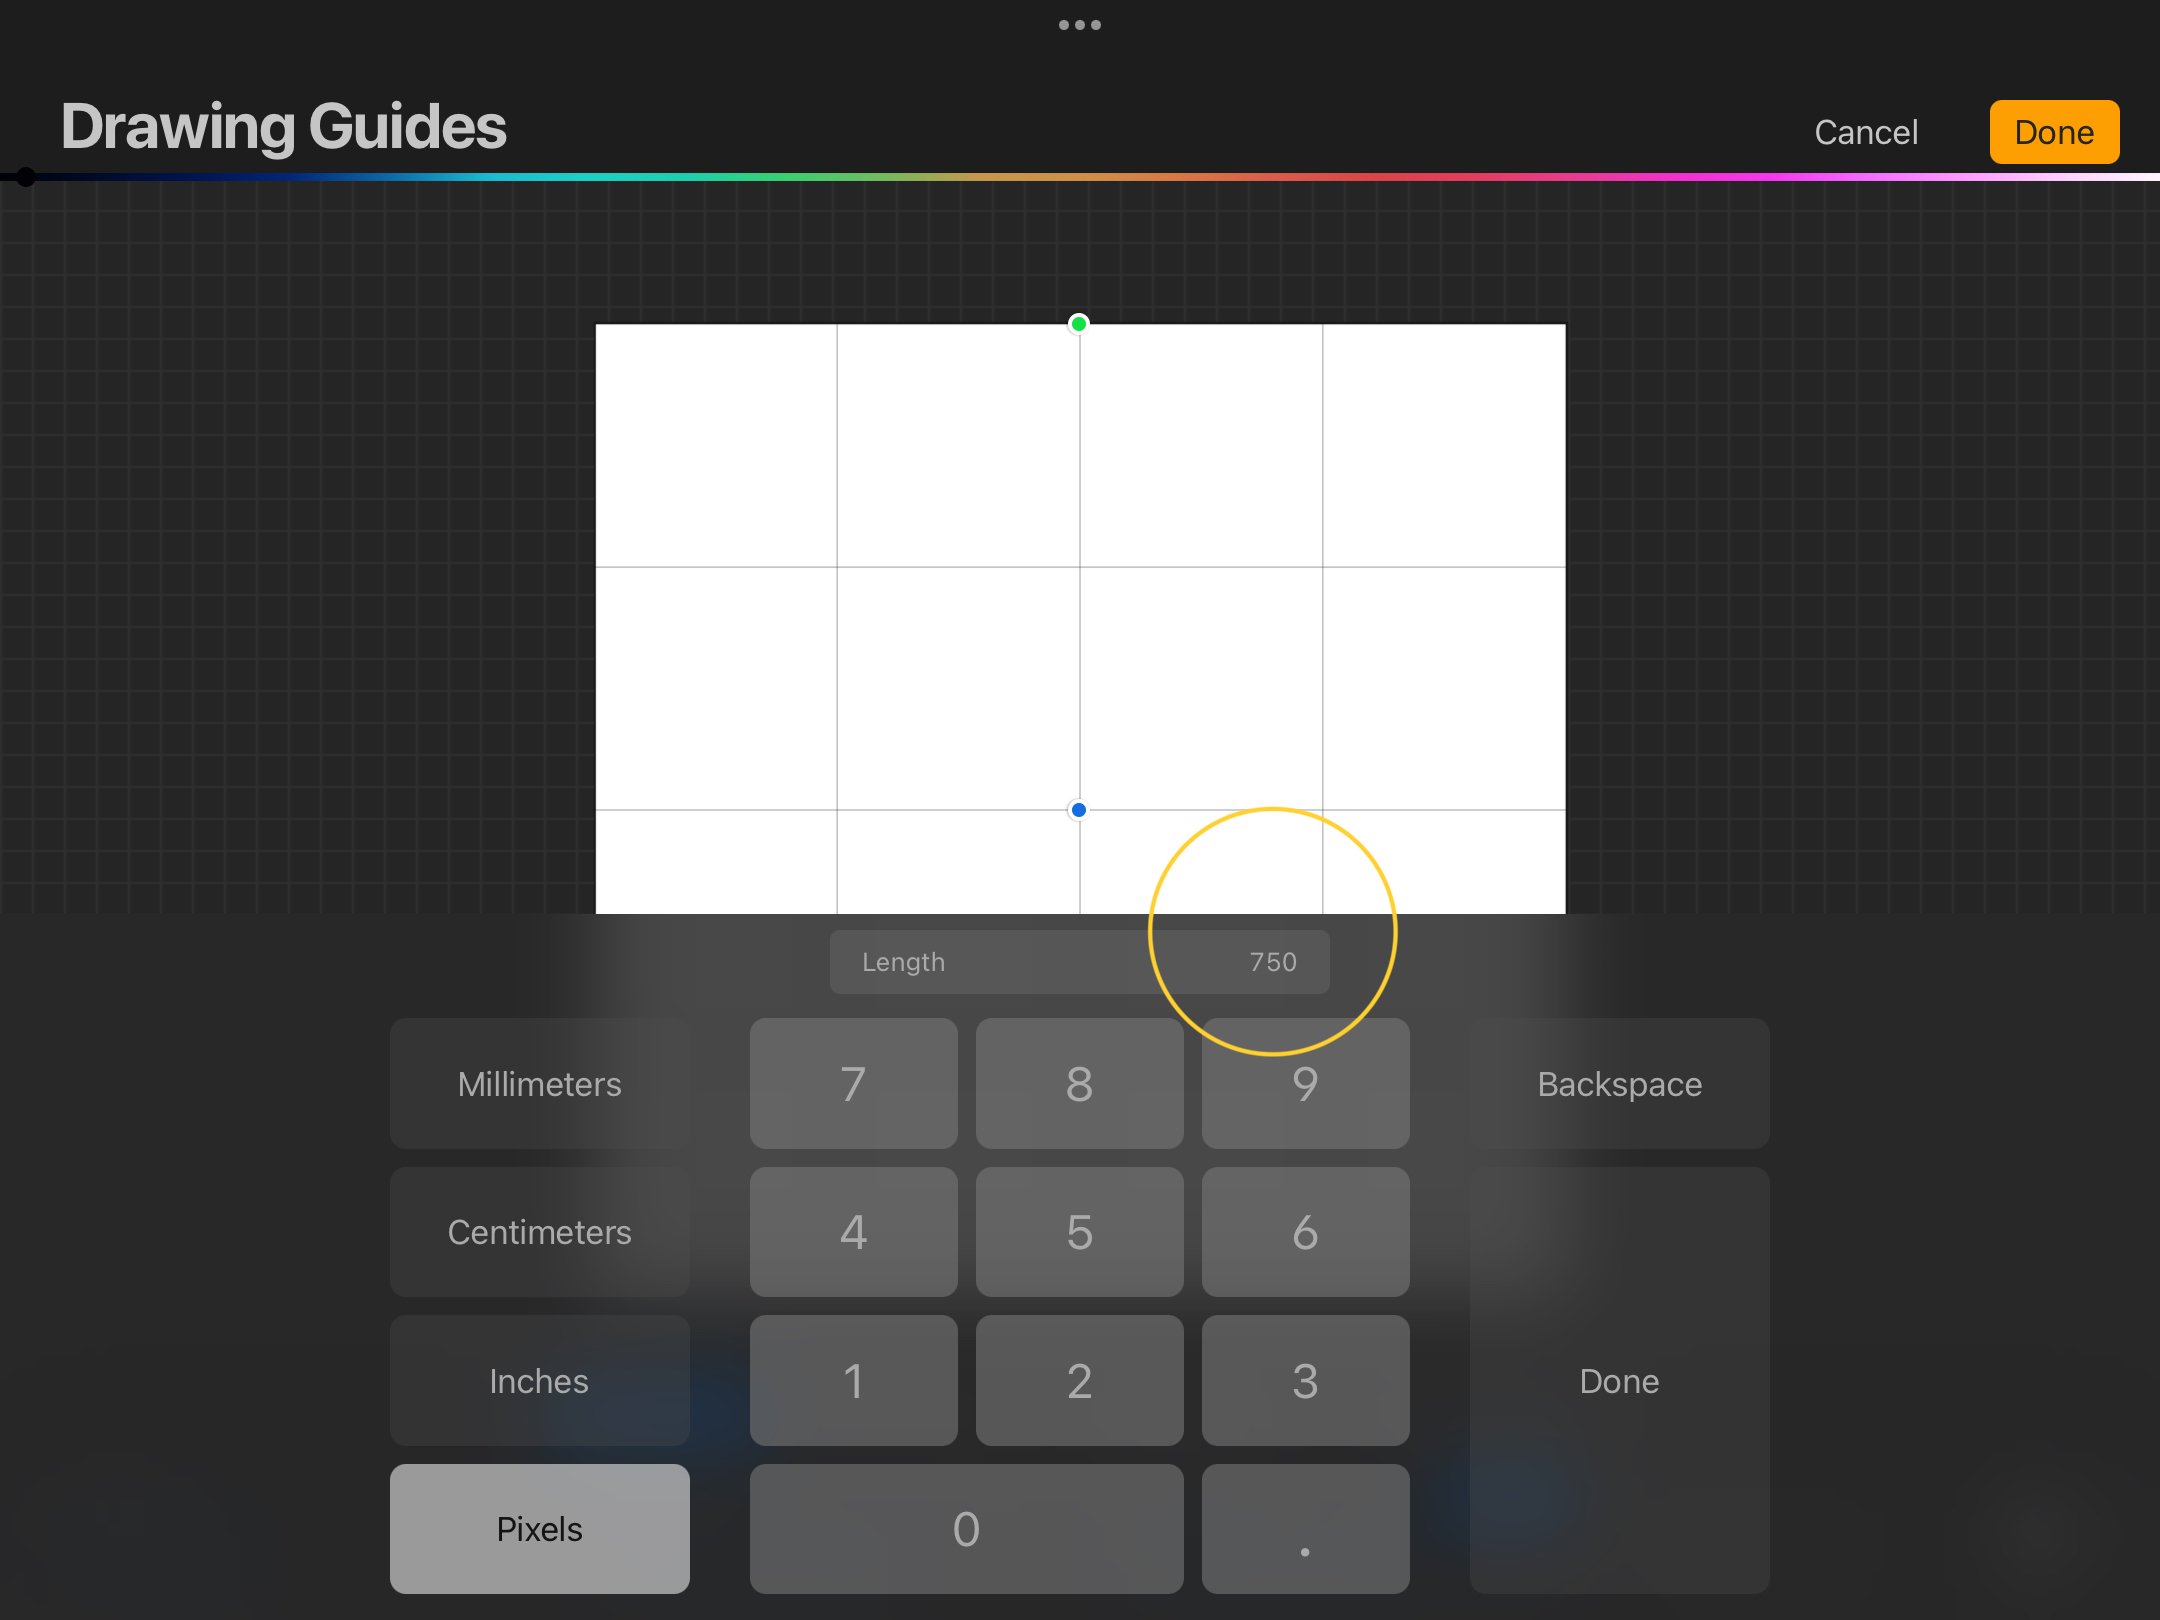
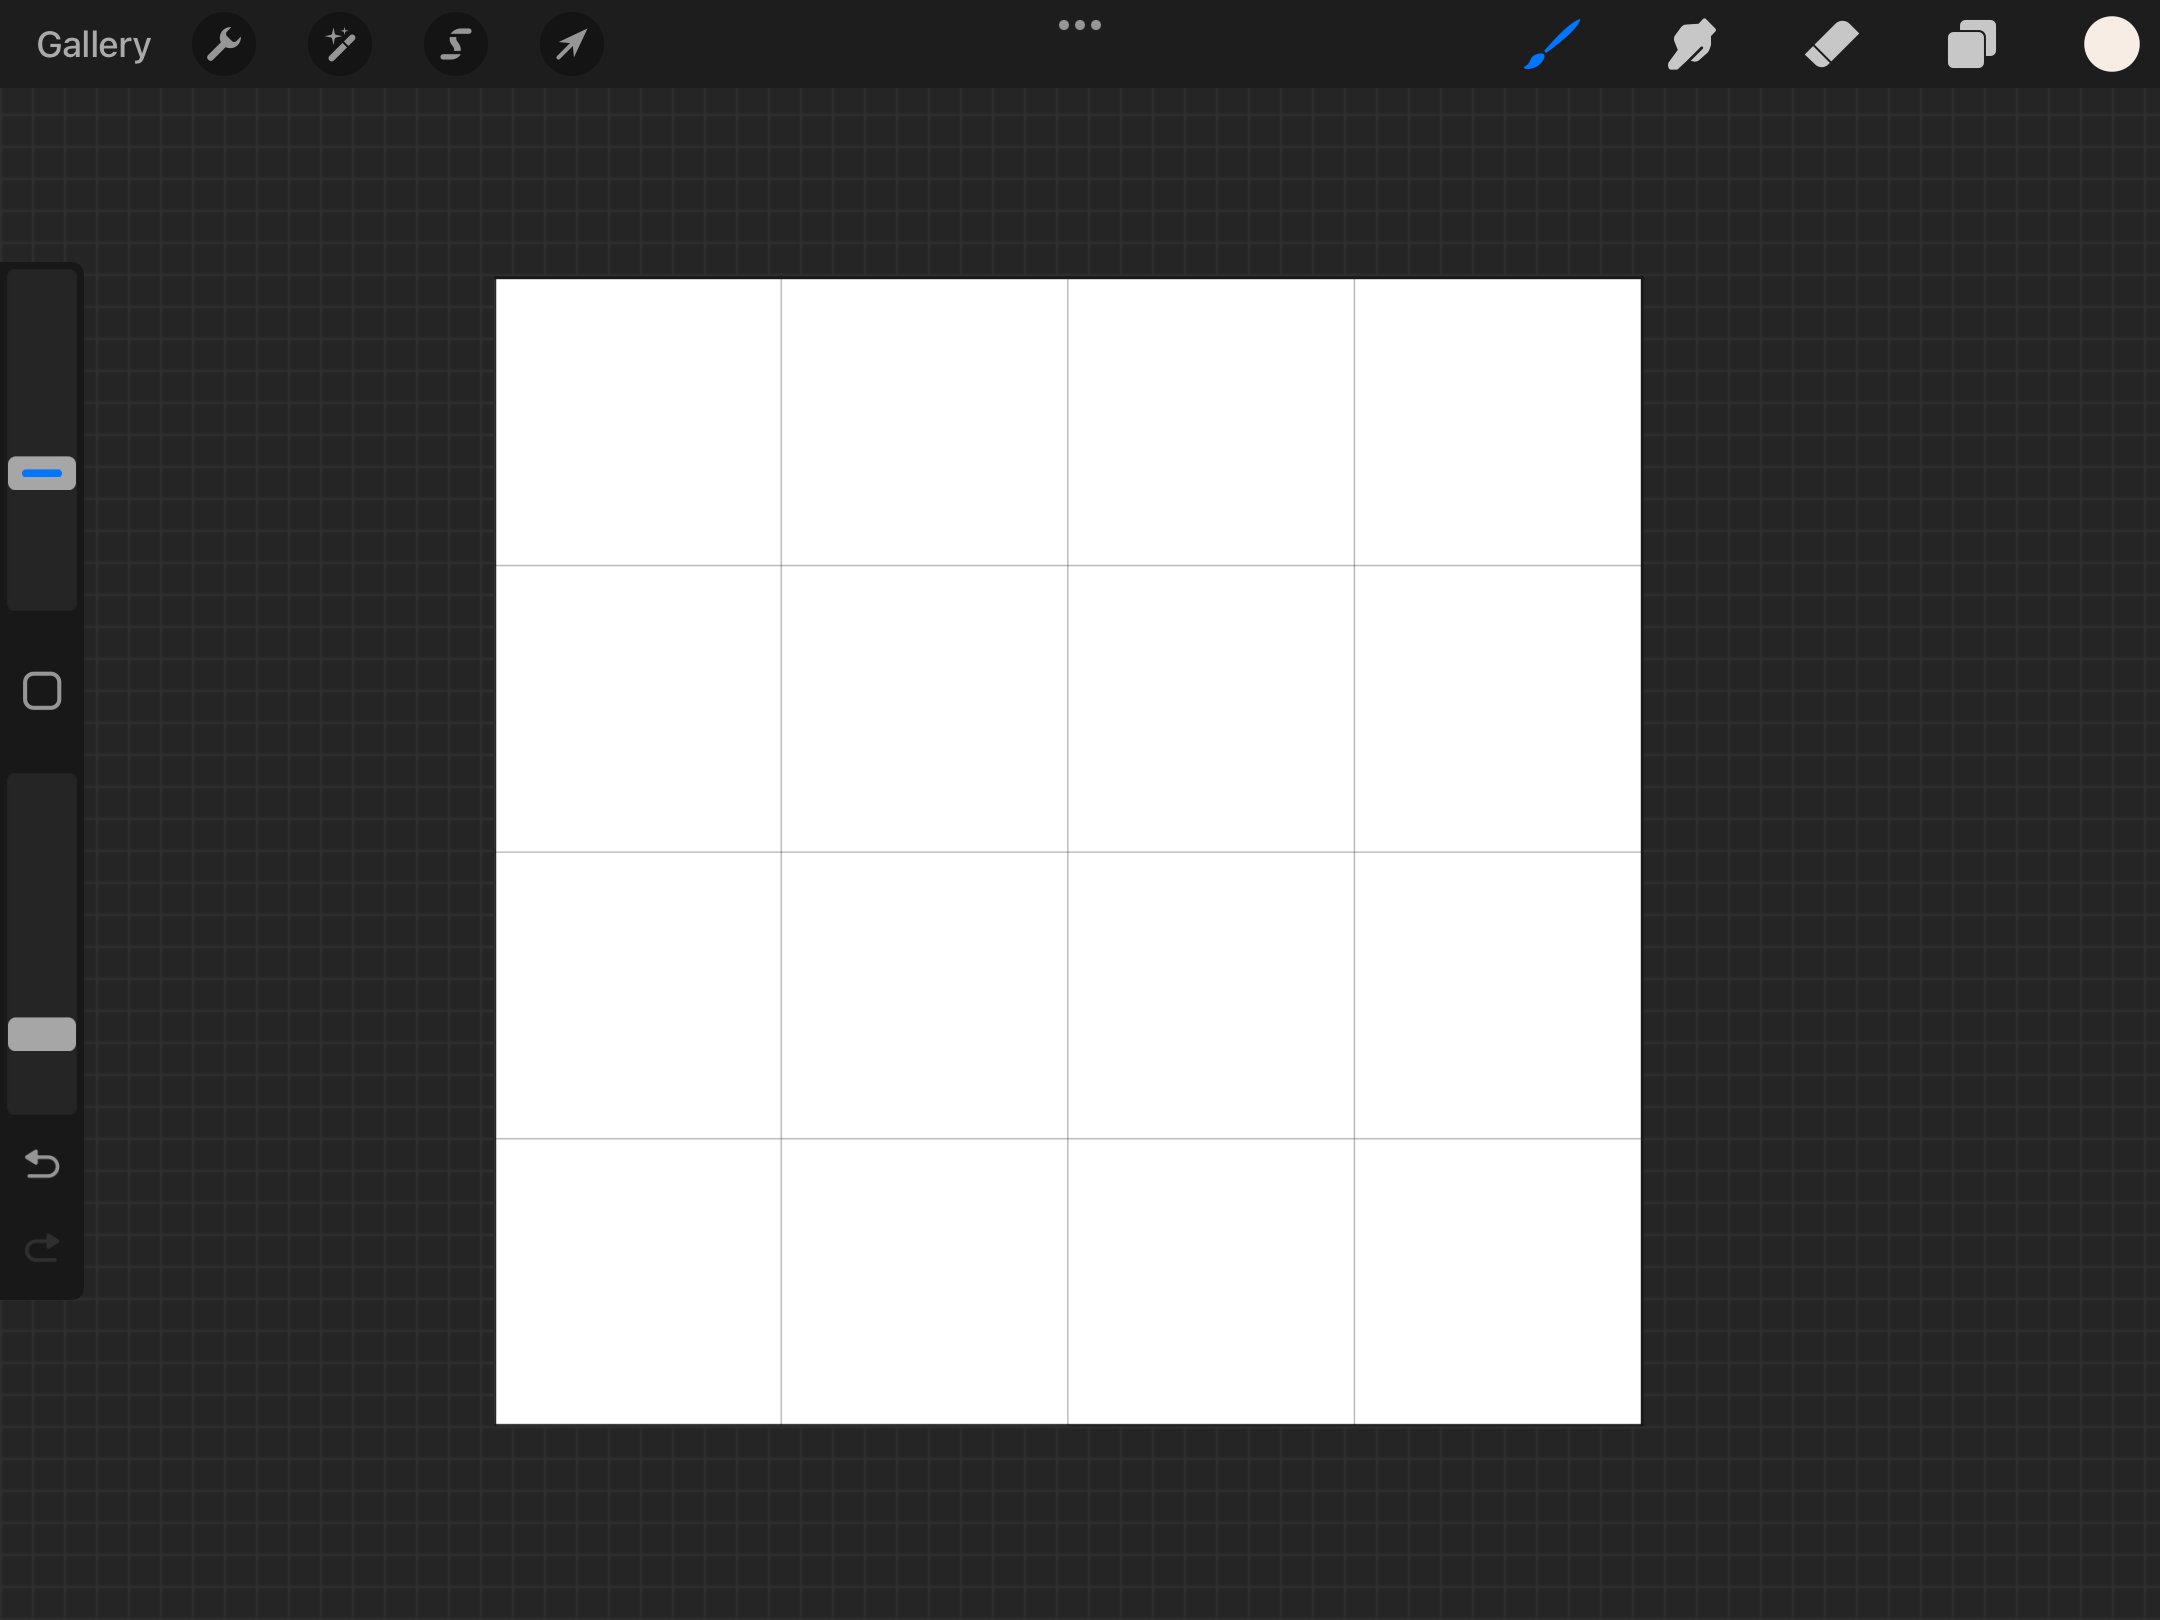
Click “Done” and you’ll have your grid all set up!
Step 2: Create the checkered pattern
Now it’s time to create the checkered pattern! Choose two colors that you want to use to get started. I’m going to use a mustard yellow and a cream color for mine.
Take your first color and drag and drop it so that it fills the whole canvas.

Next, tap the arrow icon to transform the color you just dropped. Then click “Snapping” in the bottom left corner. Double check that “Magnetics” and “Snapping” are toggled on.

Now grab the corner of the square and resize it so that it fits in one of the four main quadrants. With snapping turned on it should snap perfectly to that square. When you’ve resized it, tap the arrow to set the transformation.

Now duplicate that layer and move the duplicated square to the opposite corner.

Now you’re going to repeat that process with your second color. Create a new layer, select your new color, and fill the entire layer with the new color.

Then select the arrow and move the new square to one of the empty quadrants. From there you can duplicate the layer and move the duplicate to the last empty quadrant.

Now you could stop here since this is a perfectly acceptable seamless pattern block to use for a checkered pattern. But I like to see what the pattern will look like when it’s scaled down. First, duplicate this canvas so you have a copy of the original just in case (Non-destructive editing for the win!).
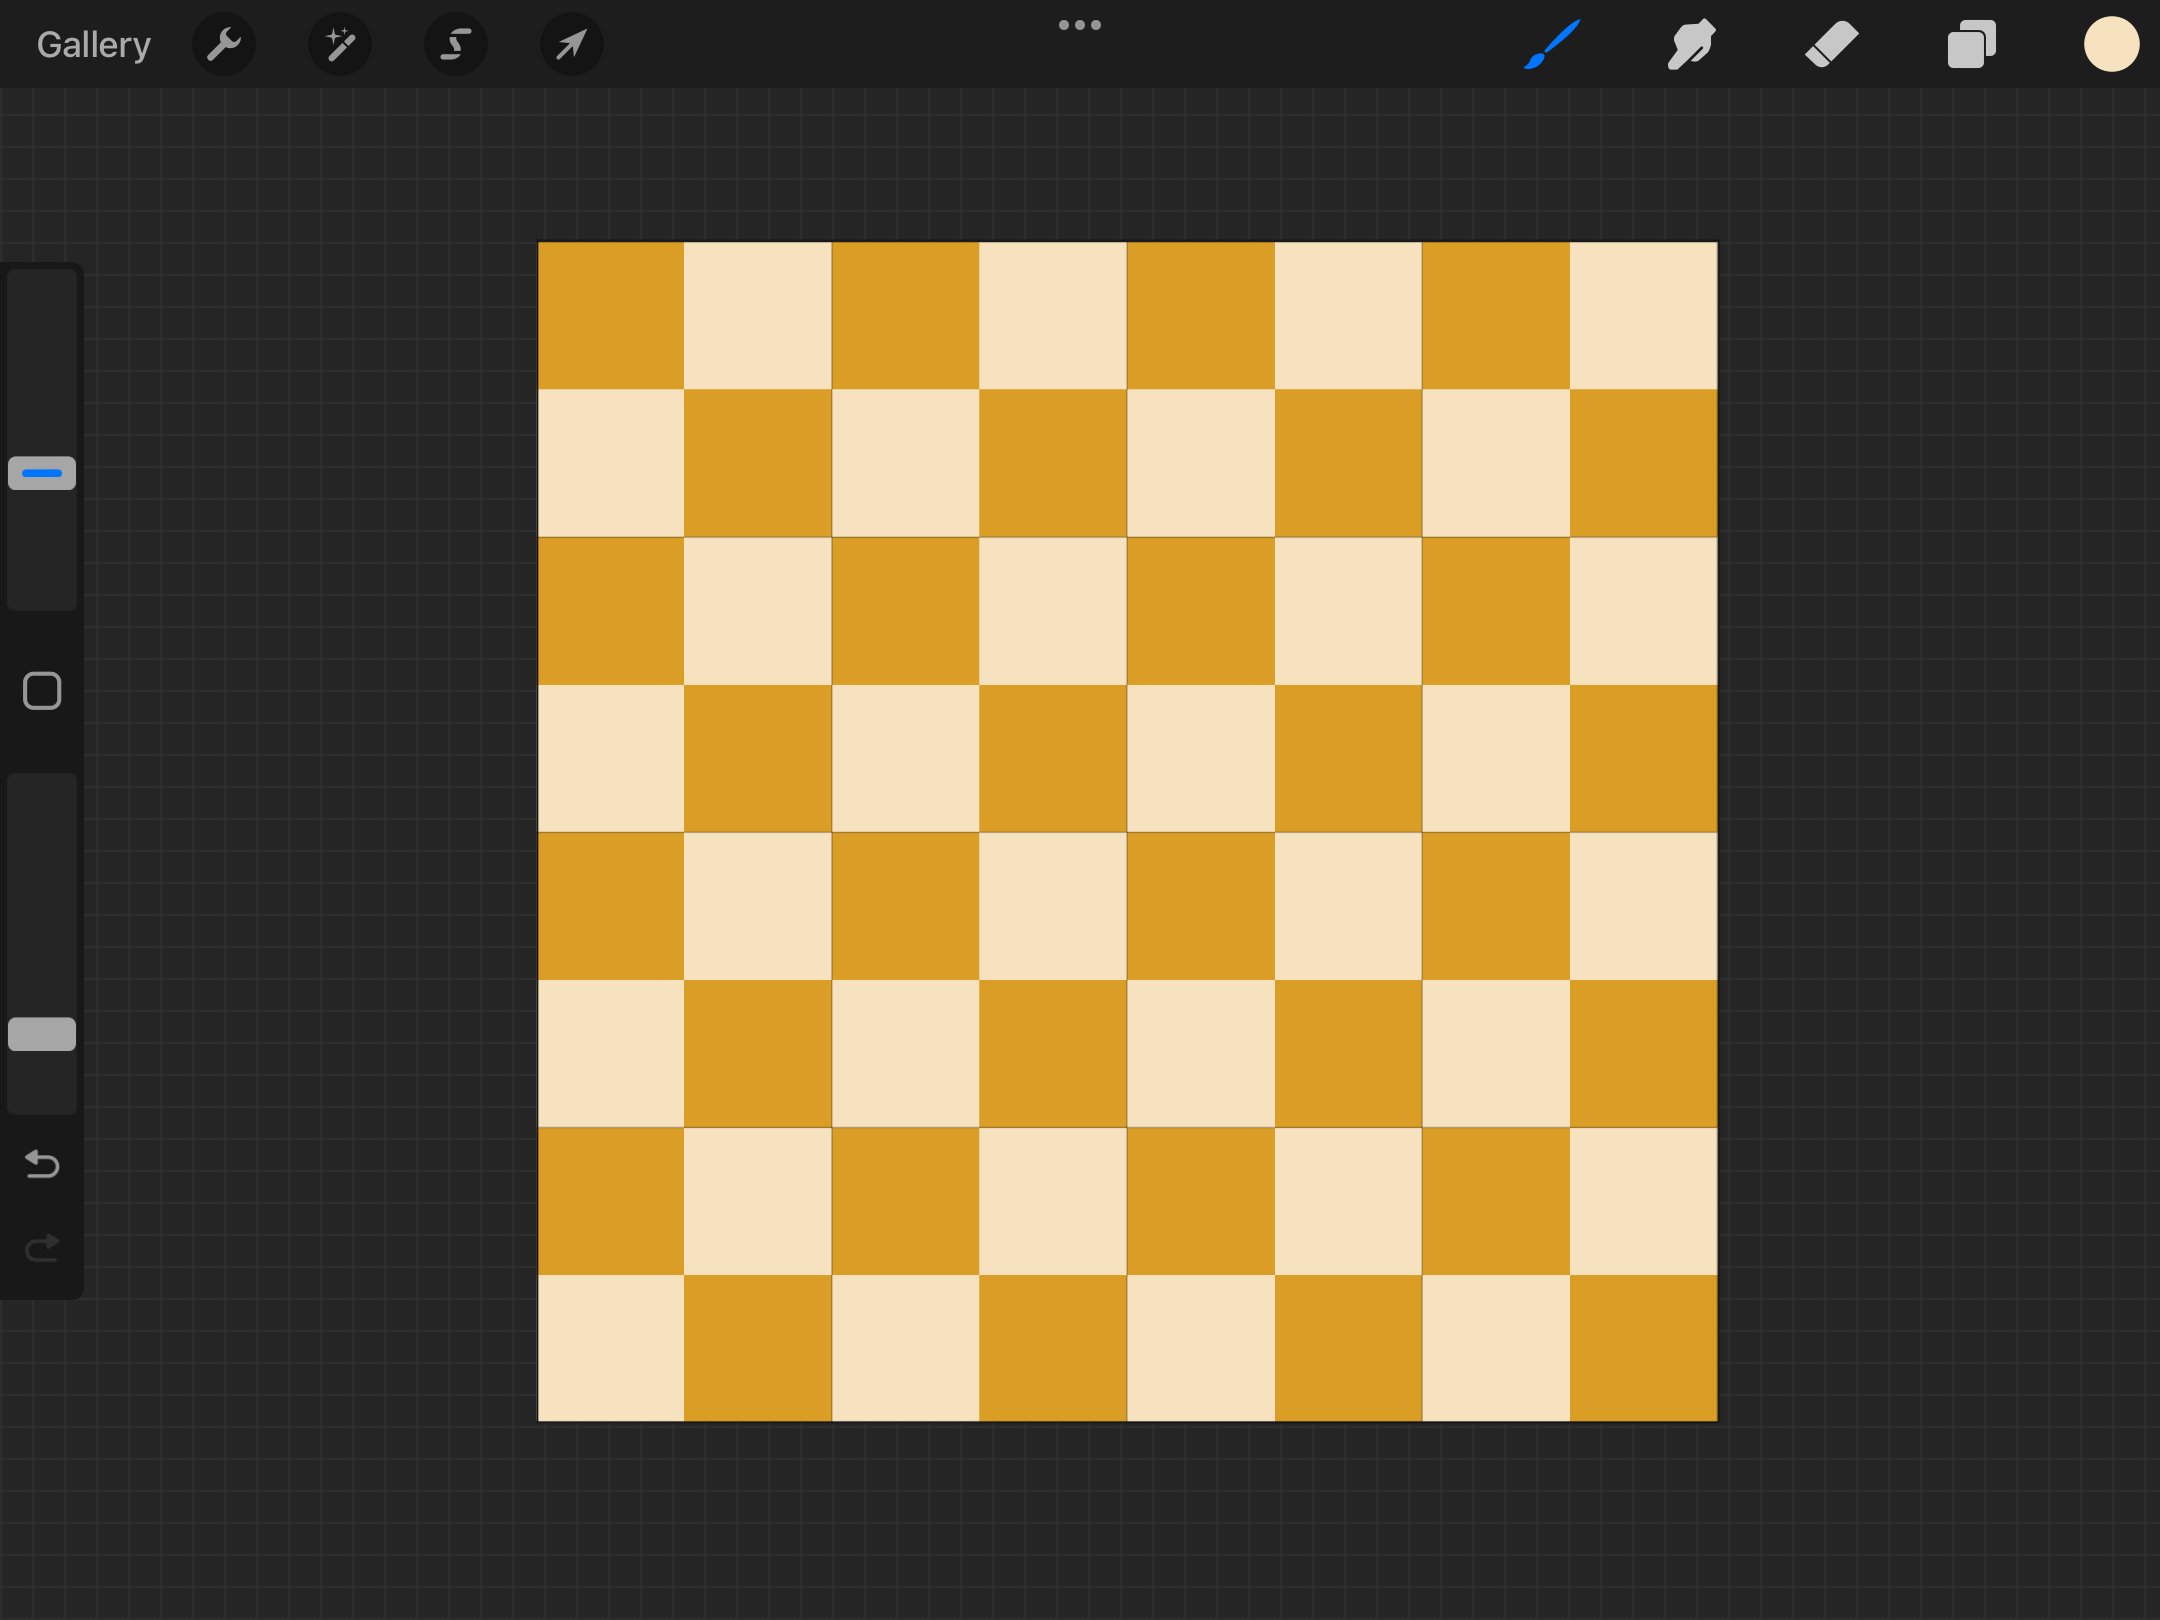
Then pinch all the layers together to flatten them. Now you can size the flattened layer down to fit into one quadrant. From there repeat the process of duplicating the layer and filling in the rest of the quadrants.

Now you can repeat the process until your checkered pattern is the size you’re looking for.
In this example I showed you a super simple checkered pattern with just two colors, but you can use this as a jumping off point to create more intricate patterns with detail inside each square or varied square colors. Here are a few detailed checkered examples from my portfolio!


Want to learn more about seamless patterns?
If you want to learn more about creating different types of seamless patterns, join me in one of my classes where I cover pattern-making in more detail!

